
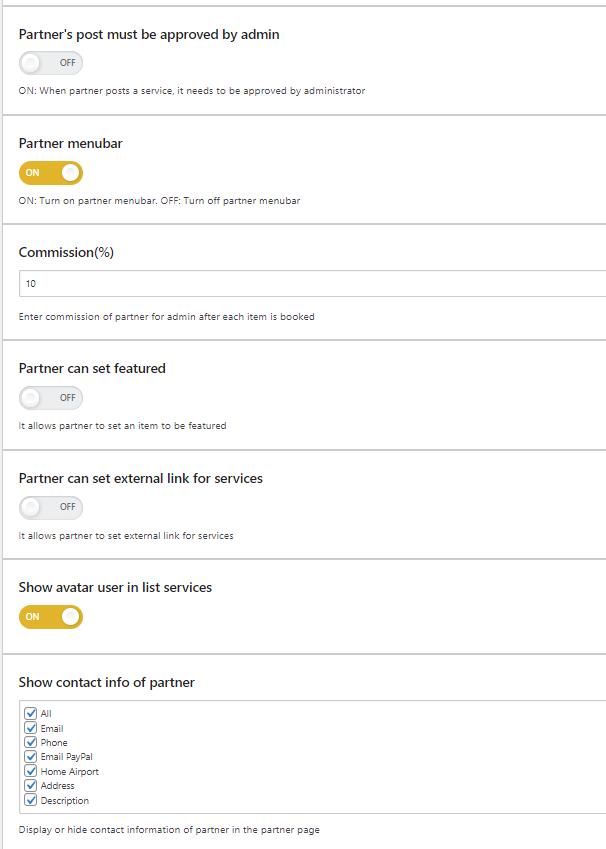
This case is applied when you have set ON for Theme Options > Partner Options > Partner’s post must be approved by admin. Specifically, when a partner posts a service, it will be in Draft status and needs to be approved manually by the administrator
System will notify admin in 2 ways:
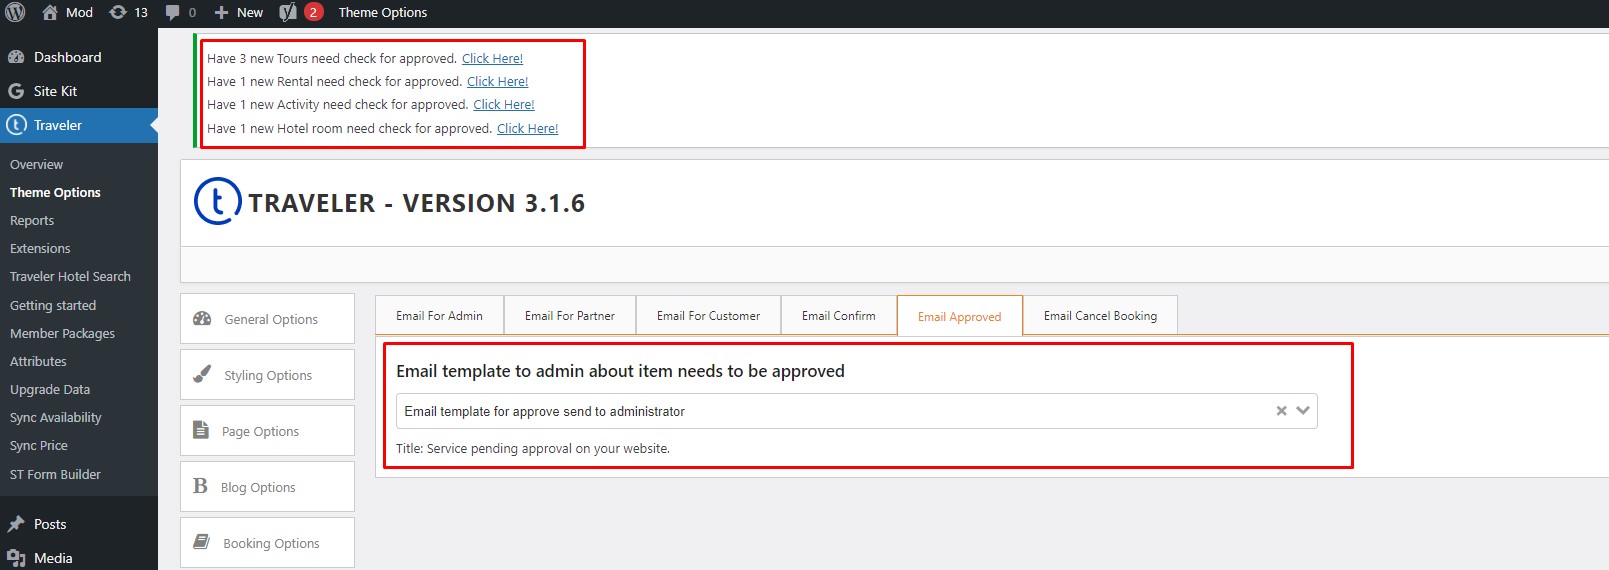
Note: Template for “Email template to admin about item needs to be approved” can use this content
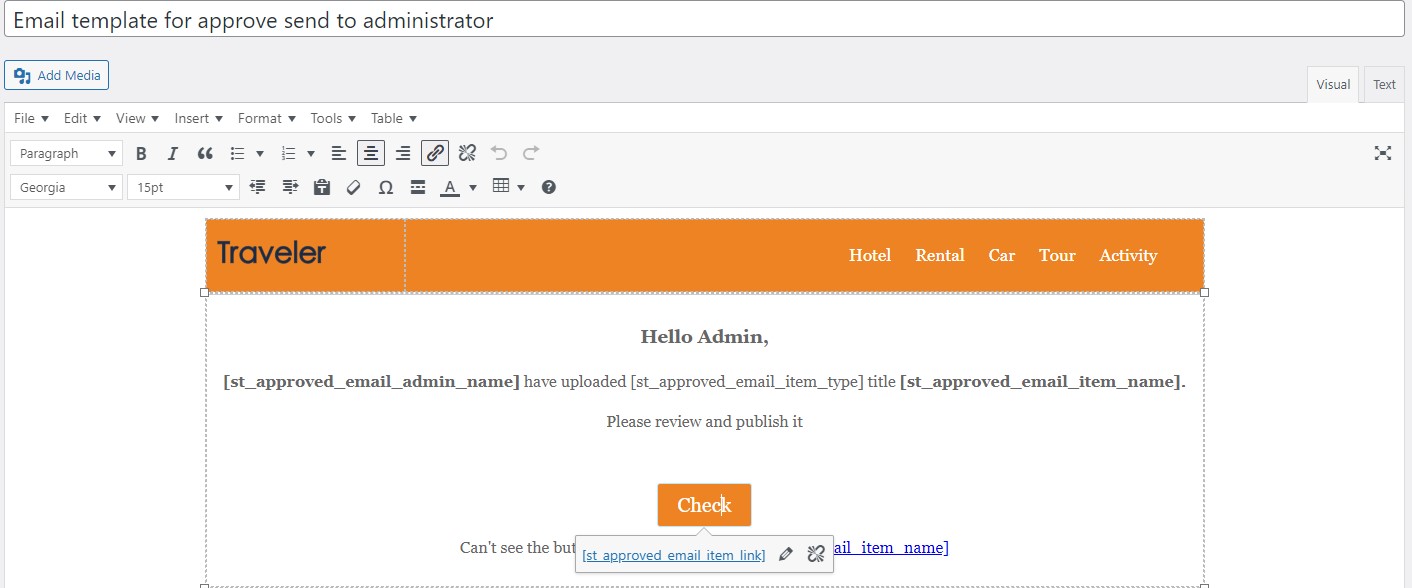
Hello Admin,
[st_approved_email_admin_name] have uploaded [st_approved_email_item_type] with [st_approved_email_item_name]. Please review and publish it
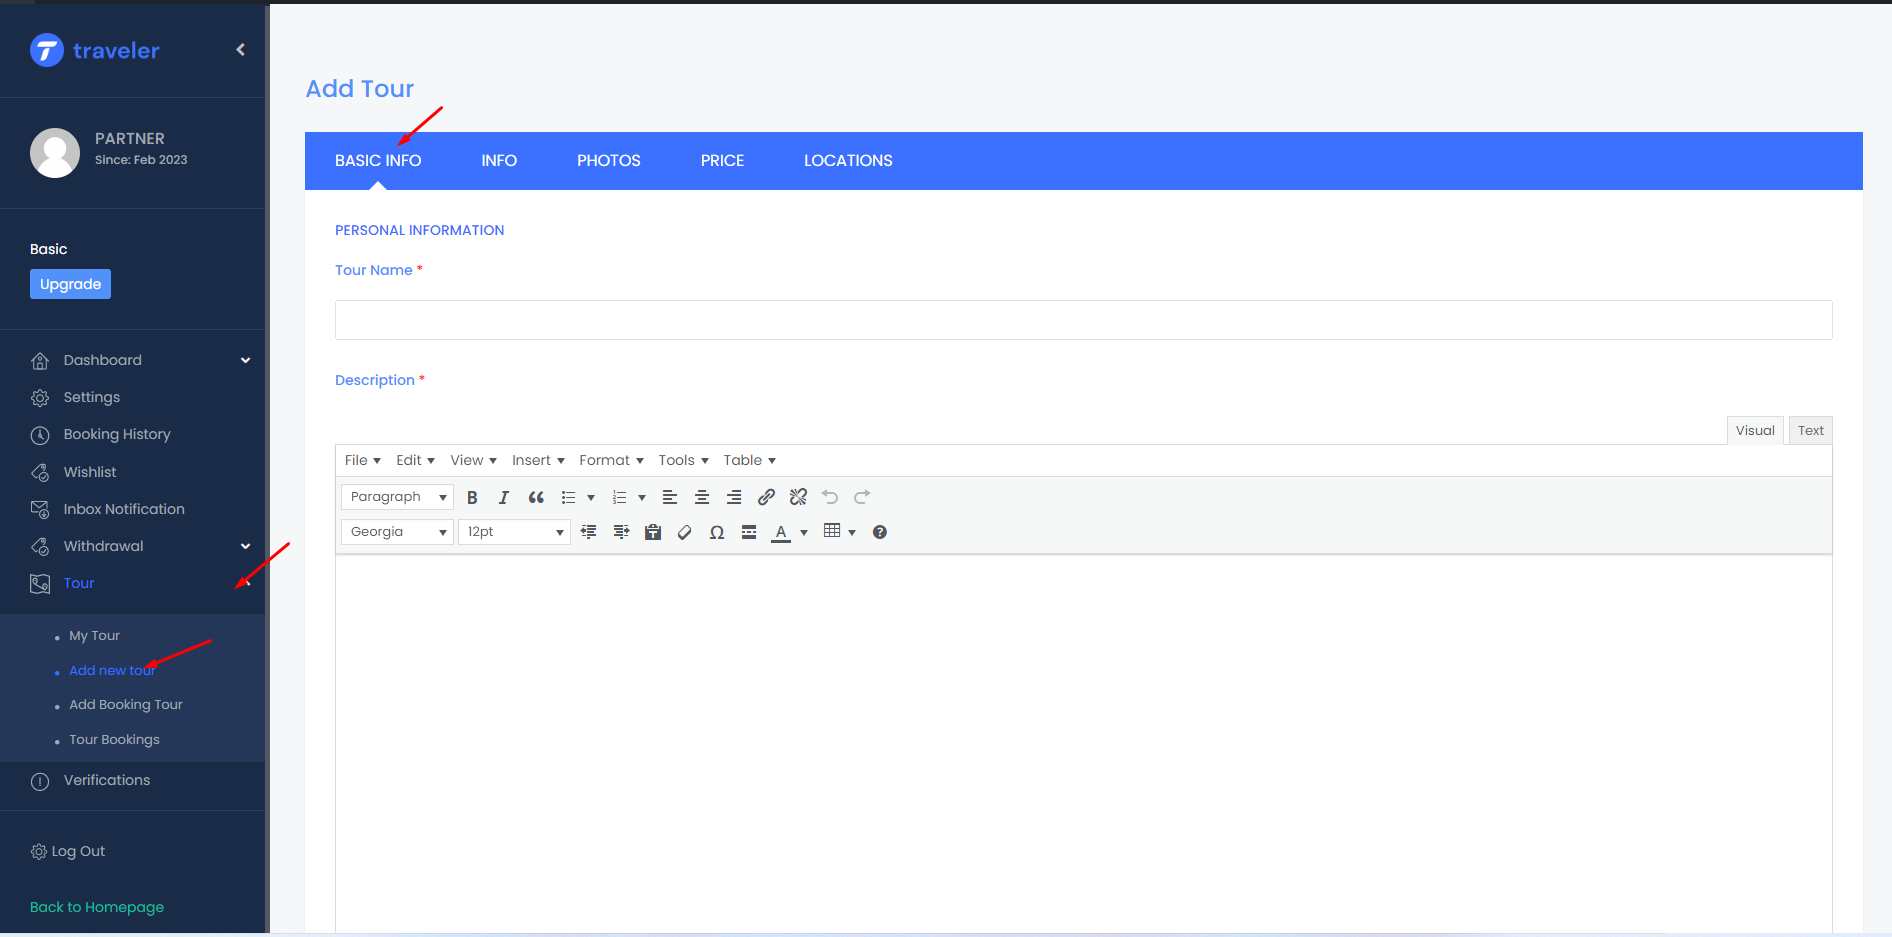
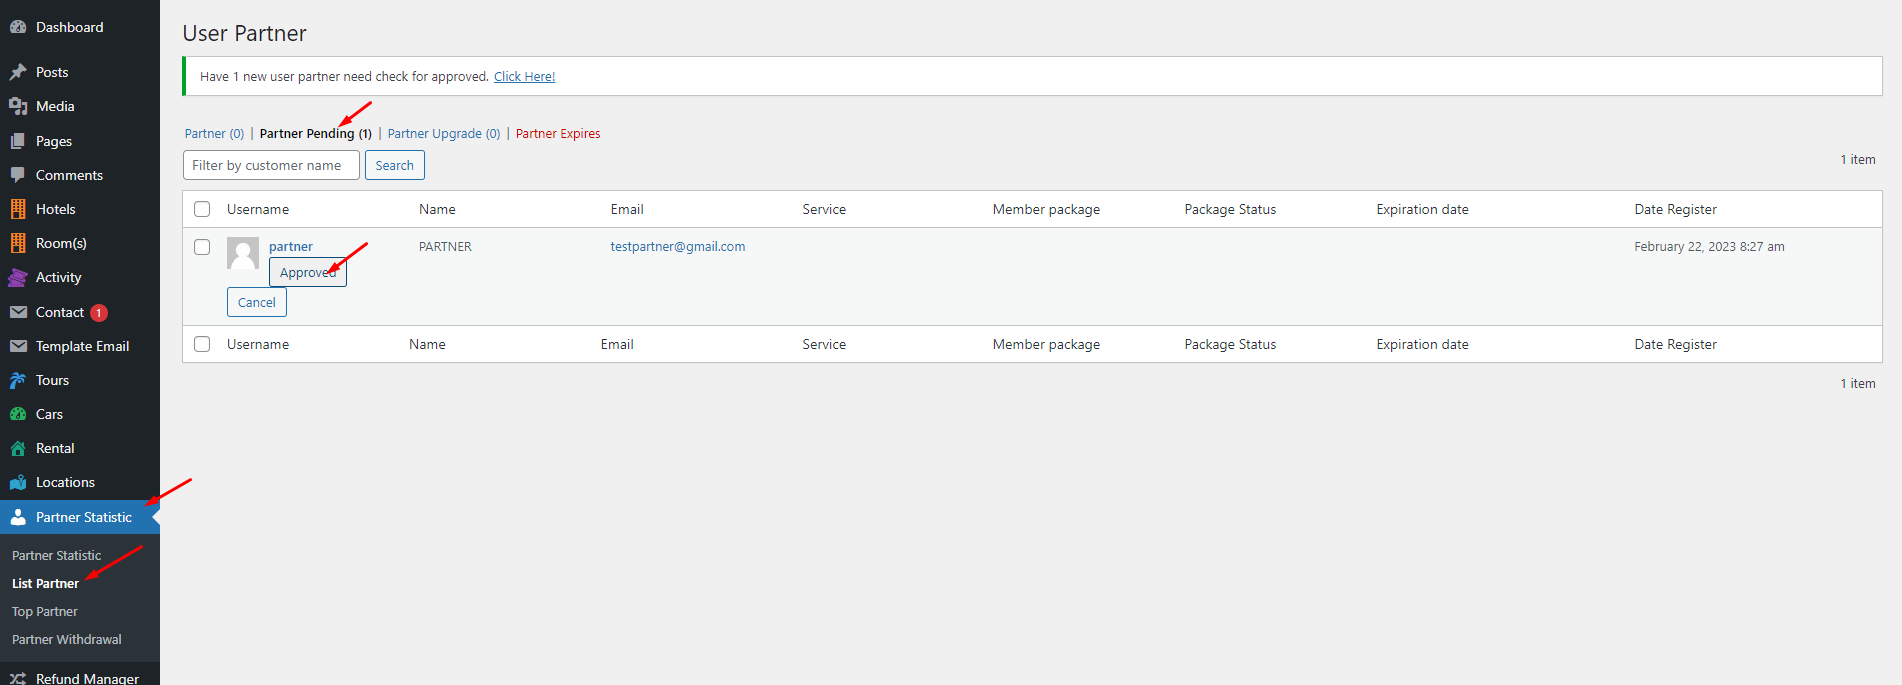
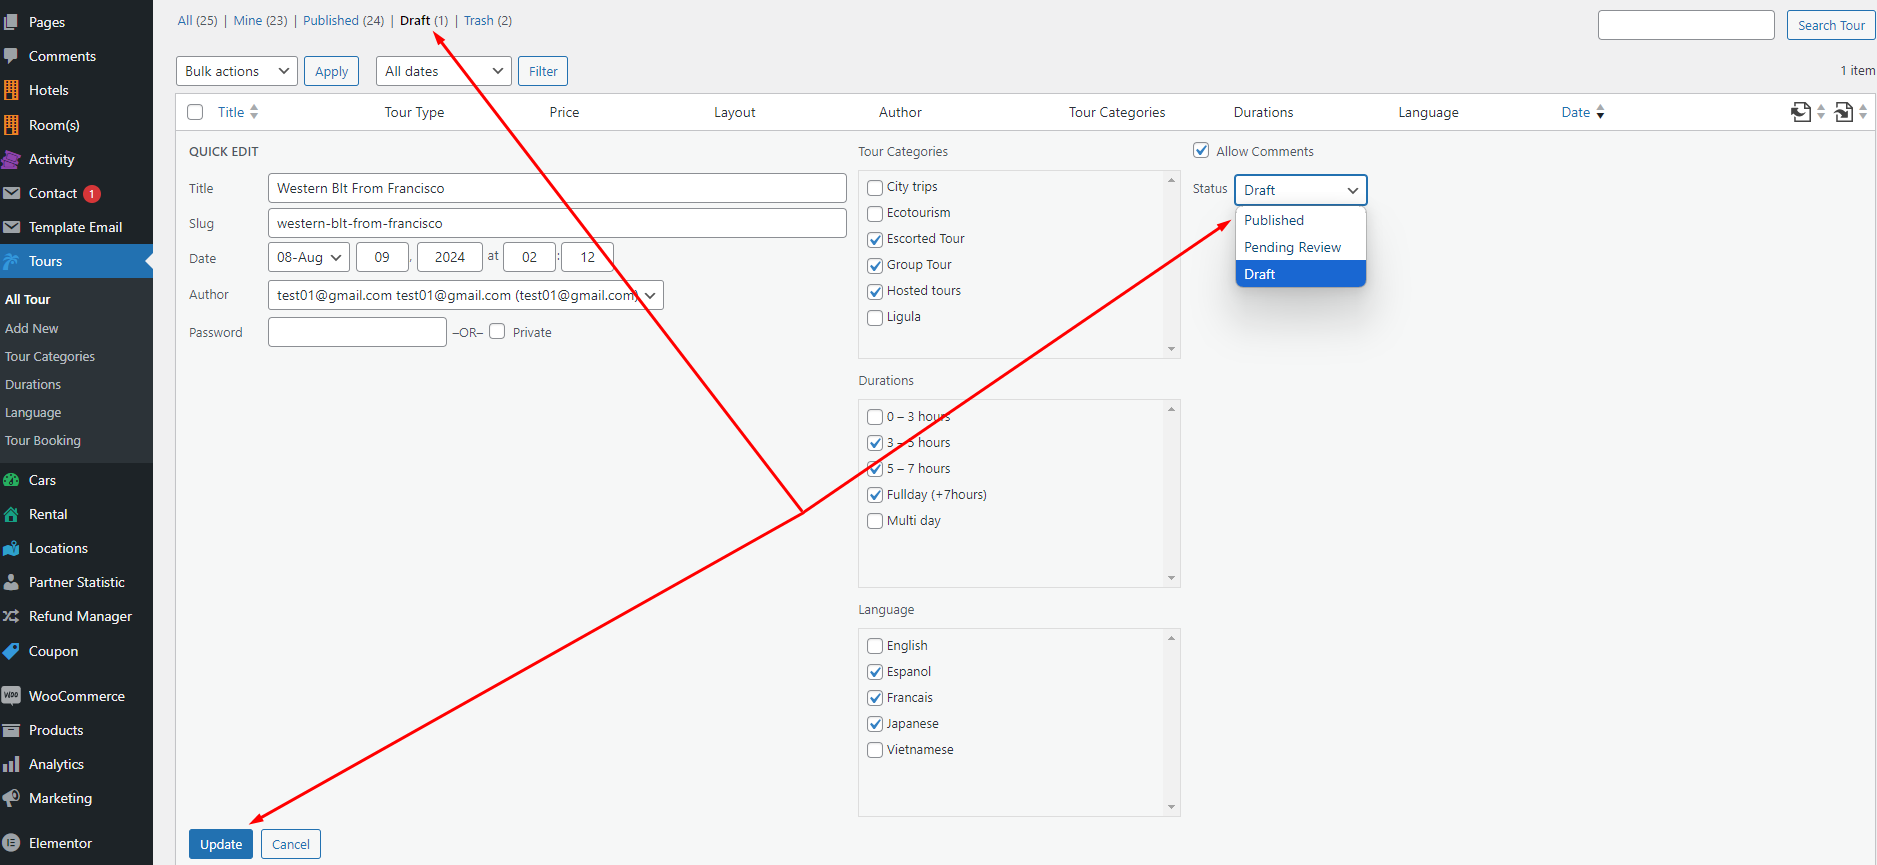
To approve a partner’s post, the Admin can either click the link on the notification bar in WPAdmin (Click Here!) or navigate to WPAdmin > Service (e.g., Tour) to check the Draft post. Then, change the post status from Draft to Publish.
After approval, the partner will receive an email titled “Service Published…”. The content of this email to the partner is defined in the code and not based on an email template