How to Sell Tours and Activities on Google Posts
One of the best parts of Google My Business is Google Posts, where you can post any kind of content to update your business profile, just like you can on social media.
It is a must-have feature for tour operators to think about if they want to get the best possible Google ranking for their business.
Google will keep looking to see if your posts match what people are looking for. Adding new content often shows that you still have something to say.
Don’t think of Google Posts as blog posts, though. They look and act more like ads because they have call-to-action buttons that can lead to sales.
Even though Google Posts sounds new, sales are likely to go through the roof soon.
All you need to do now is use our guide on how to sell tours and activities on Google Posts to set up your Google My Business profile.
Let’s dive in!
Setting up a Google My Business account
Before moving on to how to sell your tours on Google Posts, you first must have a Google My Business account. You should sign up and simply be sure to input all information properly.
Specifically as follows:
Step 1: Create a Google Account
Take a moment to register a Google account if you don’t already have one. This account should only be used for business purposes.
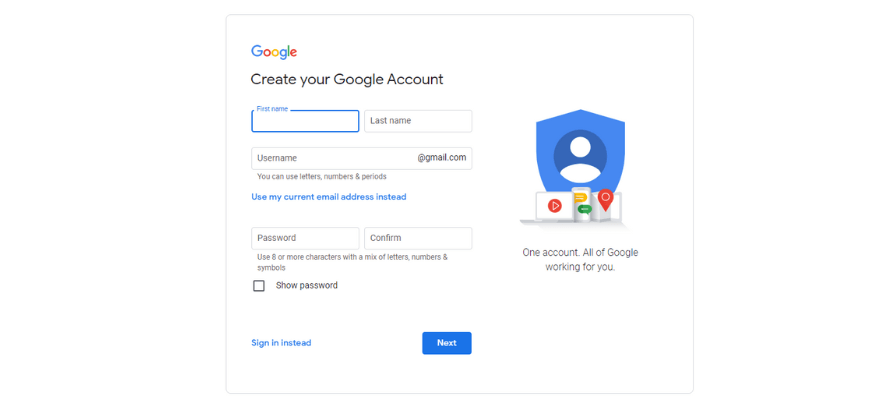
It should preferably be configured using your domain name (for example, [email protected]).
Step 2: Go to www.business.google.com
You can find out more information on the Google My Business account here.
Once you’ve created an account, you can edit your company listing, post updates online, reply to reviews, and upload images.
On the Google My Business page, click “Manage Now”.
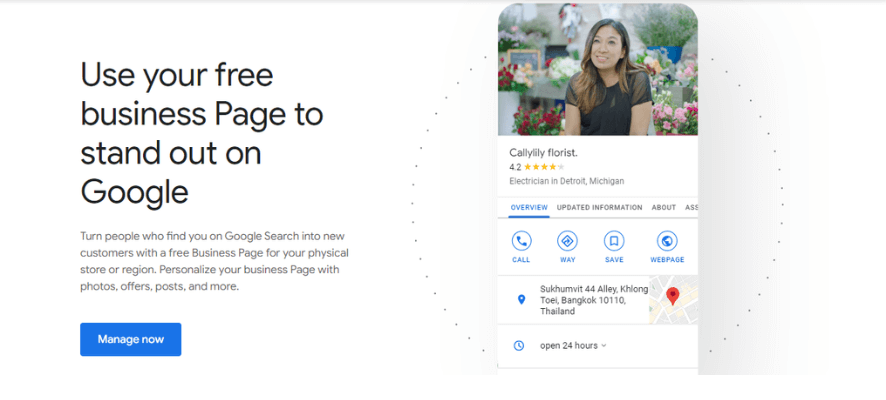
Step 3: Completing your business profile, including contact information and location
After accessing the Google My Business management system, you need to complete the information about your company.
Be sure that the entire information you provide is correct in every way.
Business name: Double-check your spelling. Ensure it’s a good one as this is the customer’s first impression of you.
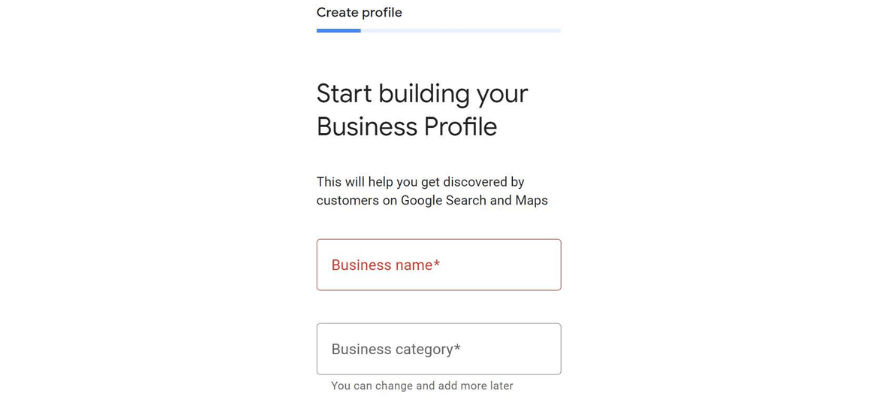
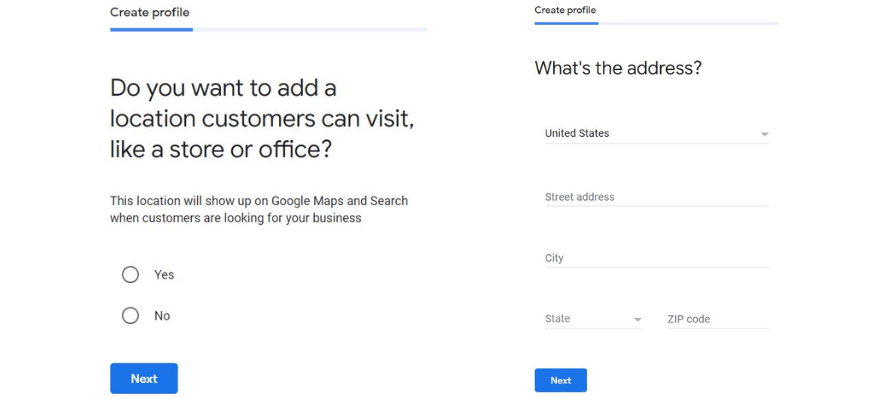
Business address: This address shouldn’t be a mailbox or a post office box. You have to put in your actual location. If your travel business doesn’t have a storefront or is service-based, choose “I deliver goods and services to my customers” and then “Hide my address” to keep your address from showing up on your listing.
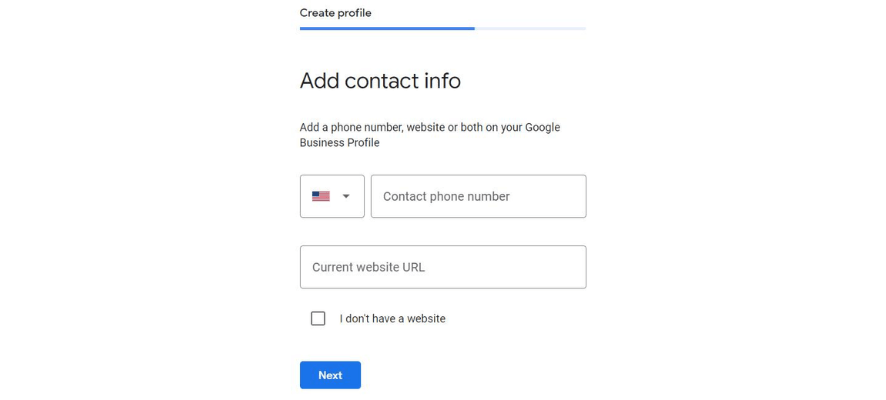
Website and phone: Google Business Profile tracks website clicks and phone calls, so be sure your information is accurate. This part is totally optional, however the more details you include, the more likely it is that you will attract more customers.
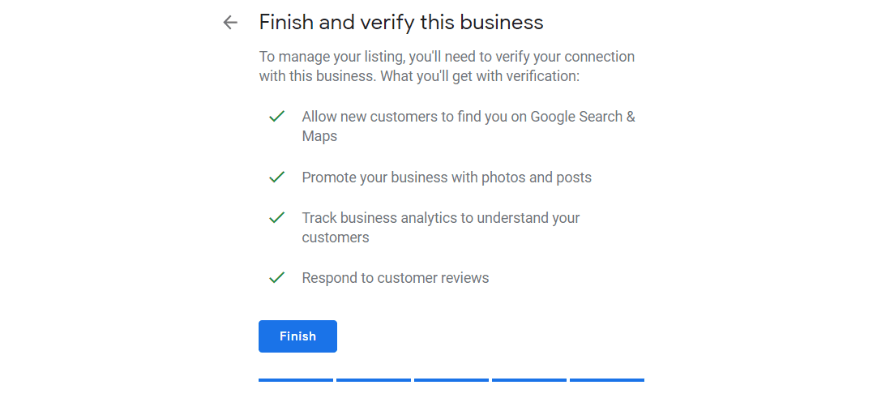
Step 4: Finish and verify your business
Google notes that you have to validate your business listing in order to manage your company’s information in Search, Maps, as well as other Google sites.
The verification process allows Google to confirm that the information about your company is correct.
Google will send a postcard to the address you provided before to confirm your listing.
You can follow the instructions on the postcard when you get it to finish the verification process. After that, your Google My Business account has been established, and you’re ready to go!
Creating and publishing Google Posts
Now think about what you want to post on Google and follow our instructions below.
Oh, slow down! Let’s see 6 types of Google posts available to all businesses as follows:
- Photos
- Updates
- Offers
- Reviews
- Events
- FAQ
- Menu
- Products
- Service
Content types on Google Posts can include a variety of elements such as text, images, videos, or call-to-action buttons (sure!)
Especially, your content should offer a variety of information about tours or activities to retain customers longer on your Business Profile.
So, have you figured out what your first post is about yet? If done, follow our steps to create and publish a Google Post through Google My Business.
Step 1: Choose a type of content
Before you start to write, identify the purpose and objective of your post as well as how it fits into your social content strategy.
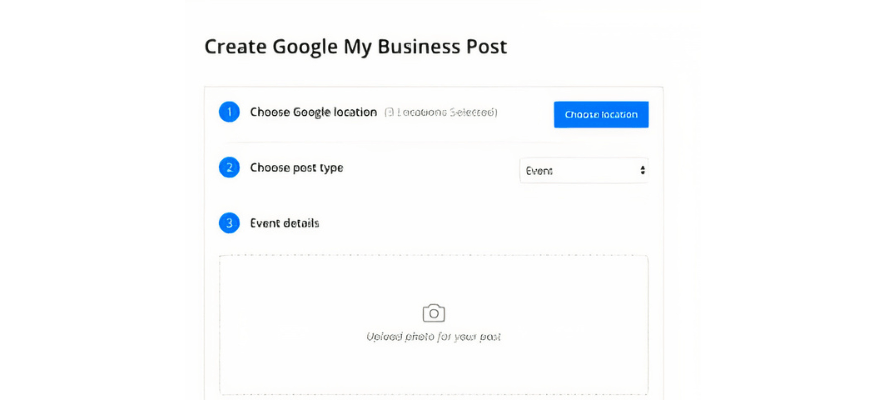
Step 2: Create your post
Here is the time to add something unique to your article.
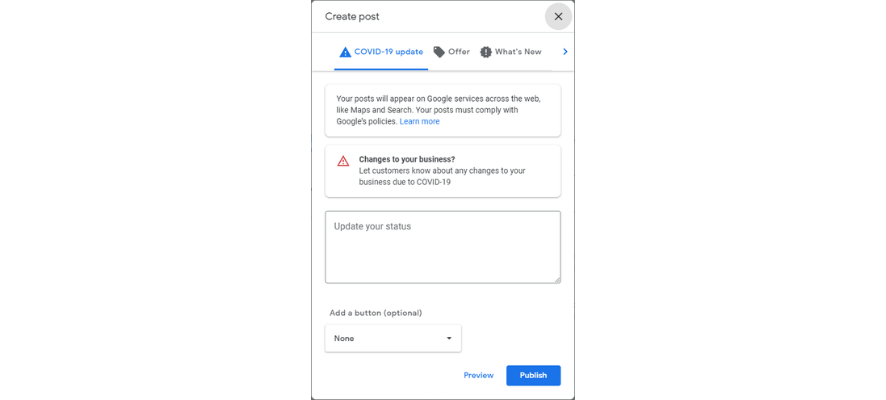
You will have many chances to engage your audience when writing your Google Posts. The following tips going for Google My Business posts will help you grab your customers’ first impression:
- Write a short post: There’s no need to use all 1,500 of your allowed characters. Straight to the point, brief, and engaging about the tour or any activity.
- Pay attention to your title: A strong title should make it clear what you are offering. Although you can write a more funny and creative one, a clear and simple title may work better.
- Choose your CTA button: This feature will encourage customers to make a book or purchase. With each Google My Business post, you have the option of the CTA buttons including “Sign up,” “Buy now,” “Book,” and others.
- One thing to keep in mind is to use hashtags. They don’t help you move up the rankings. These only tend to clog up your post.
Moreover, be careful not to violate Google’s tight content policy.
Step 3: Preview and publish your post
Before posting, make sure to review your content again. One minor spelling or language mistake might ruin the image of your tour and activities company.
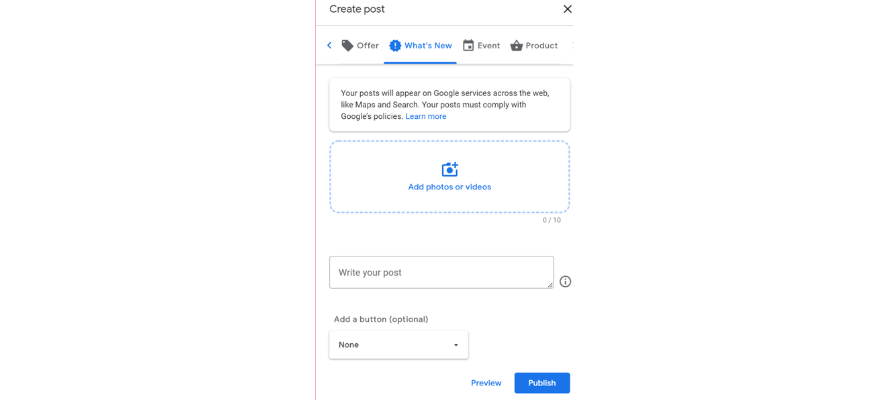
Well, click “Publish”, and your post will show! Posts on Google are displayed for 7 days. After that, they will be automatically deleted from your profile.
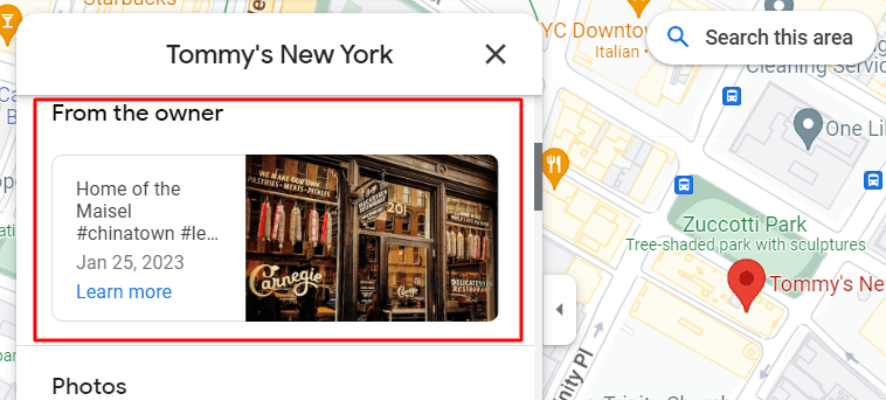
You may also share your Google posts on Facebook and a variety of other social media platforms. This will increase the visibility of your tour promotions and also save you time from manually advertising on such platforms.
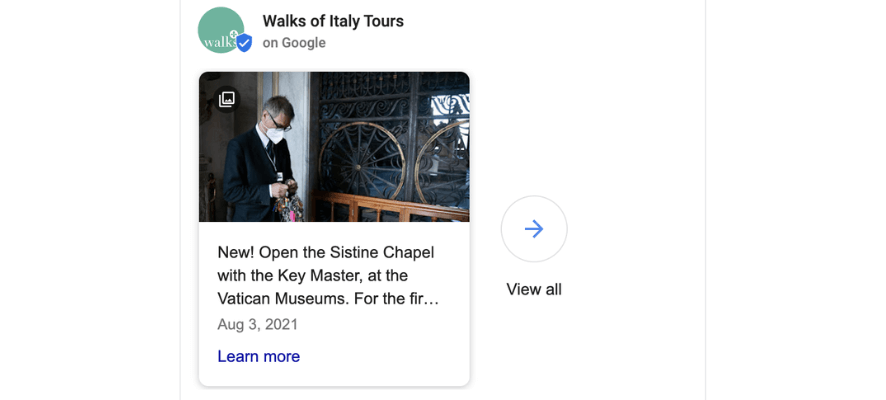
Creating and publishing Google Posts
Now think about what you want to post on Google and follow our instructions below.
Oh, slow down! Let’s see 6 types of Google posts available to all businesses as follows:
- Photos
- Updates
- Offers
- Reviews
- Events
- FAQ
- Menu
- Products
- Service
Content types on Google Posts can include a variety of elements such as text, images, videos, or call-to-action buttons (sure!)
Especially, your content should offer a variety of information about tours or activities to retain customers longer on your Business Profile.
So, have you figured out what your first post is about yet? If done, follow our steps to create and publish a Google Post through Google My Business.
Step 1: Choose a type of content
Before you start to write, identify the purpose and objective of your post as well as how it fits into your social content strategy.

Step 2: Create your post
Here is the time to add something unique to your article.

You will have many chances to engage your audience when writing your Google Posts. The following tips going for Google My Business posts will help you grab your customers’ first impression:
- Write a short post: There’s no need to use all 1,500 of your allowed characters. Straight to the point, brief, and engaging about the tour or any activity.
- Pay attention to your title: A strong title should make it clear what you are offering. Although you can write a more funny and creative one, a clear and simple title may work better.
- Choose your CTA button: This feature will encourage customers to make a book or purchase. With each Google My Business post, you have the option of the CTA buttons including “Sign up,” “Buy now,” “Book,” and others.
- One thing to keep in mind is to use hashtags. They don’t help you move up the rankings. These only tend to clog up your post.
Moreover, be careful not to violate Google’s tight content policy.
Step 3: Preview and publish your post
Before posting, make sure to review your content again. One minor spelling or language mistake might ruin the image of your tour and activities company.

Well, click “Publish”, and your post will show! Posts on Google are displayed for 7 days. After that, they will be automatically deleted from your profile.

You may also share your Google posts on Facebook and a variety of other social media platforms. This will increase the visibility of your tour promotions and also save you time from manually advertising on such platforms.
But if you are looking for the best WordPress travel theme that will help your website stand out on both Google Search and Maps? Look no further than the Traveler theme! In today’s increasingly competitive travel industry, generic content just won’t cut it anymore. By leveraging Google Posts, tour operators can effectively level the playing field and highlight their unique offerings.

Conclusion
Even though your posts will show up in both Search and Maps, generic content won’t stand out in the travel industry, which is getting more and more competitive. Tour operators can level the playing field with Google Posts.
Now is the time to use Google Posts to get more attention and make the most of your local SEO marketing. This could also be the last step in deciding to buy something.
You should now know how to use Google Posts to sell your tours and activities. Plan on a new approach right away if you want completely new content on Google Posts.

