How to set up checkout options and payment methods?
1. Modal Checkout
Modal checkout is our default standard checkout method, which includes all the necessary features. However, it only supports a limited number of payment gateways. The payment gateways available with modal checkout include popular ones like Stripe, PayPal, 2Checkout, Authorize.net, PayUbiz, DPO, IPay88, Onepay, OnepayATM, PayUMoney, PayUlatam, Mercado Pago, and Billplz.
Note: the checkout of the membership package uses Modal Checkout only
If you decide to use the Modal Checkout method for the checkout function, please TURN OFF for Theme Options > Booking Options > WooCommerce Options. You can also delete all WooCommerce plugins.
1.1. Creating checkout page
Create a new checkout page by going to the Pages > Add News
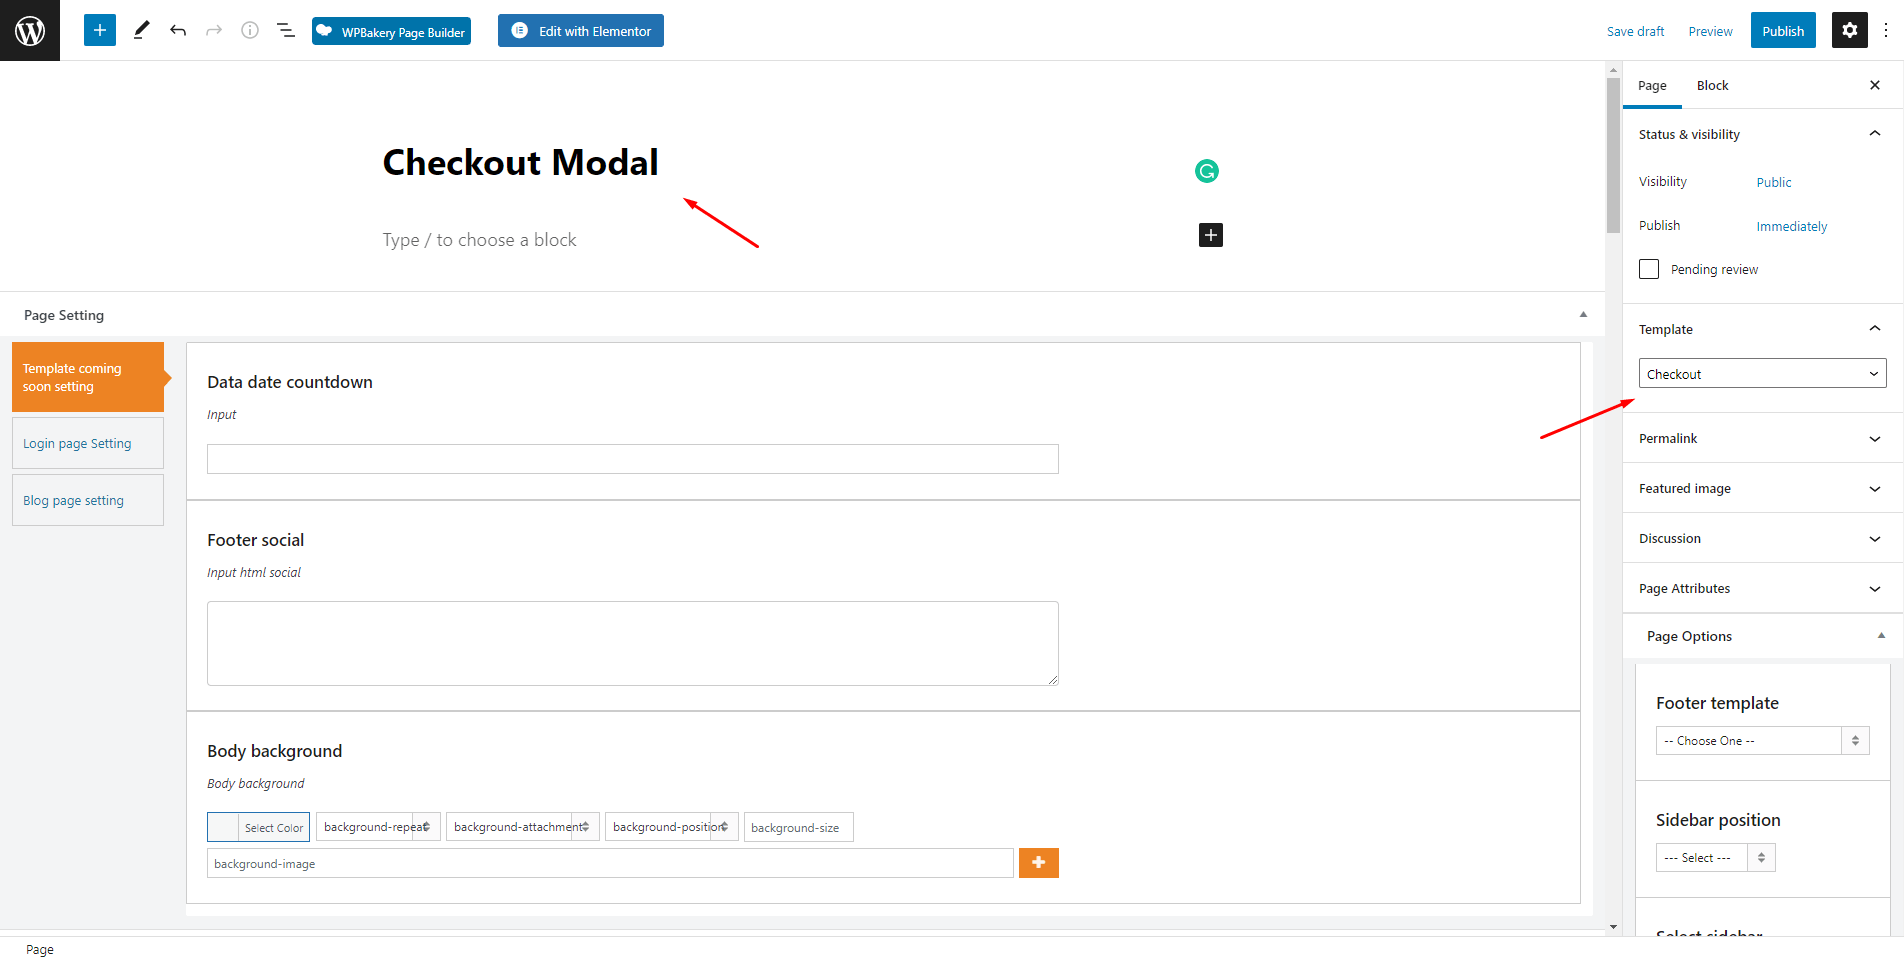
Add the title of the new checkout page, “Checkout Modal“, for example
Set the Page Template on the Page Attributes to Checkout and Publish it
1.2. Creating Payment Success Page
Create a new payment success page by going to Pages> Add News
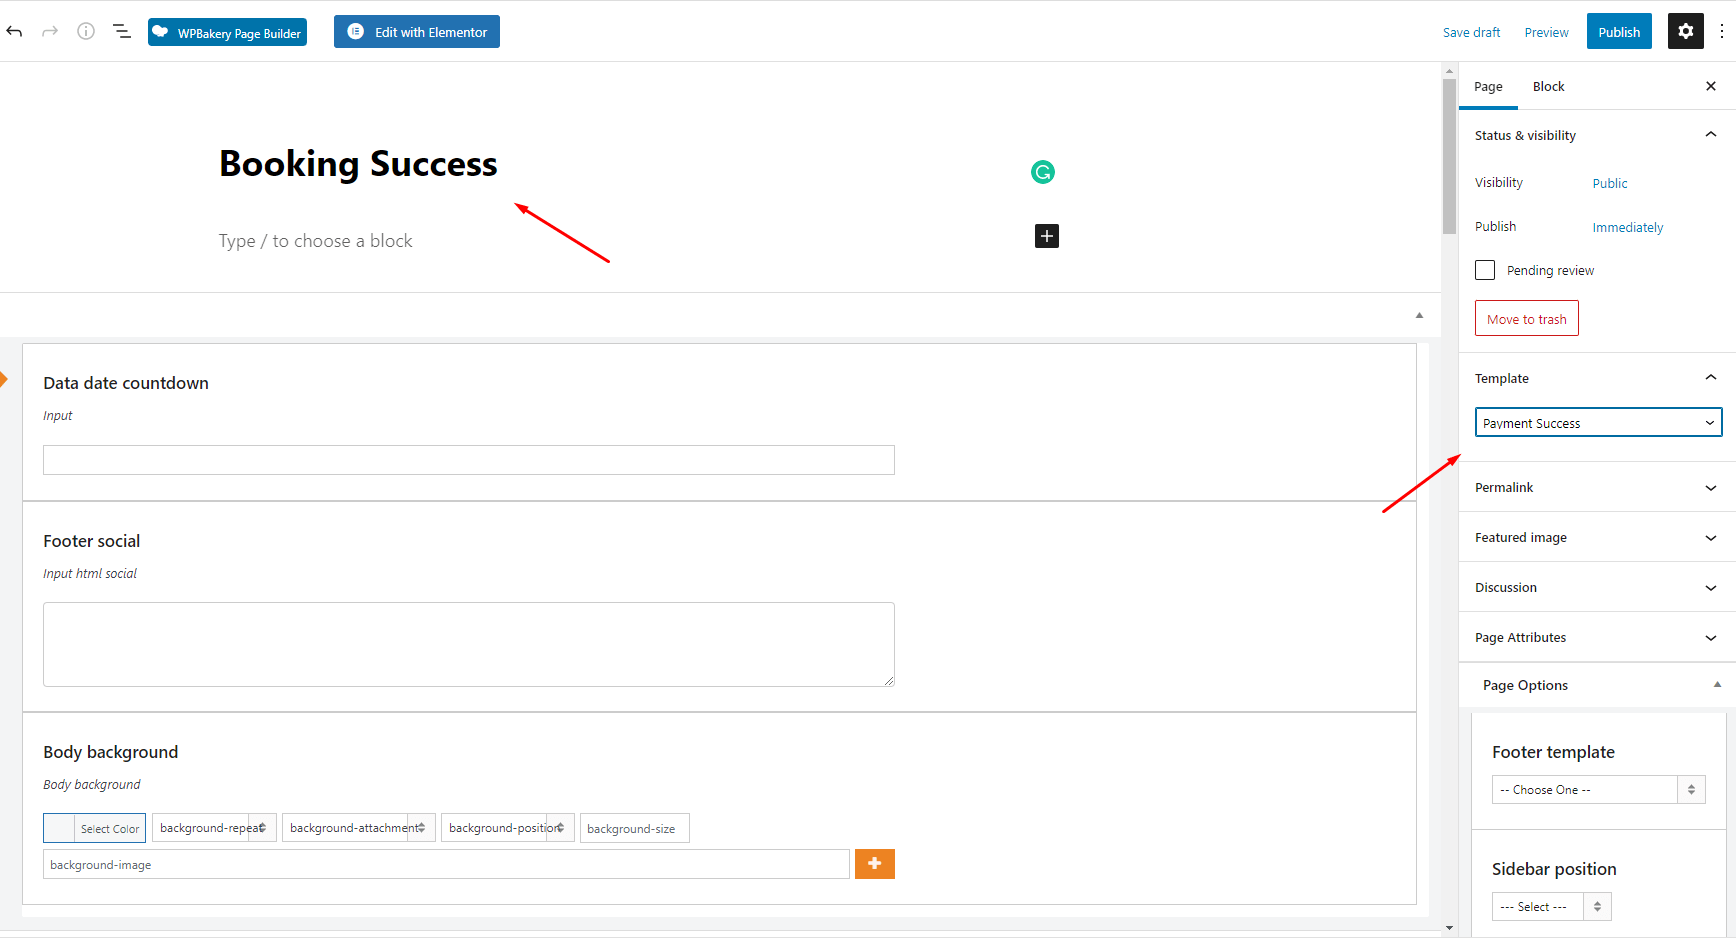
Add the title of the new checkout page, “Booking Success“, for example
Set the Page Template on the Page Attributes to Payment Success and Publish it
1.3. Setting up Booking Page
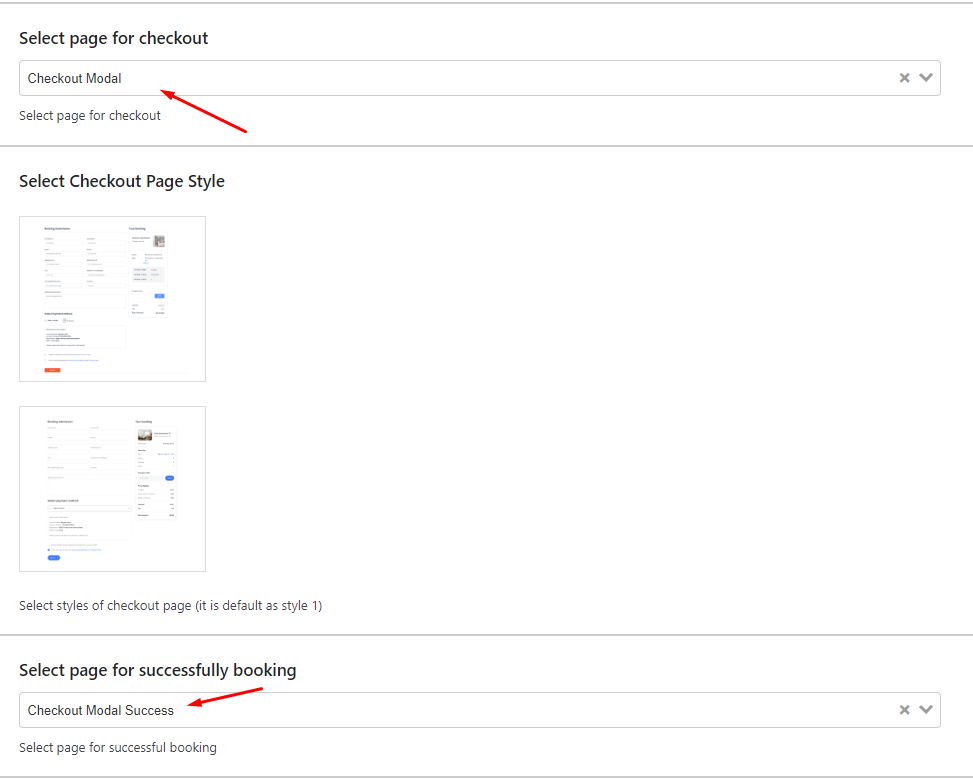
Go to Theme Settings> Page Options to set up the page for checkout and payment booking success
For the Select Page for Checkout, select the page “Checkout Modal“
For the Select Page for successfully booking, select the page “Booking Success“
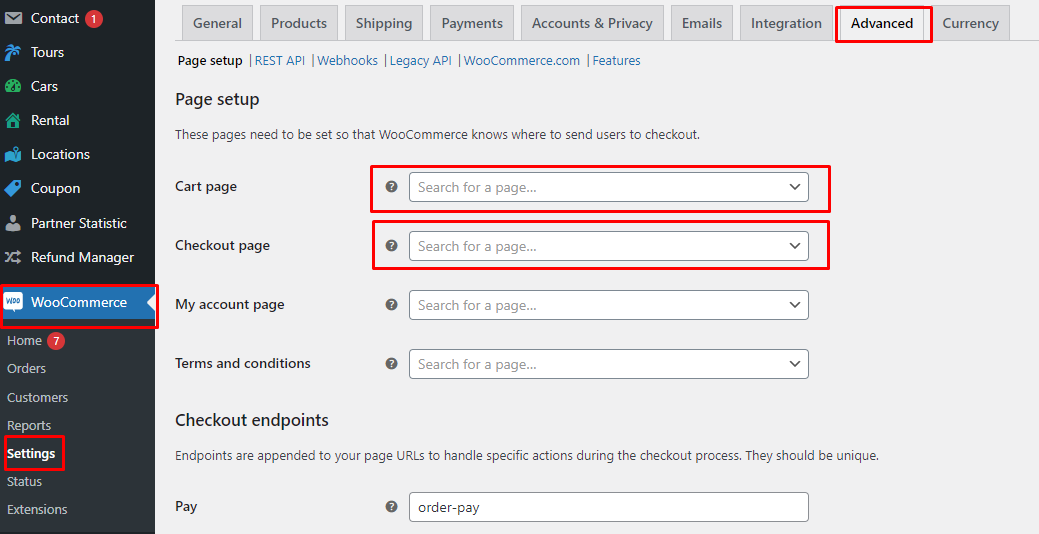
To fix the issue of the checkout page not displaying properly, please make sure that Cart Page and Checkout Page need to keep it blank on WooCommerce Settings
Go to the WooCommerce > Settings > Advanced tabs
Scroll down to the Page Setup, find the Cart Page and Checkout Page to keep it blank that means the cart page and checkout page of WooCommerce must be empty
Note: the checkout of the membership package uses Modal Checkout only
1.4. How to add Payment Gateways for Modal Checkout
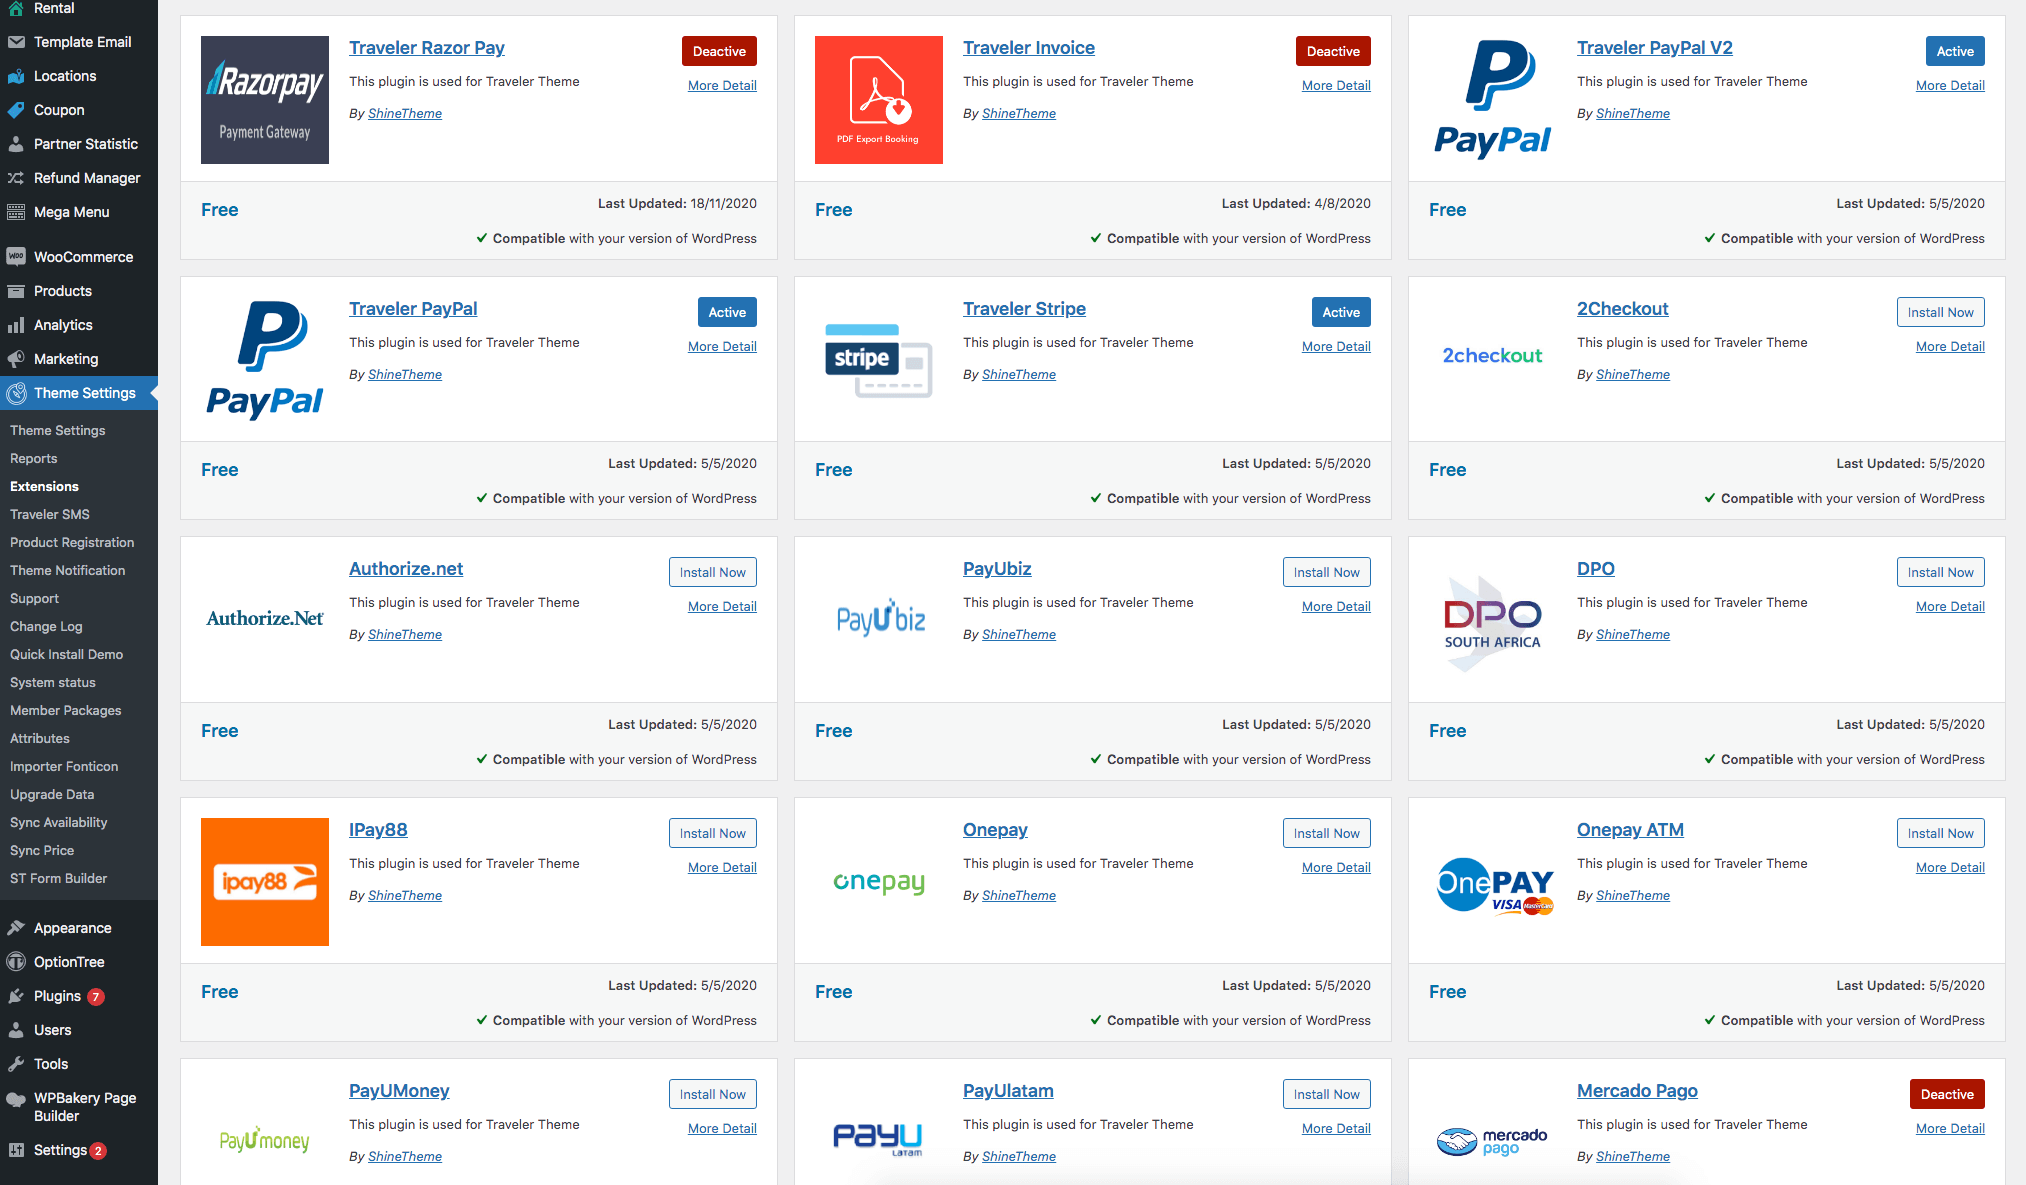
Go to Theme Settings>Extension> Plugin to add more multiple payment gateways
On the Theme Settings > Payment Options, fill in all the necessary information of each payment gateways
Here is the video to show you how to install and add payment gateways for your site. And go to Theme Settings > Booing Options to set up more options right here
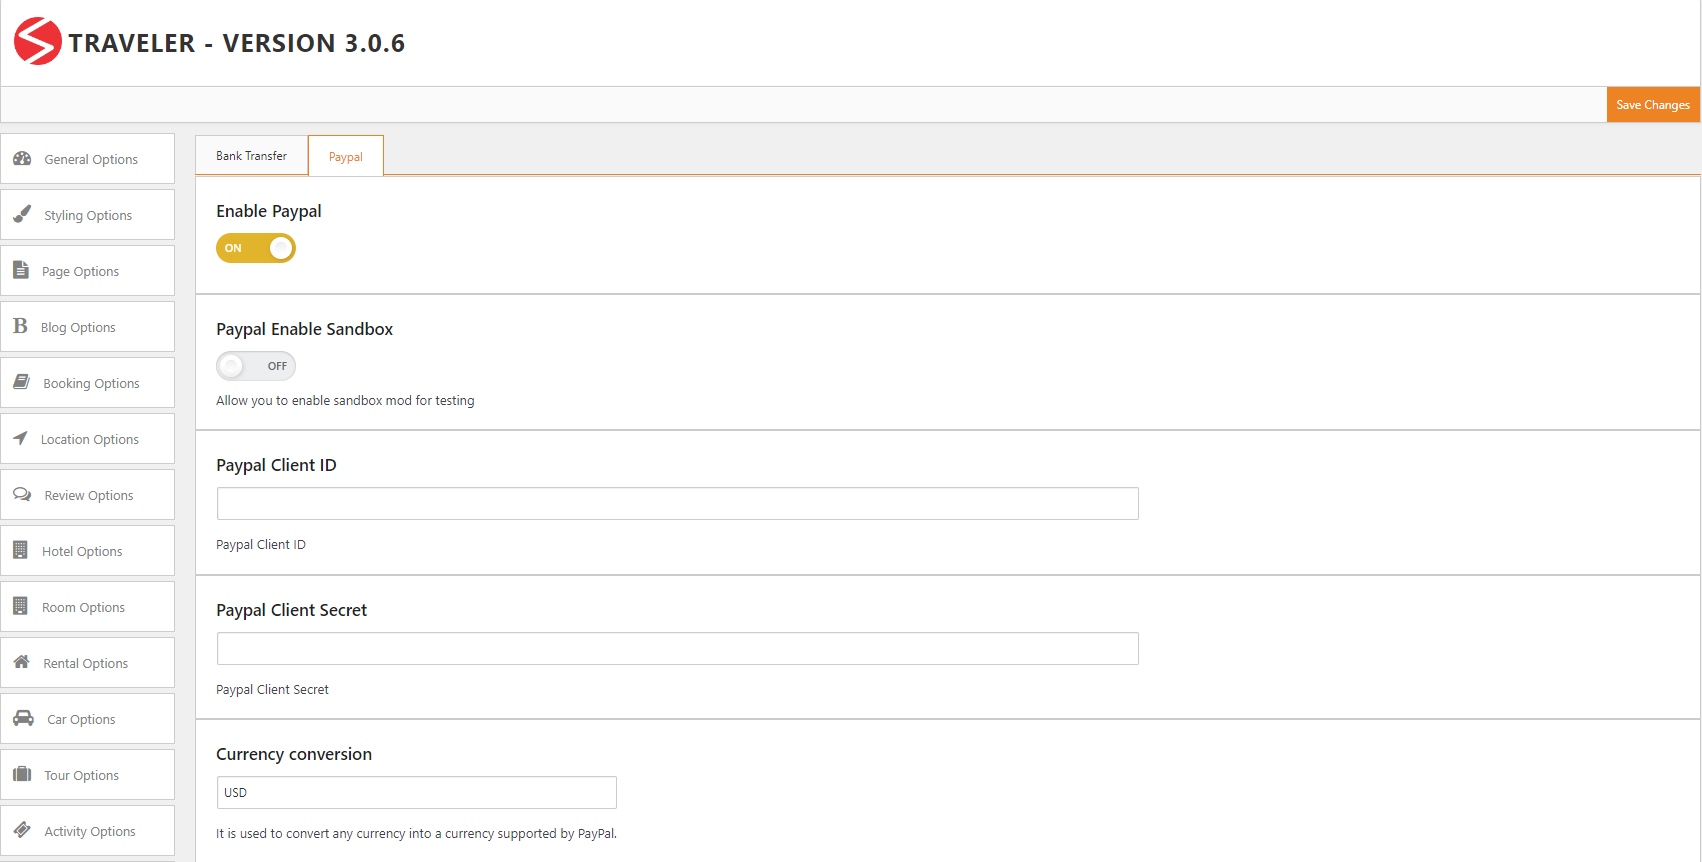
1.4.1. Paypal
This method allows your users to book a service and pay instantly using their PayPal account. To enable this method, all you need to do is enable PayPal and enter your PayPal information. If you enter the wrong information, the client will not be able to make a reservation anymore.
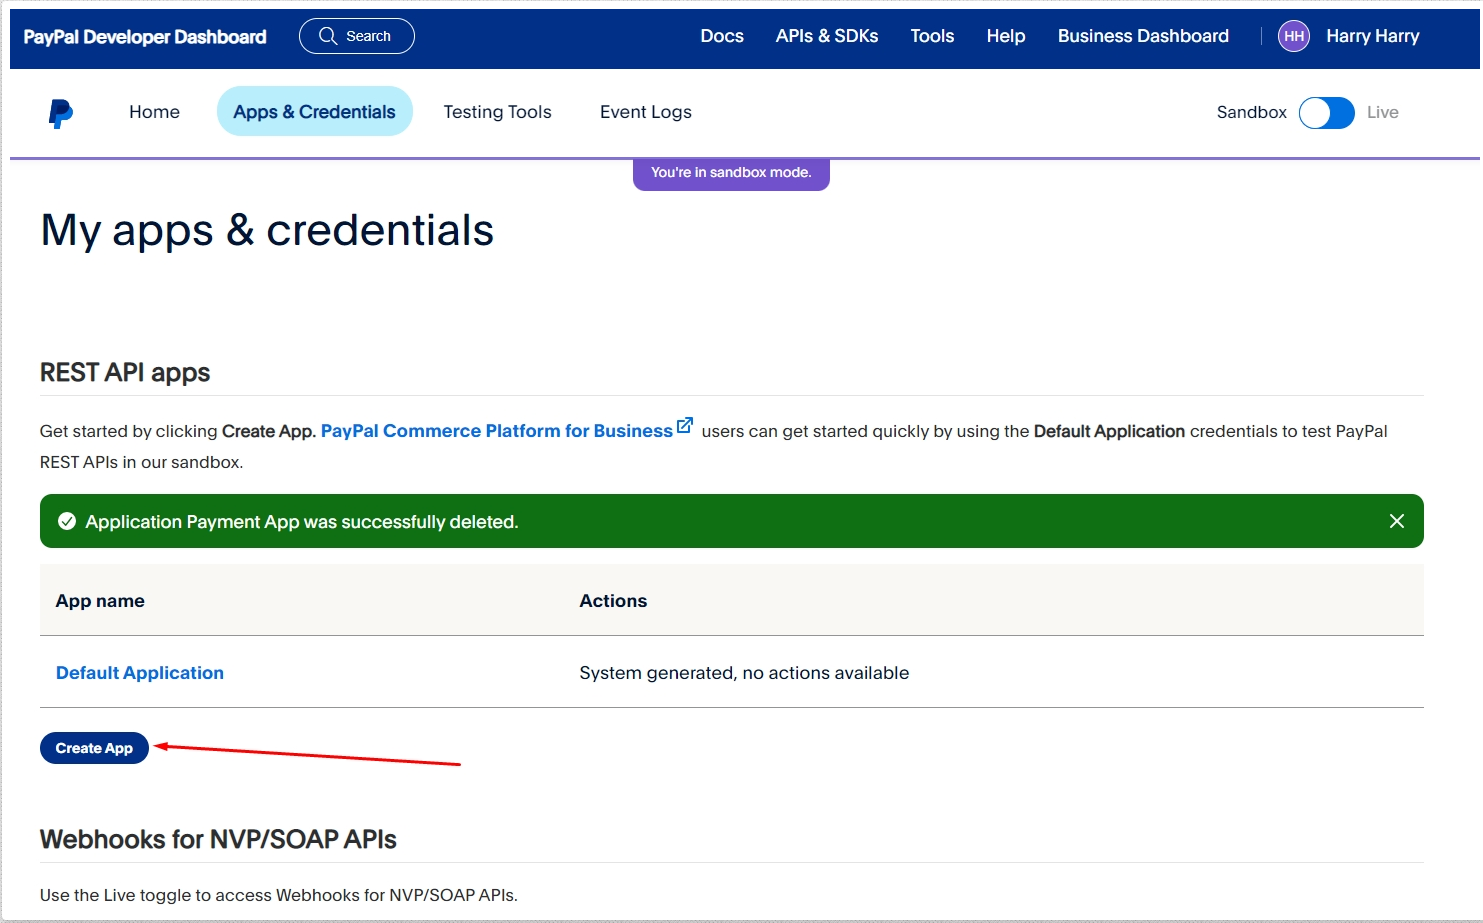
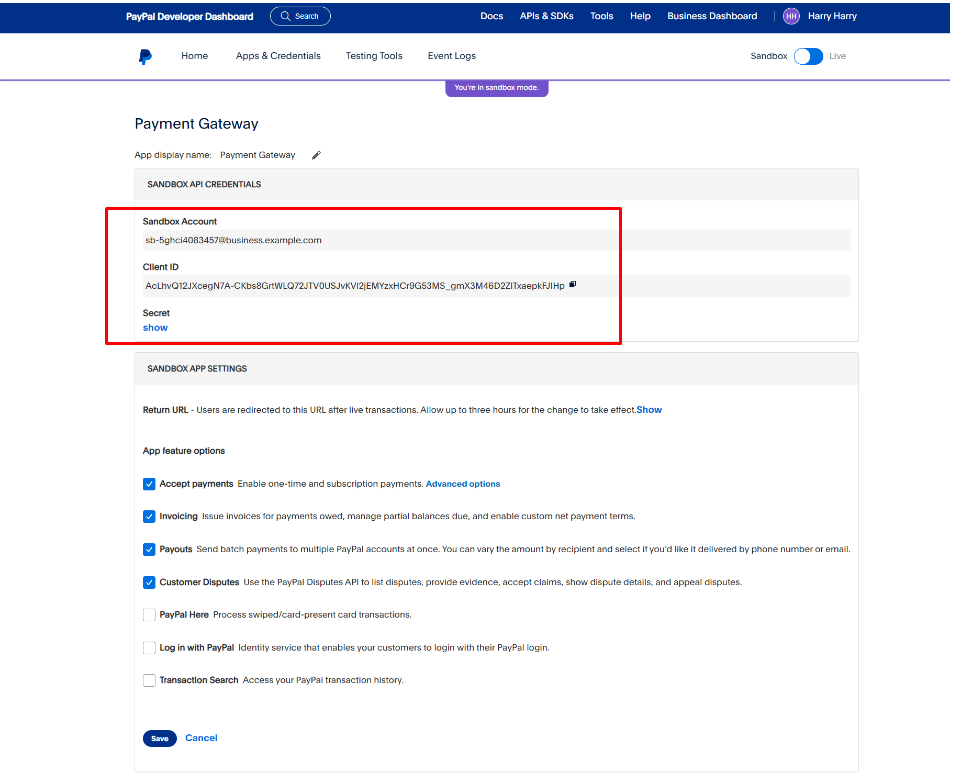
How to get Paypal Client ID and Paypal Client Secret
Note: The ID&Secret of Sandbox mode is different with ID&Secret of Live mode. Kindly generate in the right mode (sandbox or live mode) for your work. The Live mode requires PayPal Business Account
Copy your Client ID and Secret Key on Theme Settings > Payment Options > Paypal
1.4.2. Stripe
This payment method lets your users book a service and pay for it using their Stripe account right away. To enable this method, you just need to enable Stripe and enter some necessary information such as your Stripe Secret Key, enabling Sandbox Mode, and providing your Stripe Test Secret Key for Sandbox mode. If you enter the wrong information, the client will not be able to make a reservation anymore.
To get the Publishable Key and the Secret Key from Stripe, you need an account at Stripe (www.stripe.com)
Open the following website www.stripe.com and click on “Sign in“.
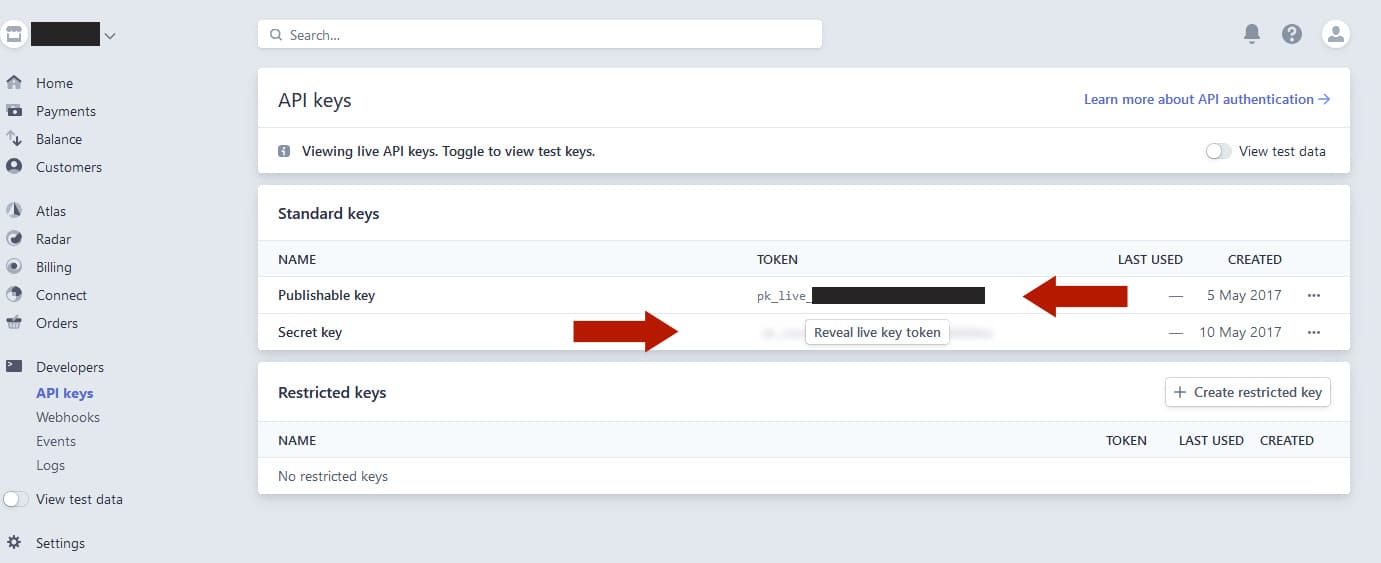
Now that you have logged in to Stripe, the dashboard opens. In the left menu, first click on “Developers” and then on “API keys“
Once you have clicked on “API keys“, the page with the API keys opens. Under Standard Keys you will see the Publishable Key and above the Secret Key there is a button “Reveal live key token“. Now click on it to display the secret key.
To switch Stripe to the Sandbox (Test Payments) mode or Live (Real Payments) mode, click on “View test data” in the left menu. Note that Sandbox and Live Mode have different keys
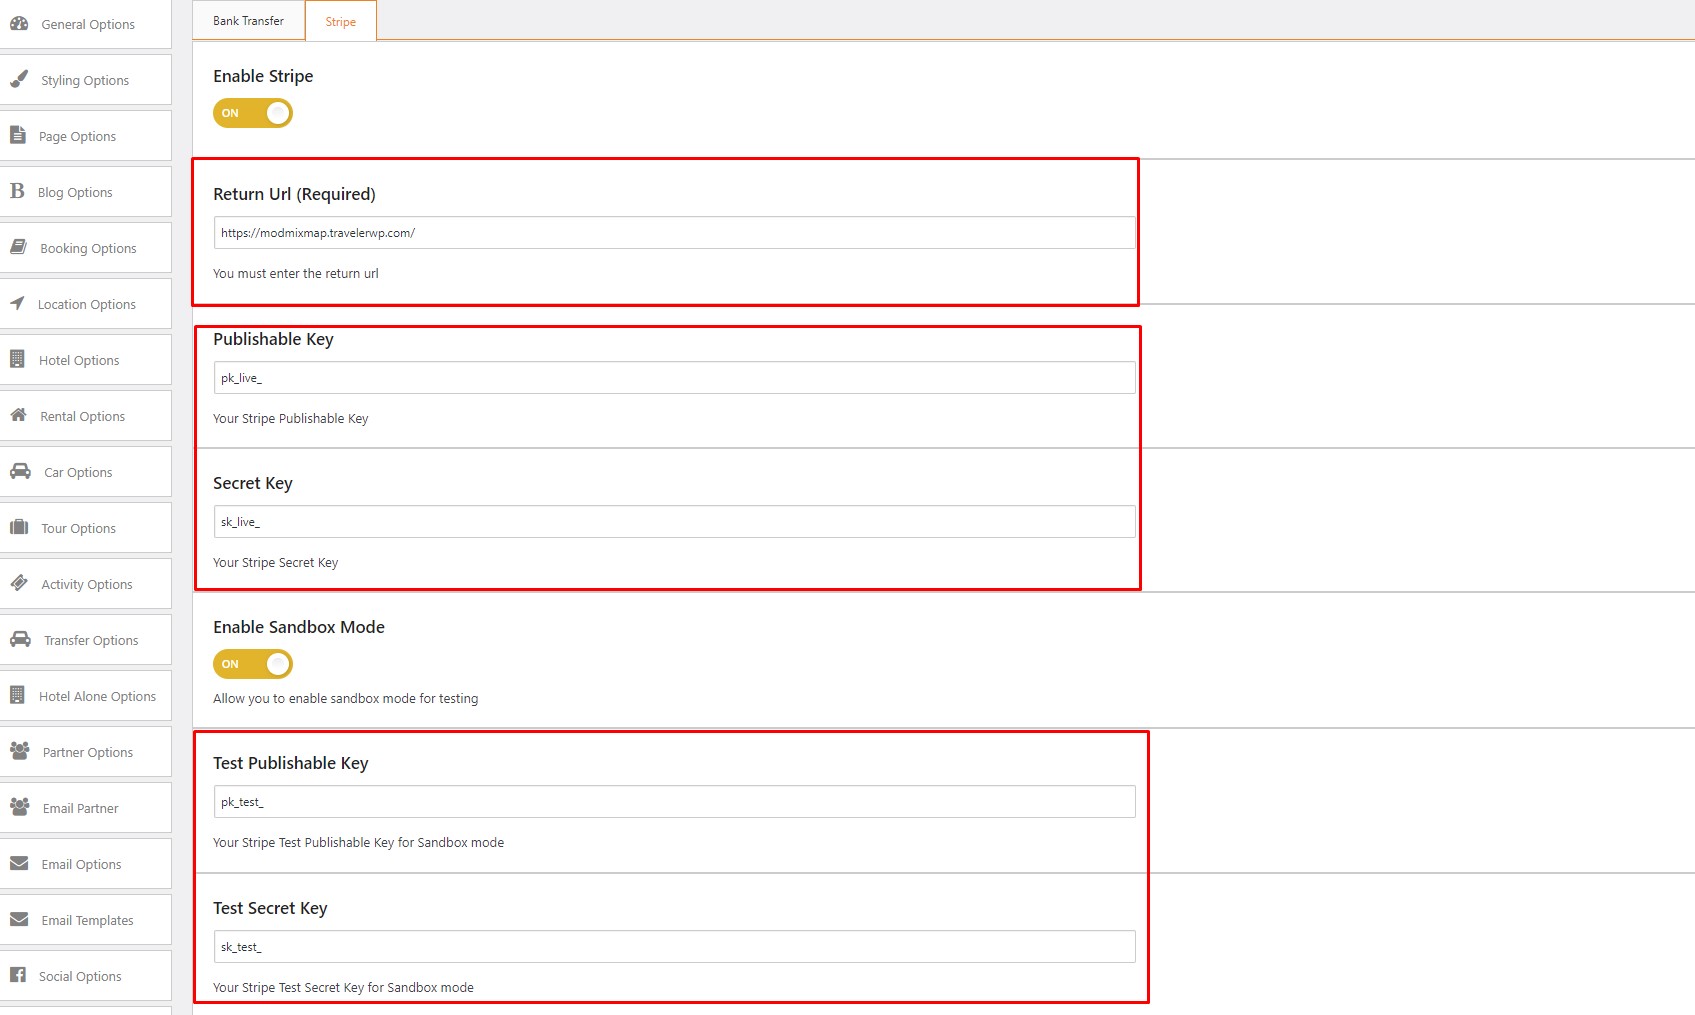
Go to Theme Options > Payment Options > Stripe to enter your Stripe’s account information
Return URL: your domain url, such as https://modmixmap.travelerwp.com/
Input Key in the sandbox if you are using Test mode or disable Sandbox mode to use key in Live mode.
Stripe secret API keys start with either sk_live_ (for live keys) or sk_test_ (for test keys). Similarly, Stripe publishable API keys start with pk_live_ or pk_test_
1.4.3. 2Checkout
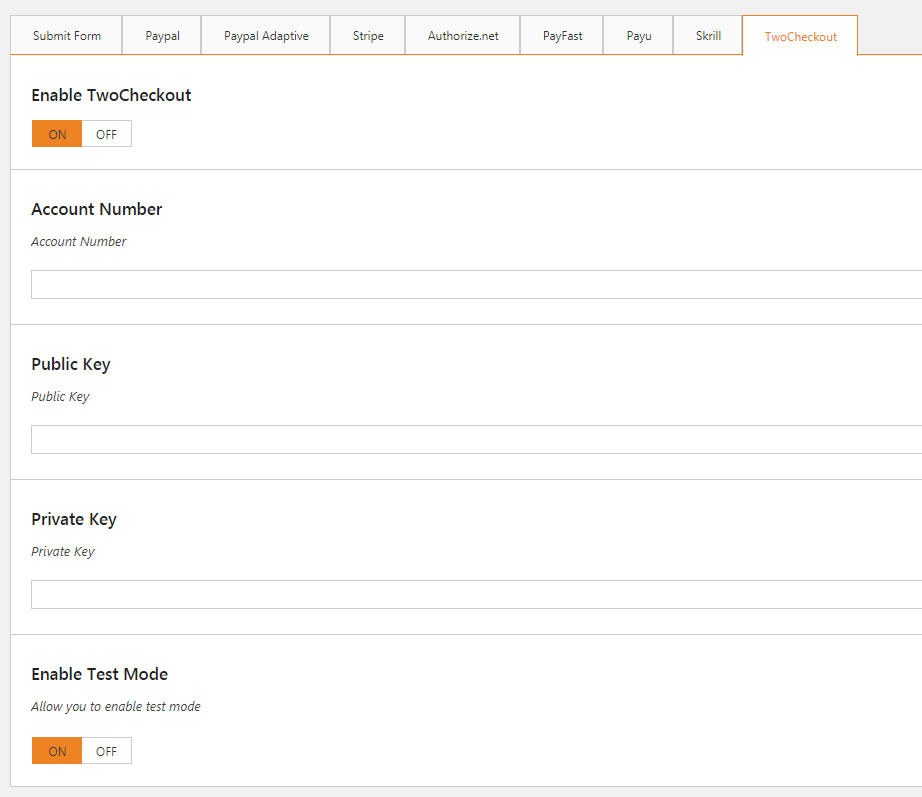
This payment method allows your users to book a service and pay right away using the Authorize.net system. To enable this method, you just need to turn on 2Checkout and enter some private information such as your Account Number, Public Key, and Private Key. You also can enable Test Mode to test the payment.
To get the Public Key and the Private Key from 2Checkout, you need an account at 2Checkout website and copy these key on Theme OPtions > Payment Options > TwoCheckout
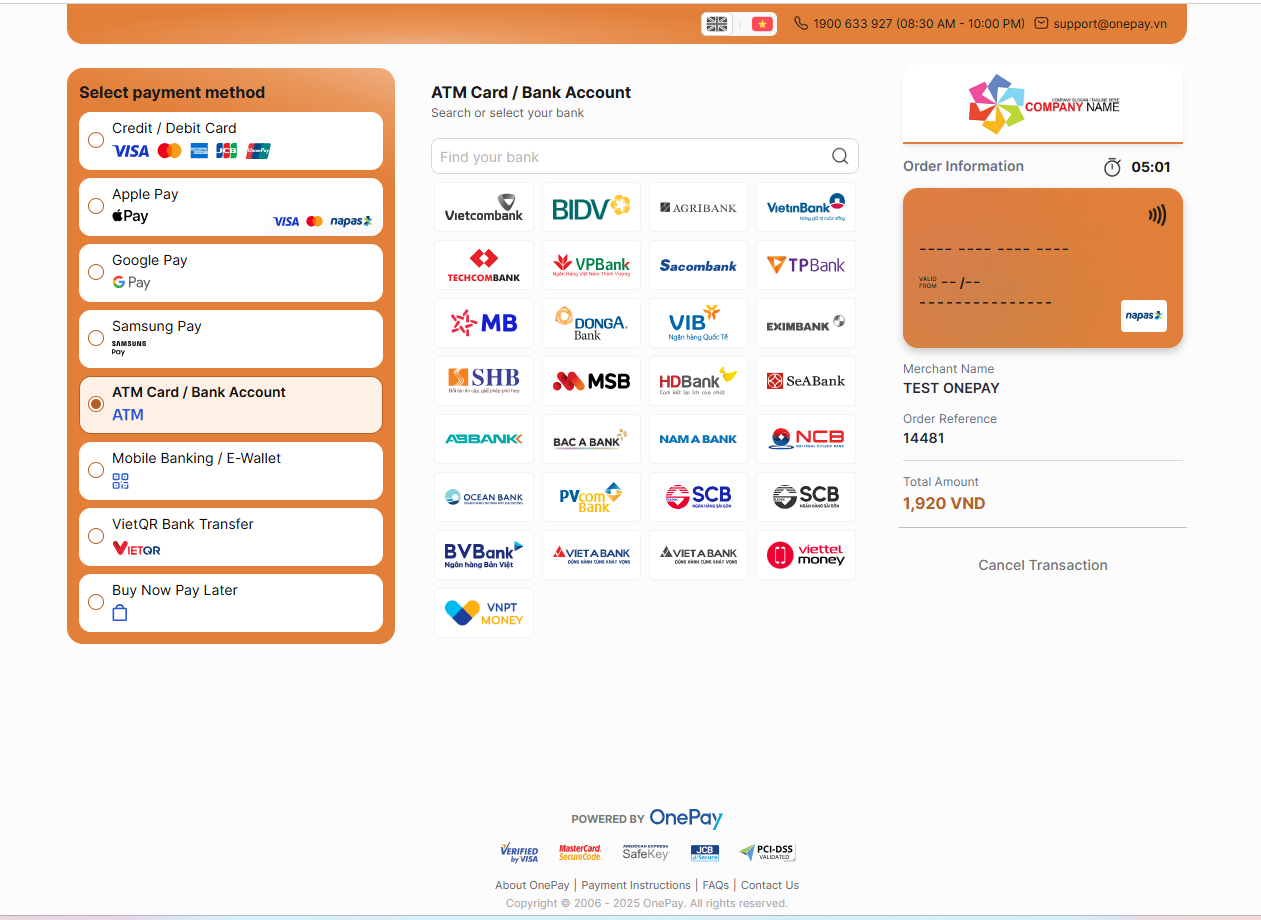
1.4.4. OnePay
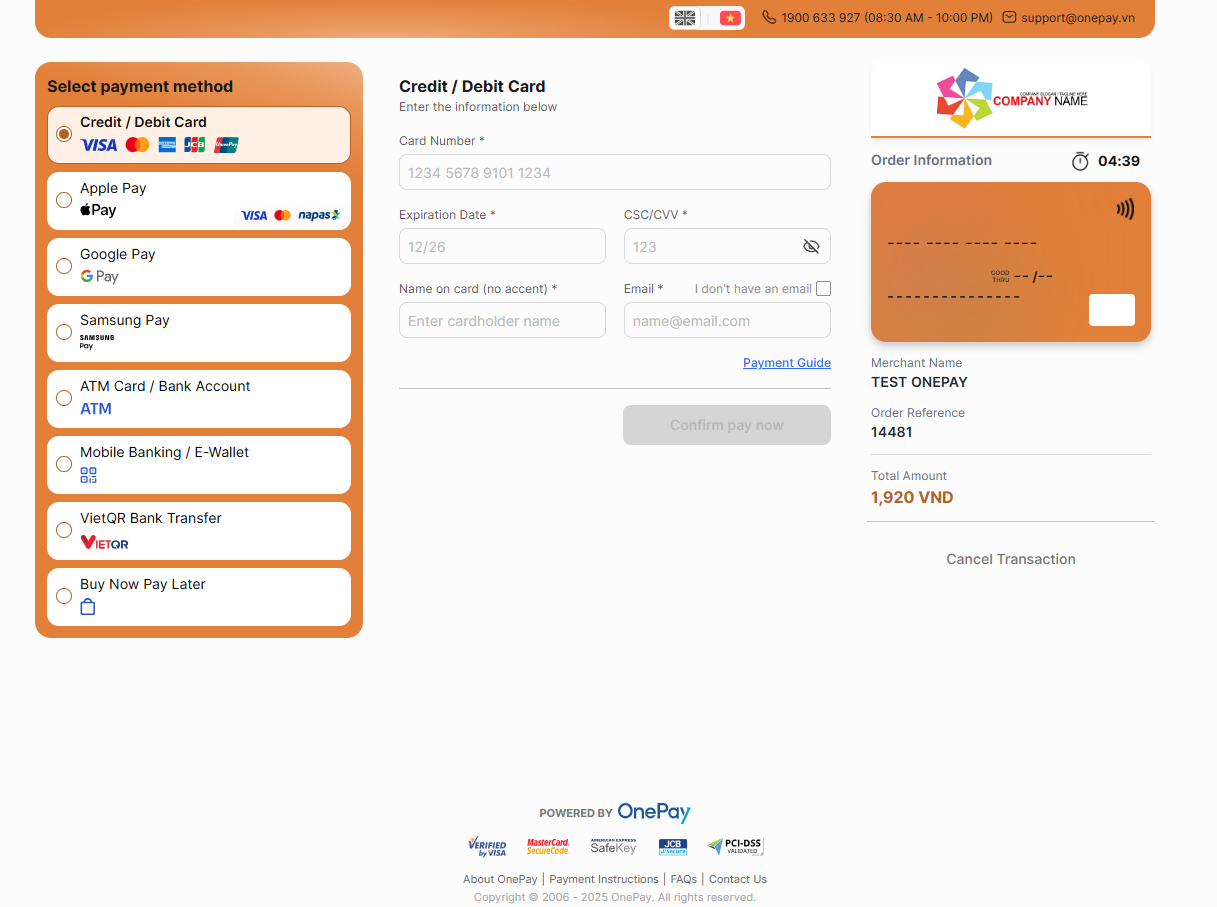
OnePay/OnePayATM payment only accepts Vietnamese dong currency. Therefore, your item must be checked out using Vietnamese dong.
Onepay supports payments with internationally branded cards (Visa, MasterCard, JCB…) and ATM card payments from various banks, including Vietcombank, Vietinbank, VIB, Techcombank, MSB, SHB, Eximbank, MB,…
To enable Onepay, install and activate it via WPAdmin > Traveler > Extension > Onepay, then configure it under Traveler > Theme Options > Payment Options > Onepay CreditCard. You will need to enter the URL, Merchant ID, Merchant Access Code, and Security Secret.
Regarding live transactions, remove the test credentials you previously entered and input the credentials provided by Onepay in your contract. You can contact Onepay for the correct credentials.
For example, URL is https://onepay.vn/paygate/vpcpay.op
Card Payment
ATM Card Payment
1.4.5. OnePayATM
Since OnePay already accepts ATM card payments, you don’t need to set up OnePay ATM separately.
However, if you still wish to set it up, please use the same credentials as those used with OnePay.
2. WooCommerce Checkout
WooCommerce checkout is the alternative checkout method, which has fewer functions but is able to integrate a payment gateway from the WooCommerce system. With some unique payment gateway, customers will use WooCommerce Checkout only. Mostly, WooCommerce checkout contains the basic checkout function – not the advanced function
The limitation: https://travelerwp.com/different-between-modal-checkout-and-woocommerce-checkout/
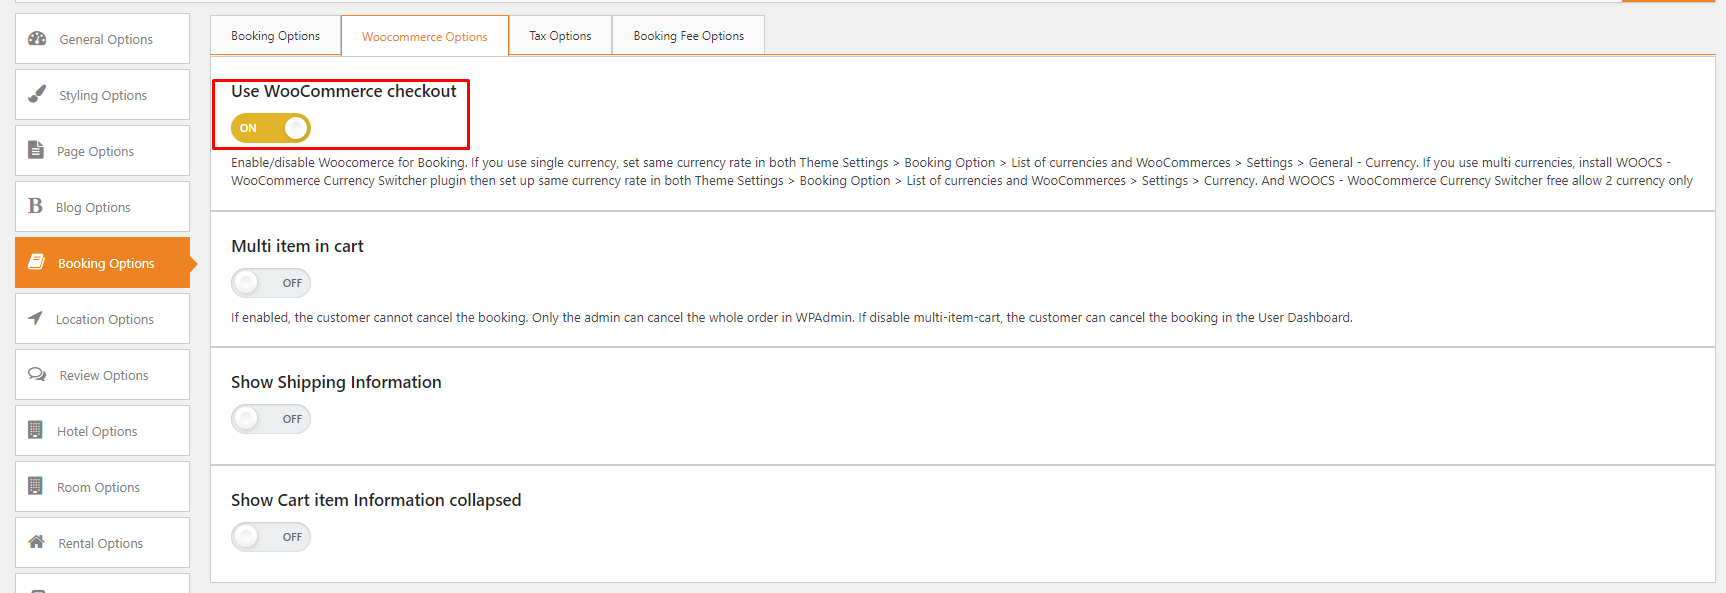
To turn on the WooCommerce checkout function, navigate to Theme Options > Booking Options > WooCommerce Options to turn it on then setup WooCommerce store + these required page
2.1. Initial setup For WooCommerce
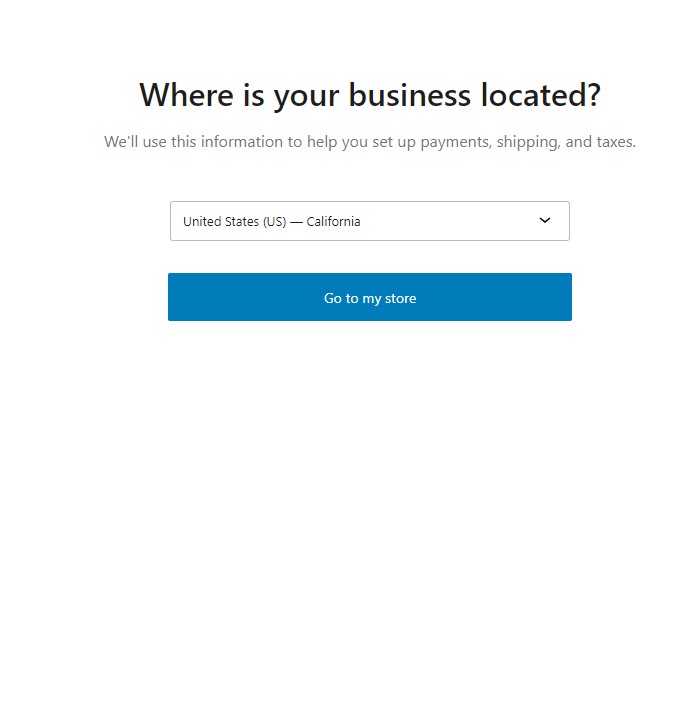
Navigate to WPAdmin > WooCommerce if you have not set it up. Besides, just need WooCommerce Checkout so you can click “Skip guided setup”
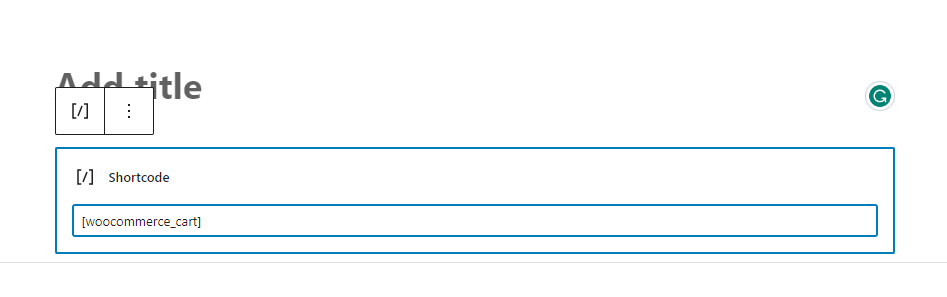
2.1.1. Creating Cart Page
Create a new cart page by going to the Pages> Add News
Add the title of the new cart page, “Cart”, for example
Insert the shortcode to the page [woocommerce_cart] like the image below
Set the Page Template on the Page Attributes to Default Template and Publish it
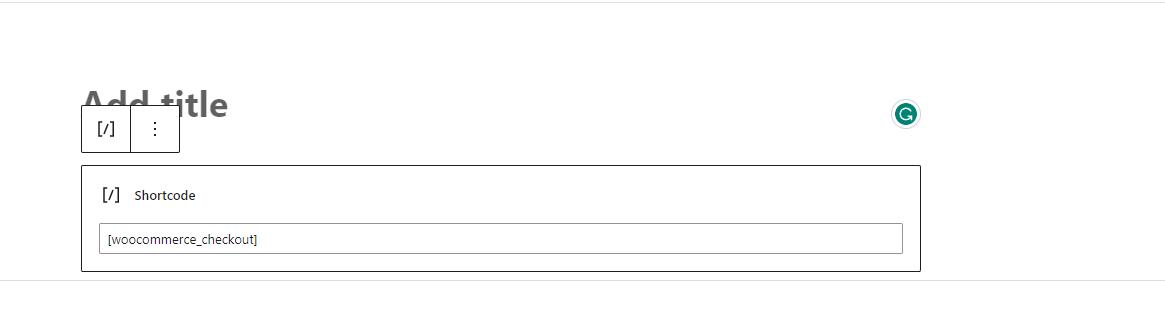
2.1.2. Creating Checkout Page
Create a new checkout page by going to the Pages> Add News
Add the title of the new checkout page, “Checkout Woo”, for example
Insert the shortcode to the page [woocommerce_checkout] like the image below
Set the Page Template on the Page Attributes to Default Template and Publish it
The Modal Checkout page cannot be used for WooCommerce Checkout, and vice versa. You must create a unique page for WooCommerce Checkout and avoid using the page designated for Modal Checkout.
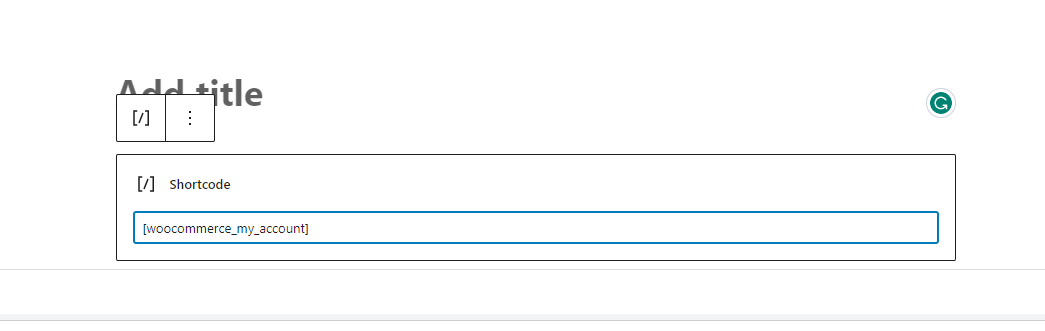
2.1.3. Creating My Account Page
Create a new my acount page by going to the Pages> Add News
Add the title of the new my account page, “My Account”, for example
Insert the shortcode to the page [woocommerce_my_account] like the image below
Set the Page Template on the Page Attributes to Default Template and Publish it
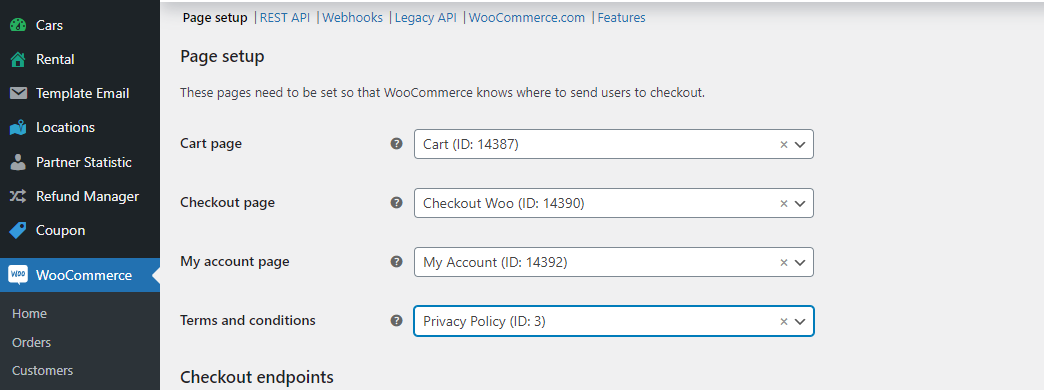
2.1.4. Setting up Booking Page
Go to the WooCommerce>Settings>Advanced to set up the page for the checkout process
Scroll down to the Page Setup, find the Cart Page, Checkout Page and My Account Page to select the page to display.
For the Cart Page, choose the ” Cart “
For the Checkout Page, choose the ” Checkout Woo “
For the My Account Page, choose the” My Account ” and click Save Changes to finish it
The Modal Checkout page cannot be used for WooCommerce Checkout, and vice versa. You must create a unique page for WooCommerce Checkout and avoid using the page designated for Modal Checkout.
Here is the video to show you how to set up WooCommerce
2.2. Setup Currrency
– If your site uses only a single currency for the checkout process: Set up the currency on Theme Settings > Booking Options and Woocommerce> Setting> General> Currency options (do not install Fox plugin)
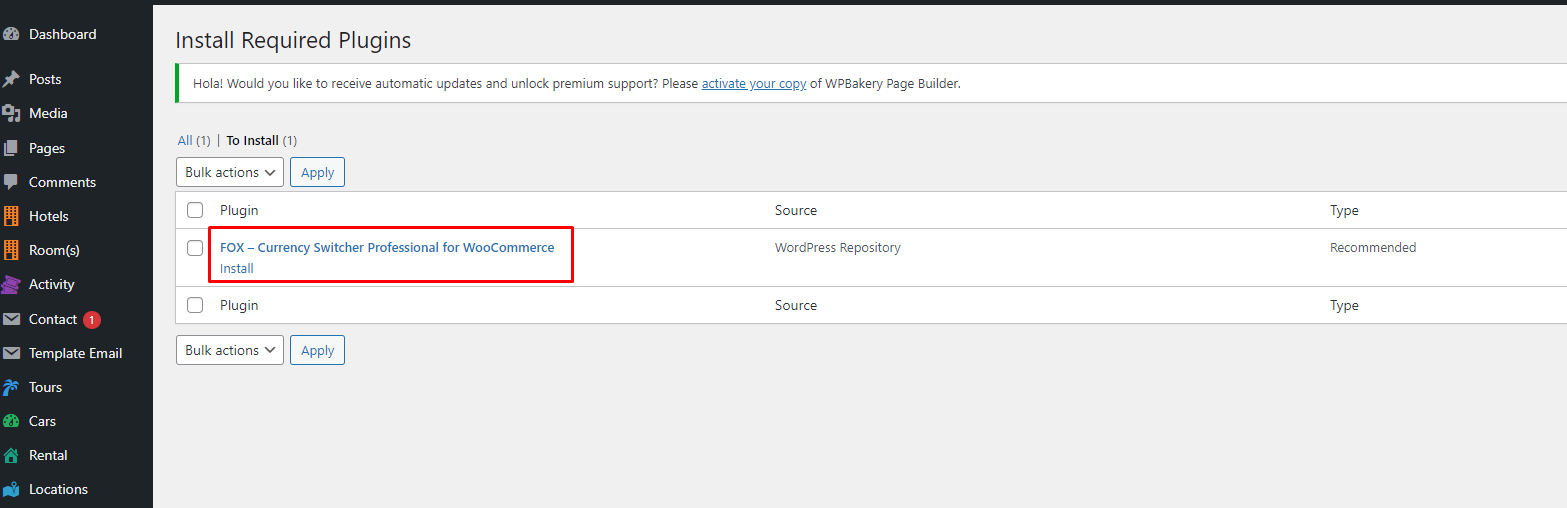
– If your site uses multi-currencies, install FOX – Currency Switcher Professional for WooCommerce plugin from Appearance > Install Plugins.
FOX - Currency Switcher Professional for WooCommerce
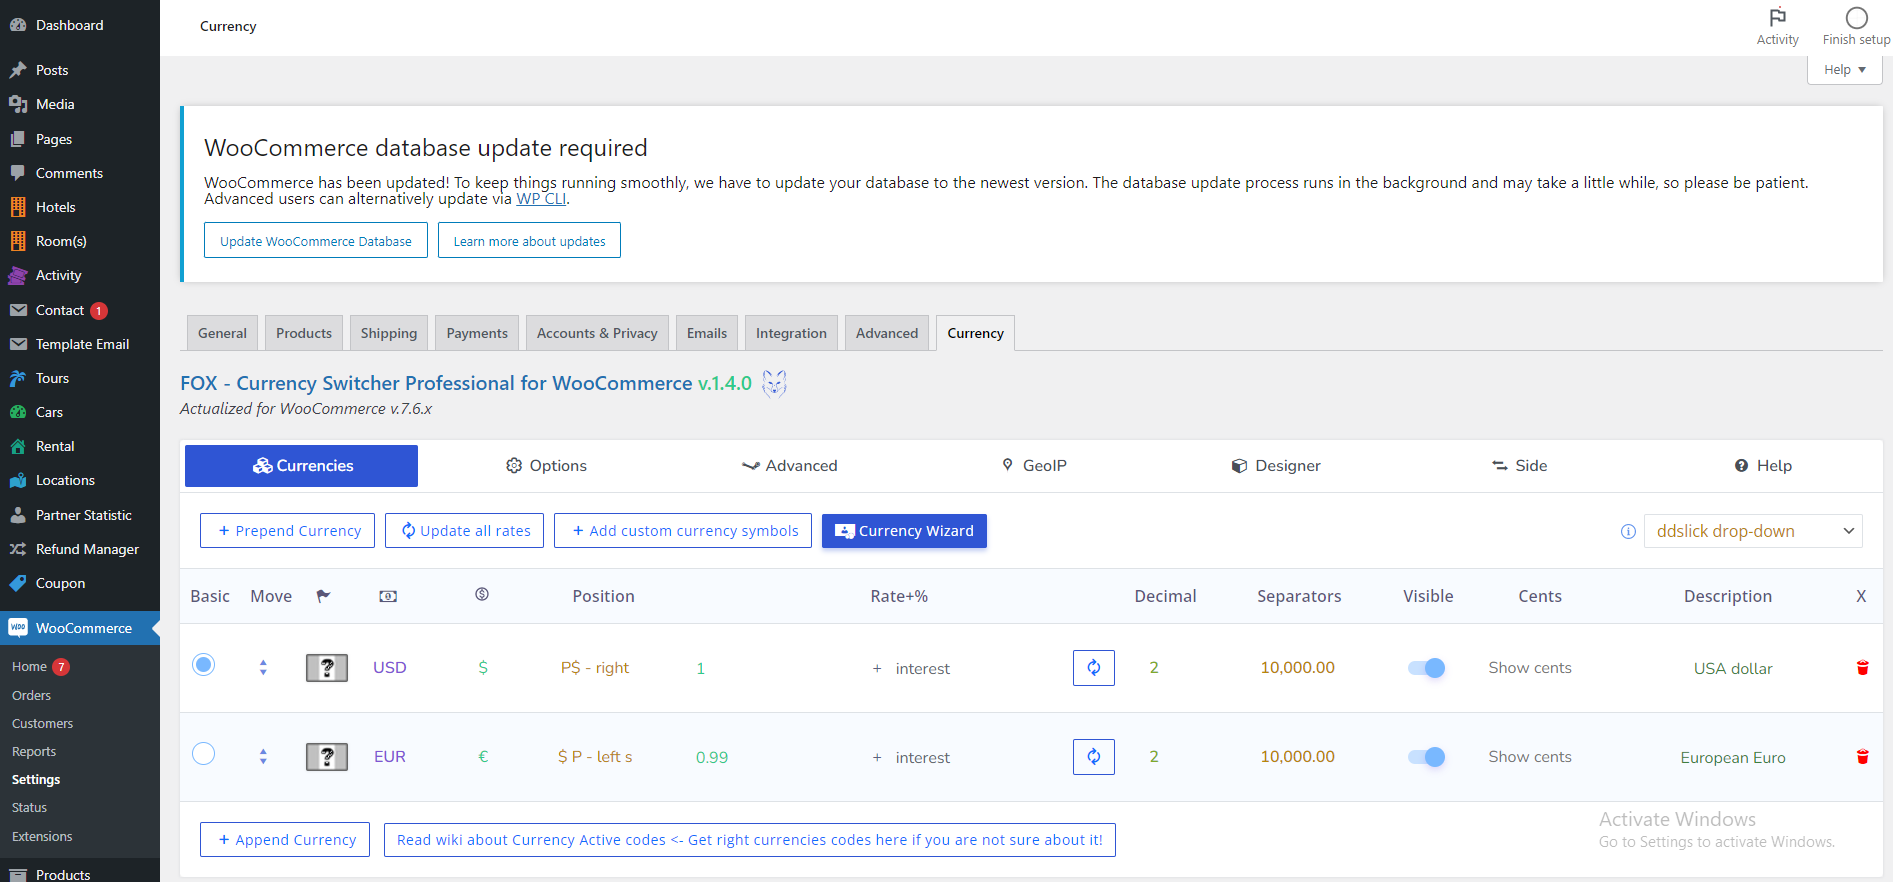
Set up the currency on Theme Settings > Booking Options then Woocommerce> Setting> Currency
The exchange rate in Booking Options and in the FOX – Currency Switcher Professional for WooCommerce setting must be exactly the same. For example, EUR = 0.99 and USD = 1 in both settings.
FOX - Currency Switcher Professional for WooCommerce
2.3. Add Payment Gateways for WooCommerce Checkout
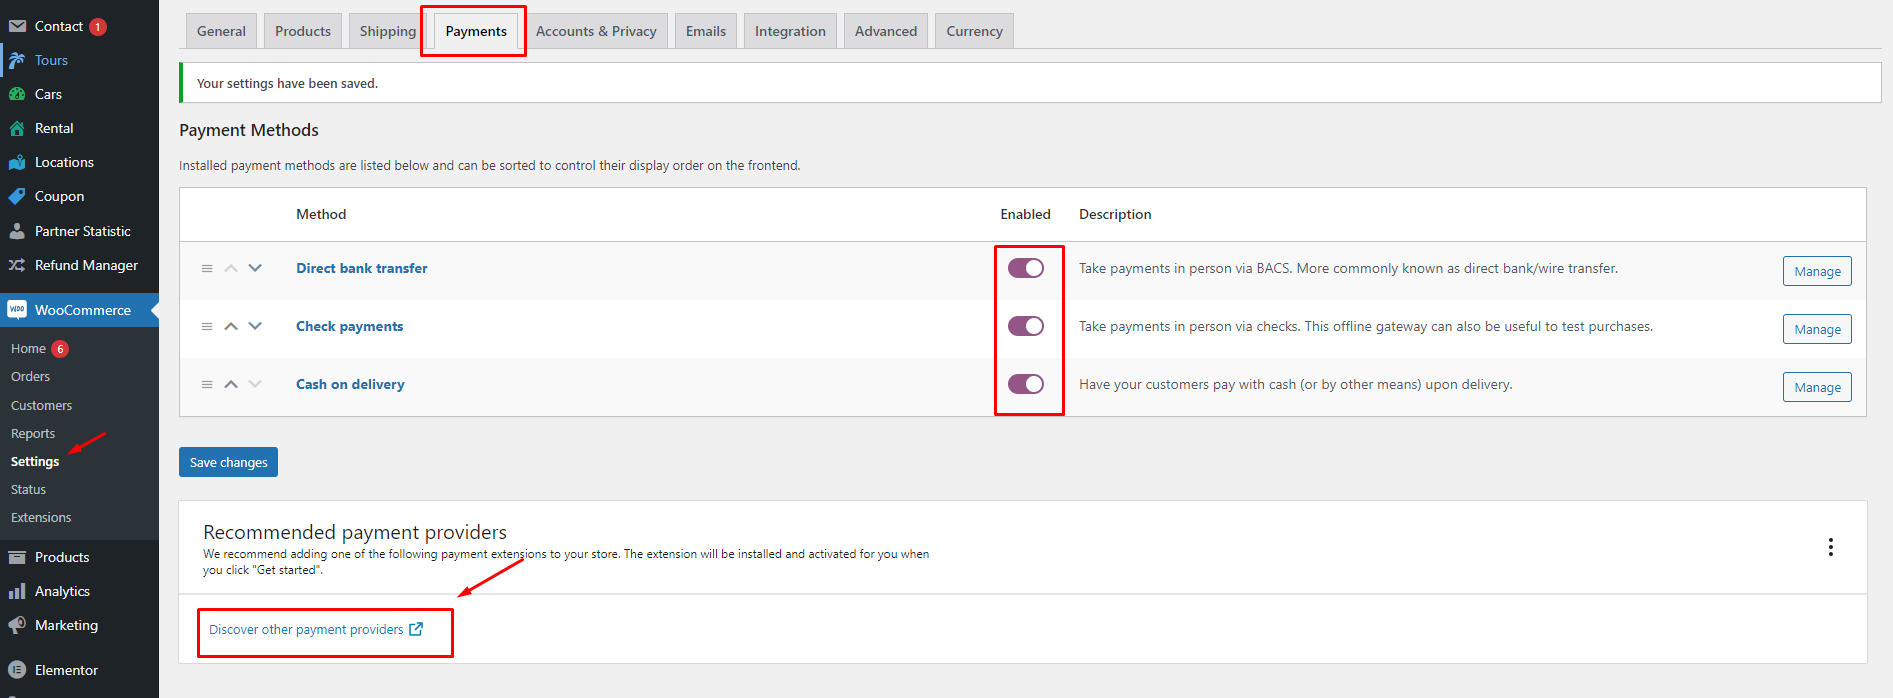
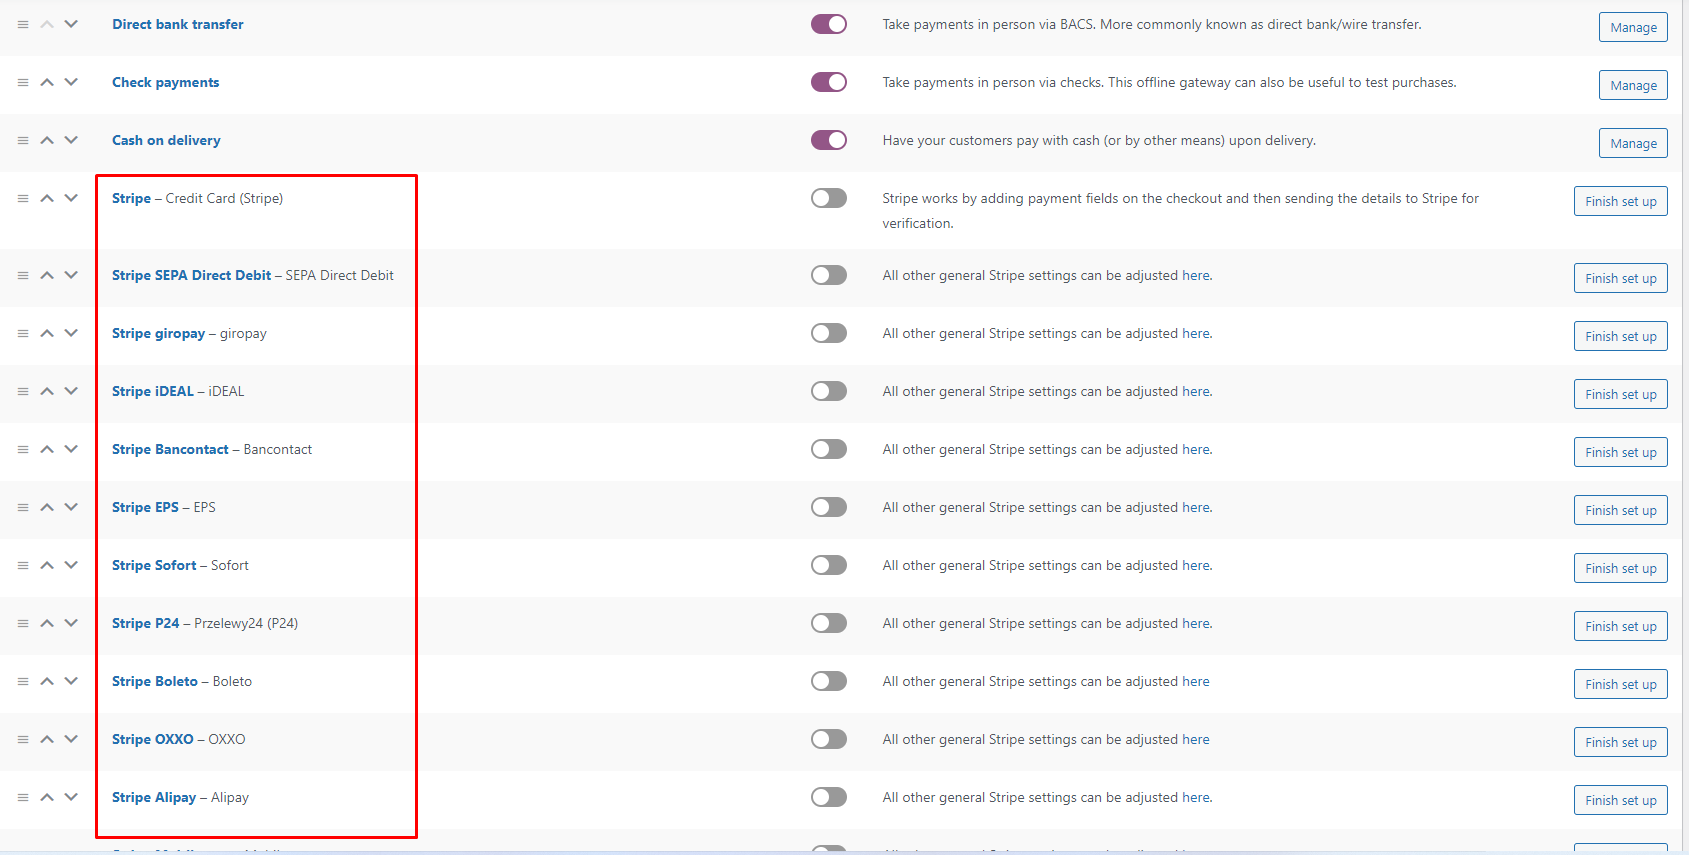
Go to the WooCommerce> Settings> Payments to enable the payment method you want. There are 3 different payment methods for you to choose from, which are Direct Bank Transfer, Check Payments, and Cash on Delivery
And Click Manage to edit the basic information of each payment method
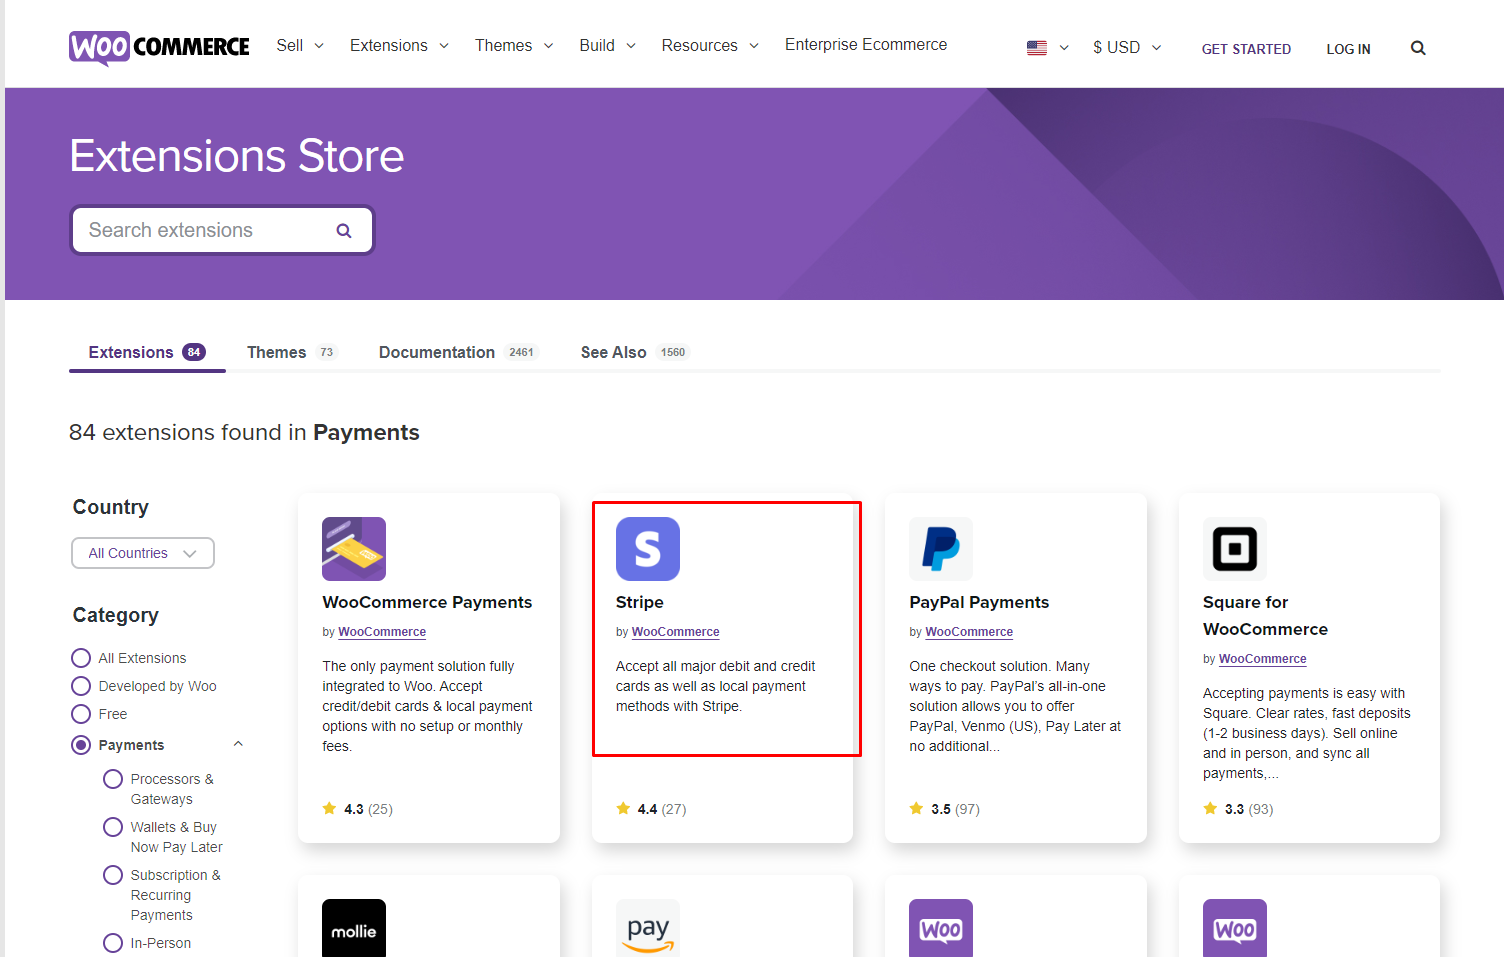
Click Discover Other Payment Providers to choose your payment gateways
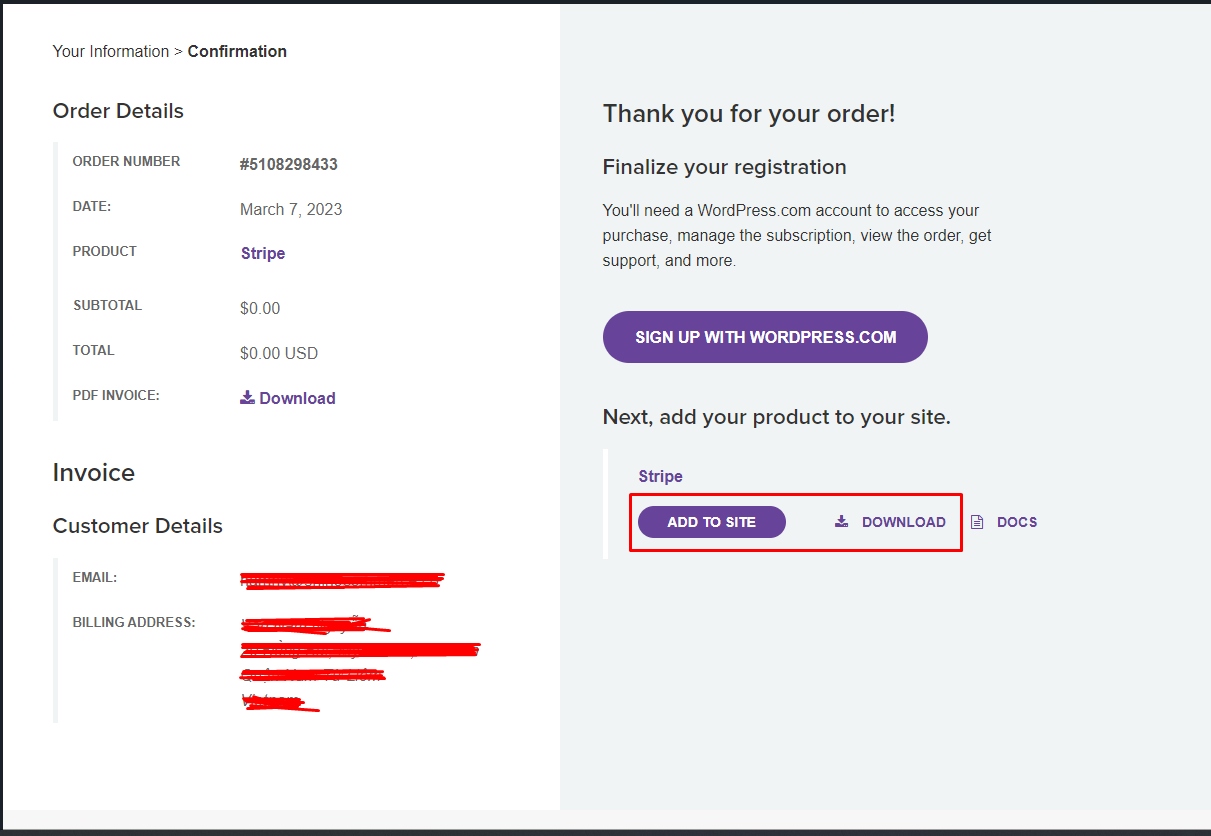
You can choose other payment providers for your site and download it
Go to Plugin > Add News > Upload Plugin to add the file you’ve just downloaded
On Payments, you can see the installed payment method right there