How to set up MailChimp for your website?

Step 1: How to get Mailchimp API Key?

  • Log in to your Traveler Admin Account, click on “Mailchimp on WP” -> “Get your API key here”
Mailchimp Image 1
  • Navigate to Profile -> Account -> Extras -> API Keys
  • Click on Create a Key
Mailchimp Image 2
  • Copy the API key code and paste on your website > MailChimp for Wp > MailChimp
Mailchimp Image 3
  • Click on “MailChimp for WP” -> “Forms” -> “Setting” and check the list you want to assign to the form

Step 2: How To edit MailChimp Sign Up Form?

  • Navigate to “MC4WP” -> “Forms” and create your form using the tools provided by the MailChimp plugin.
  • You can copy our form code and paste it to your website.
				
					<div class="stt-mailchimp-form">
    <input type="email" name="EMAIL" class="form-control" placeholder="Email Address">
    <input type="submit" name="submit" value="Subscribe">
</div> 
				
			
Mailchimp Image 5
  • And here is your sign up form in preview mode.
Mailchimp Image 8

Step 3: How to insert MailChimp Shortcode Form?

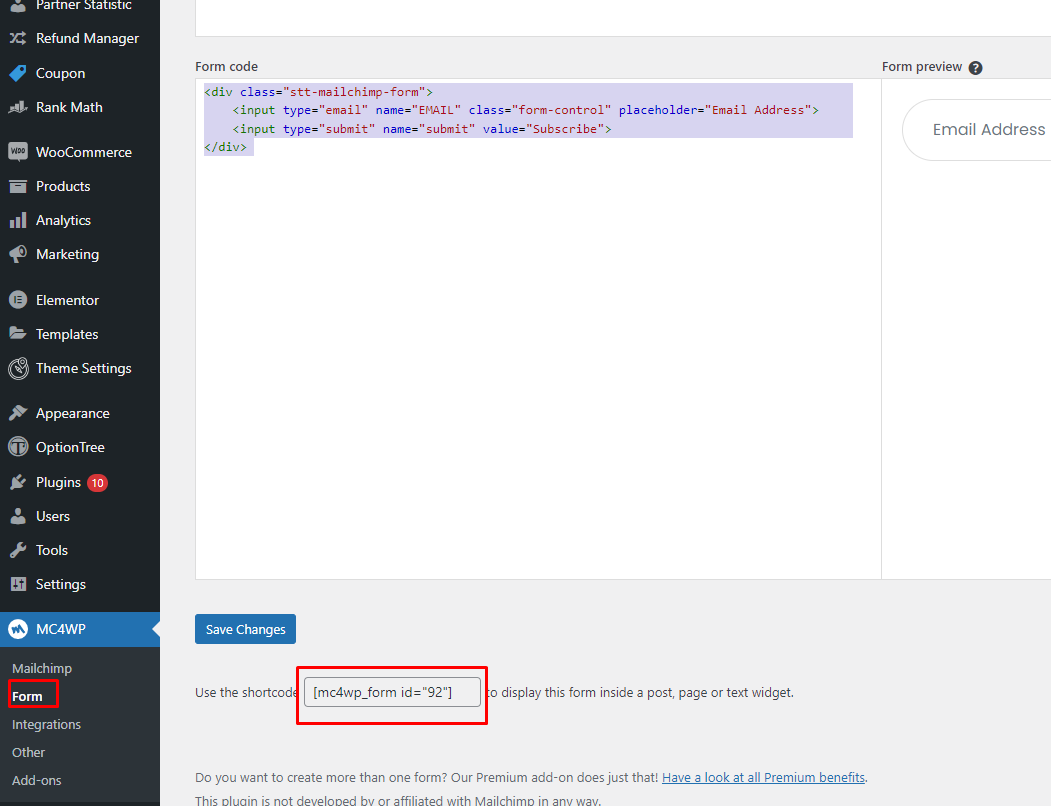
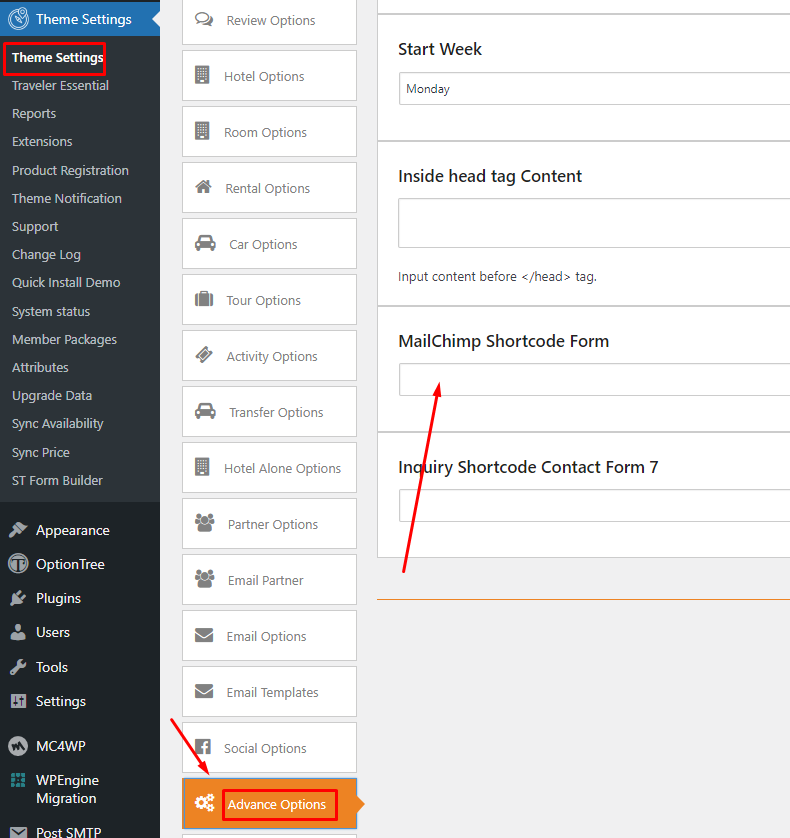
  • Click on “Theme Setting” -> “Advance Options”, copy the Shortcode from the “Use the shortcode” button above and paste it into “Mailchimp Shortcode Form”
  • For example, shortcode form is [mc4wp_form id=”92″]
Mailchimp Image 6

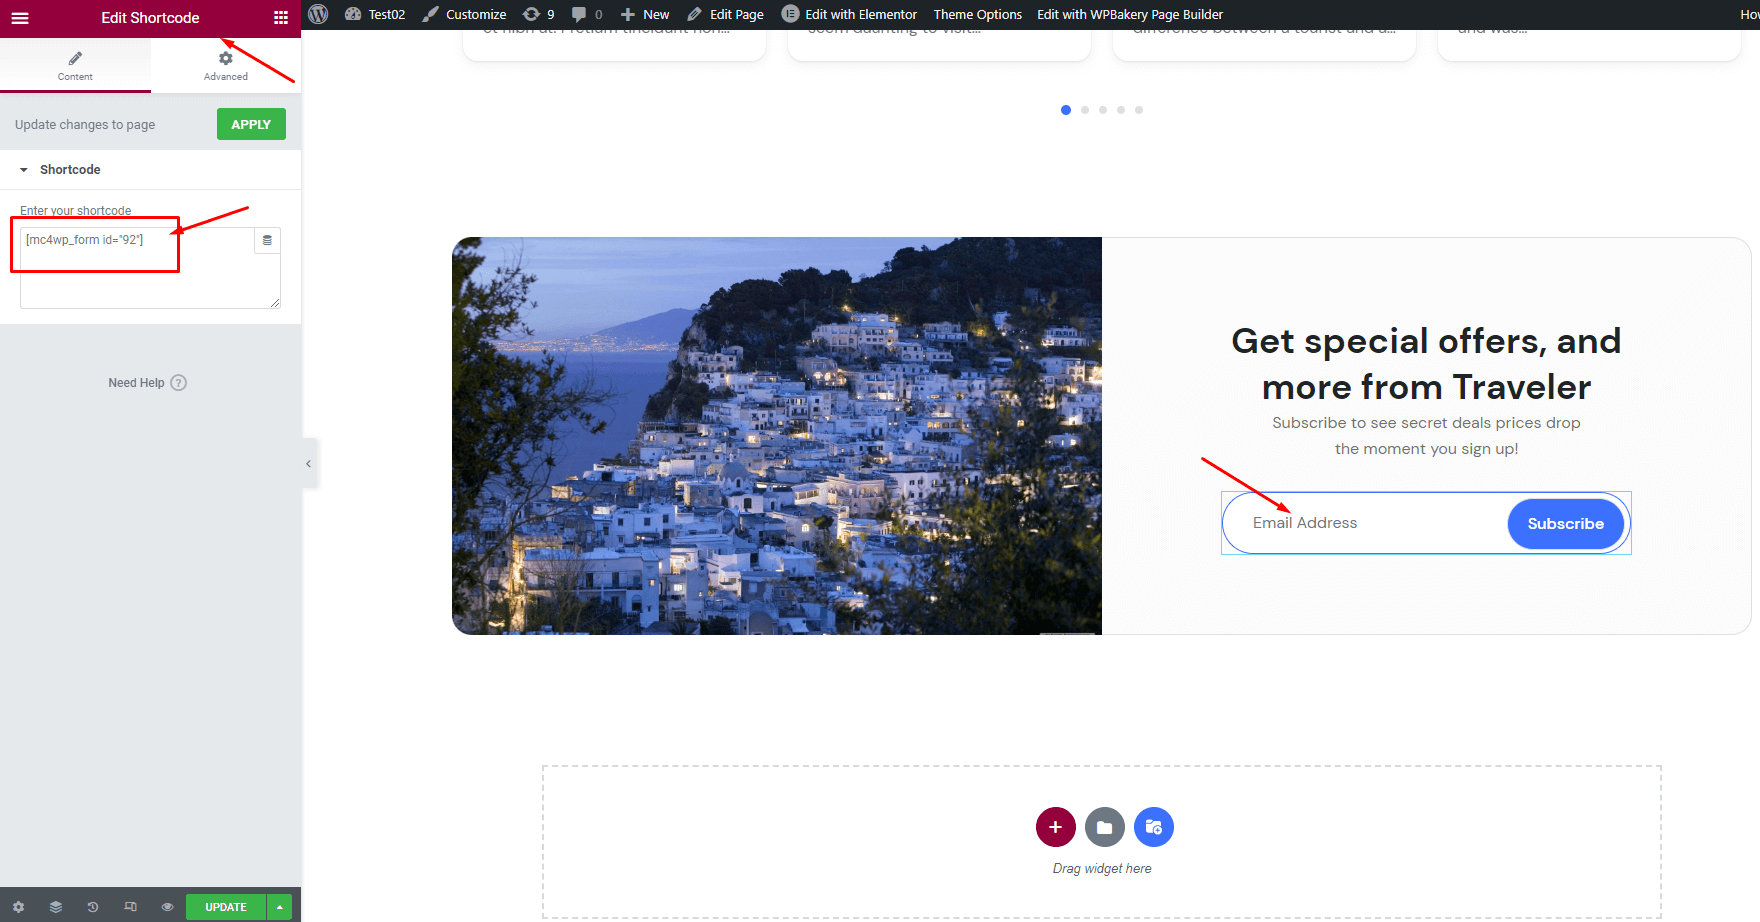
Step 4: How to add MailChimp Shortcode Form to your website

  • For example, we’ll add this shortcode form to our homepage. So, we begin to make changes to the homepage using Elementor.
  • Scroll down the page until you see the sign-up form at the bottom.
  • To change it, click on the shortcode widget.
  • Copy and paste your shortcode to show this form on your site.
Mailchimp Image 9

$79