A stunning travel website that shows off your most memorable trips and makes people want to join you on your adventures. Traveler theme is a great starting point, but how do you go about getting and setting it up?
Imagine having a travel website that really grabs people’s attention and makes them want more. With the Traveler theme, you’ll have the right mix of visual appeal and useful features to tell your stories and make your readers want to go on adventures.
In this step-by-step guide, we’ll make it easy for you to download and installing theme traveler, which will help you make an interesting online presence. If you follow these steps, you’ll be well on your way to making a website that looks professional and captures the spirit of your trips.
Are you ready to go on this exciting trip? Read this post to learn how to download and set up the Traveler theme in a few easy steps. Soon, you’ll be ready to tell the world about your exciting adventures, one at a time.
Before you can install the Traveler theme, you’ll need to download it.
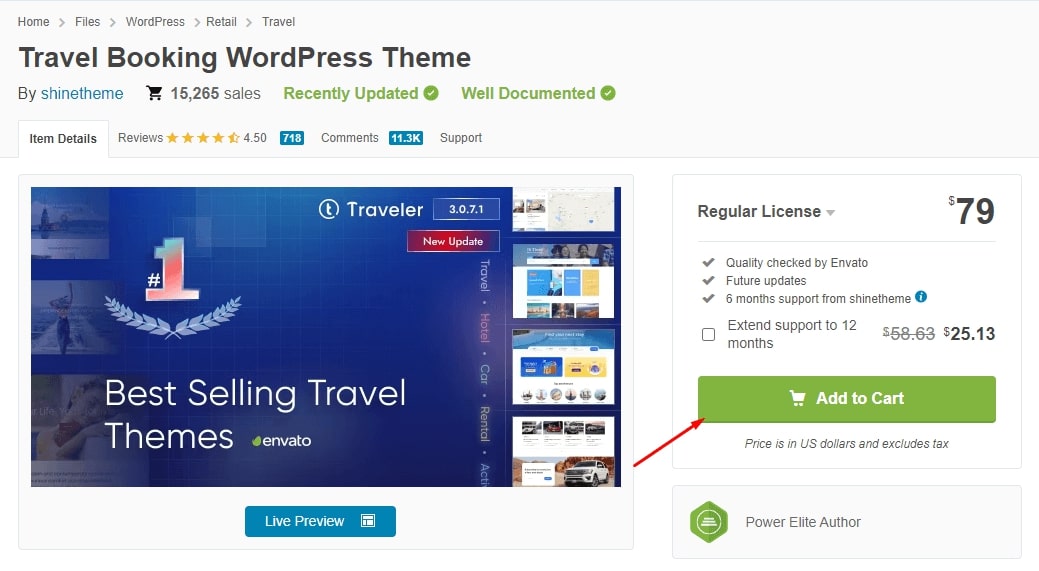
– Visit the main page for the Traveler theme on the ThemeForest market or click this link
– Click on the Buy Now or Add to Cart button to initiate the purchase process.
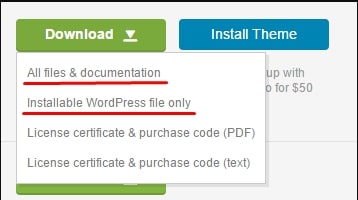
– After completing the payment, you’ll receive a confirmation email with a link to download the theme
– Click on the download link, and choose to download the “Installable WordPress file only” as a ZIP file. This file contains everything you need to install the theme on your WordPress site.
Install Traveler
Now that you have the Traveler theme ZIP file, it’s time to install it. To do this, you’ll need to access your WordPress dashboard, which is like the control center for your website.
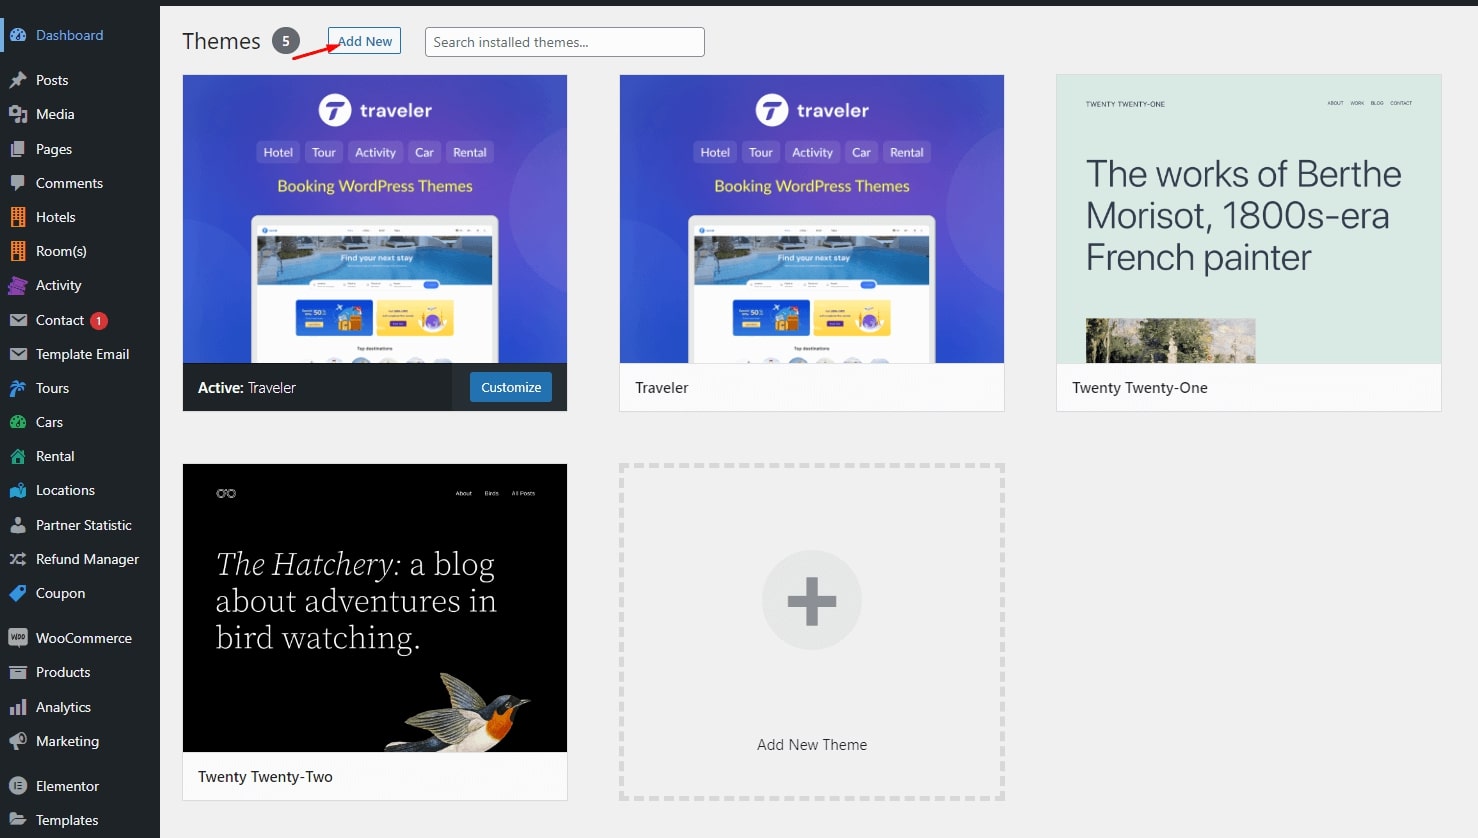
– In your WordPress dashboard, go to Appearance > Themes.
– Click to Add New button at the top of the page.
– Click the Upload Theme button, then Choose File.
– Select the Traveler theme ZIP file you downloaded earlier, and click Open
– Click Install Now and wait for the installation process to complete.
– Select all the required plugins and click Begin Installing Plugin and Activate them.
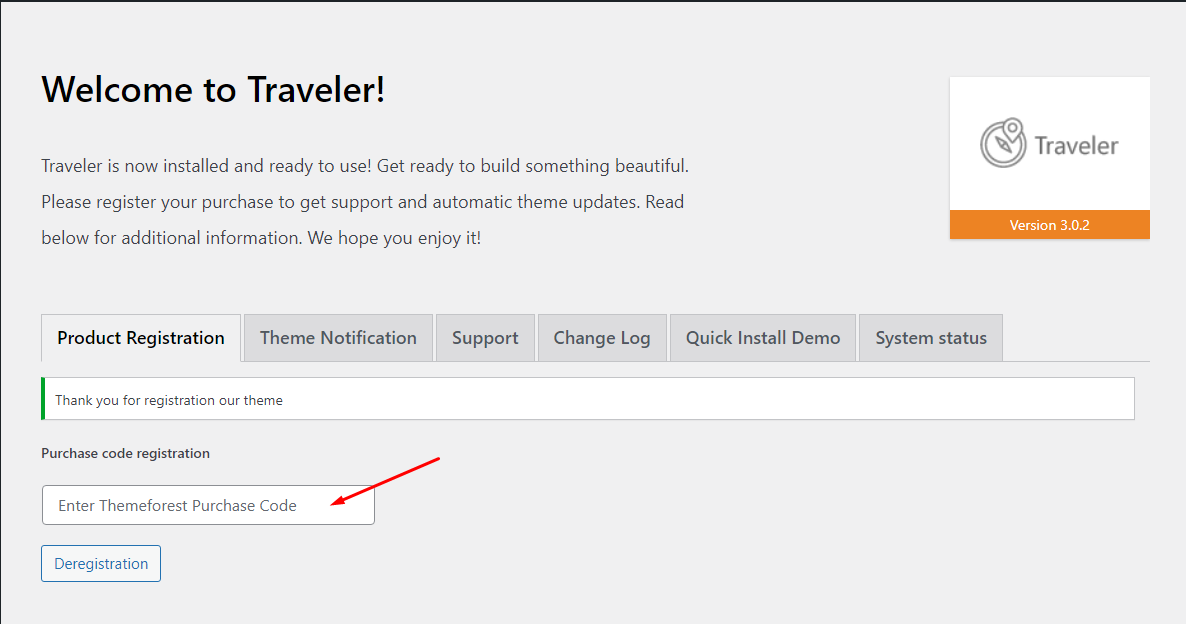
Register Your Purchase Code
You’re almost there! The final step is to register your purchase code to the Traveler theme, bringing your website to life,
– On the Theme Settings > Product Registration, enter your theme purchase code on the Product Registration and click Register
And there you have it! By following these steps, you successfully downloaded and installed the Traveler theme. Now you need to import demo content
Bonus: Troubleshooting Installing Issues
When installing the Traveler theme, there are four technical problems you may encounter, but don’t worry – we’ve got you covered!
Downloading the Wrong Theme Zip File: Make sure you download the “Installable WordPress File Only” from Themeforest and not the “All files & documentation”. If you do download the wrong file, simply download the correct one and install the theme again.
Stylesheet Is Missing: This happens when you download and install the “All files & documentation” instead of the “Installable WordPress File Only”. To fix this, download the correct file and install the theme again.
Are You Sure You Want to Do This?: This is shown if you download and install the “All files & documentation”. To avoid this message, make sure you download and install the “Installable WordPress File Only” from Themeforest.
WordPress White Screen of Death: a common issue in WordPress. This occurs when your memory limit is too low. To fix it, either contact your hosting provider to increase your memory limit, or access your hosting cPanel to increase the limit yourself.