Are you a travel lover who wants to make a website that shows off your trips, but the thought of setting up a website makes you feel overwhelmed? The Traveler theme is an amazing solution, and you can quickly make a site that stands out by importing its demo content.
With the demo content for the Traveler theme, you’ll have a strong base for telling trip stories in the most interesting way possible, drawings people in, and keeping them coming back for more.
In this detailed guide, we’ll walk you through the process of adding demo content for the Traveler theme step by step. By following these steps, you can turn your website into an interesting place where your audience can join you in exploring the world.
So, why don’t you just do it? Read this post to learn how to import demo content for the Traveler theme in a few easy steps. Soon, you’ll be ready to tell the world about your exciting adventures and make people want to go places.
Install theme and Required Plugins
First things first: make sure you’ve installed and activated the Traveler theme and you’ve got the necessary plugins installed for a smooth experience.
– In your WordPress dashboard, navigate to Appearance > Themes.
– Click on Add New and upload the Traveler theme’s ZIP file.
– After the installation is complete, click on Activate.
– Head to Appearance > Install Plugins in your dashboard.
– You’ll see a list of required and recommended plugins. Select and install them all.
– Once installed, activate the plugins
– On the Theme Settings > Product Registration, enter your theme purchase code on the Product Registration and click Register
Prepare to Import Demo (Requirement System)
Before importing the demo content, make sure your server meets the theme’s requirements. To check your server settings, go to Theme Settings > System Status in your dashboard. If your server doesn’t meet the requirements, contact your hosting provider for assistance.
For WordPress
To install WordPress, the WordPress PHP and server requirements that you need to consider:
- PHP version 7.4 or greater.
- MySQL version 8.0 or greater OR MariaDB version 10.1 or greater.
- HTTPS support
For Traveler Theme
To use our theme, please make sure that your hosting is configured with the following features: WordPress 6.0+ with these PHP Configuration Limits
- Max_execution_time 600
- Max_input_vars 10000
- Memory_limit 256M
- Post_max_size 100M
- Upload_max_filesize 100M
- cURL: 7.4 or higher
- Zip PHP Module Enabled
- allow_url_fopen Enabled
- Max_allowed_packet = 128M (for database) and 10M (for PHP)
Import Demo
Now it’s time for the final treasure! The moment we’ve all been waiting for. It’s time to import the demo content.
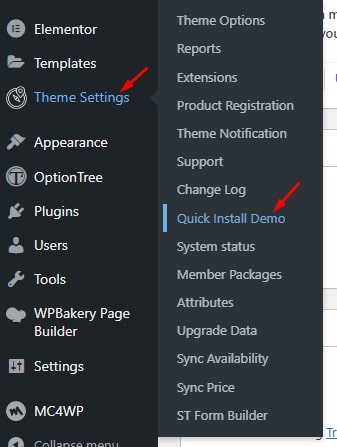
– Log in to your WordPress dashboard, and click Theme Settings > Quick Install Demo. This will take you to the demo importer page.
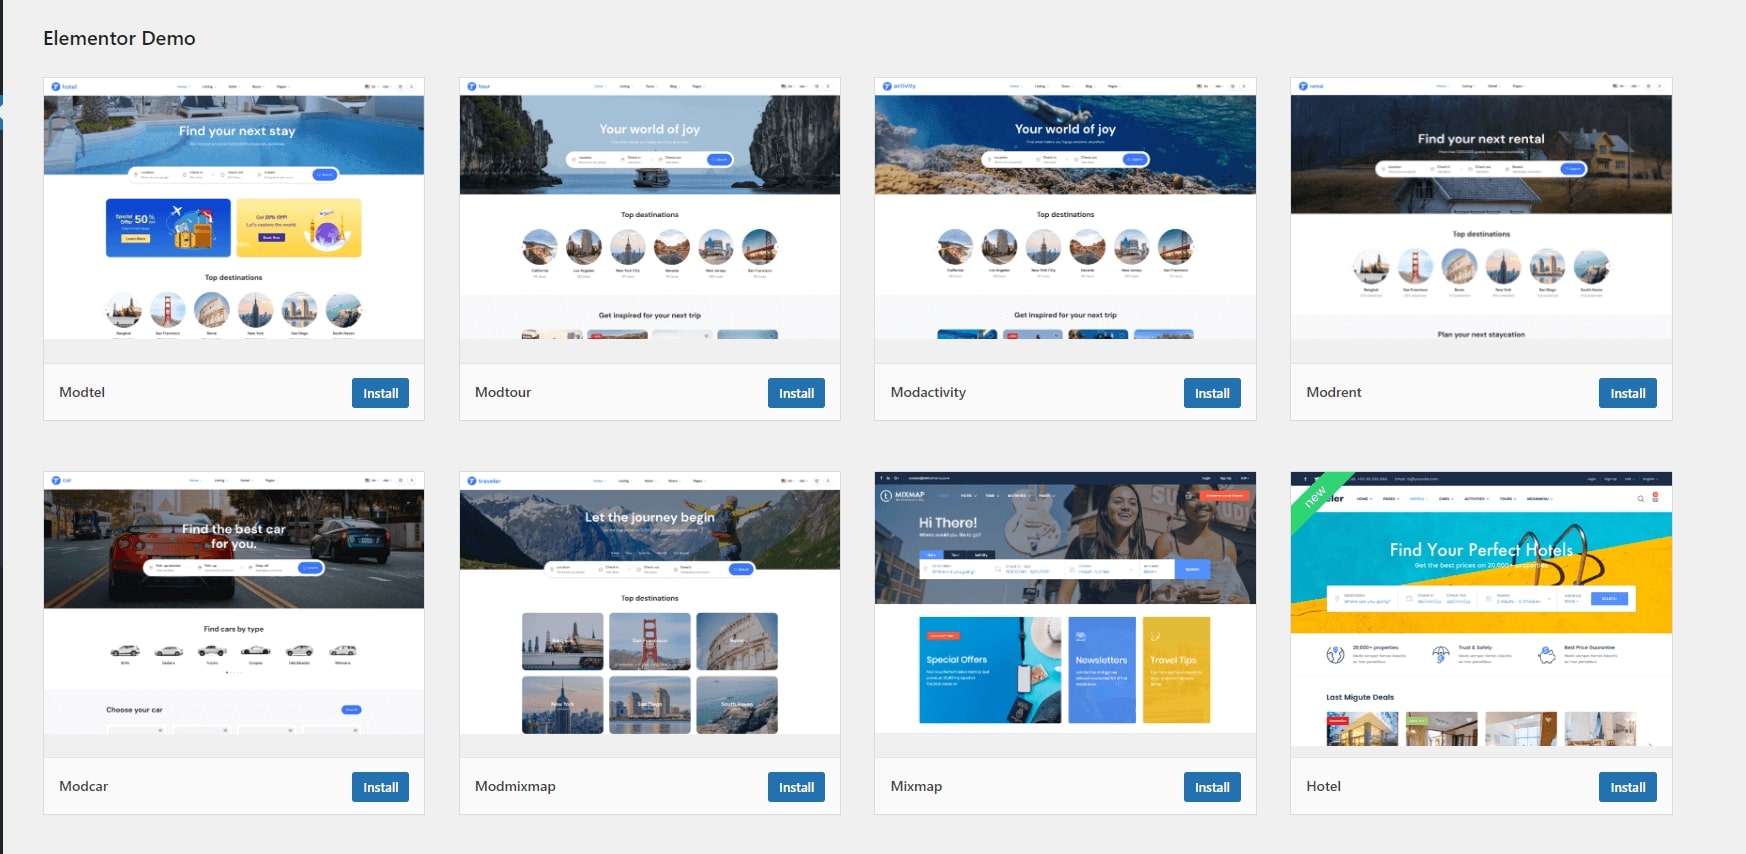
– You’ll see a selection of available demo versions. Each version has a different layout and design tailored to specific niches within the travel industry. Take your time and choose the one that resonates with your vision
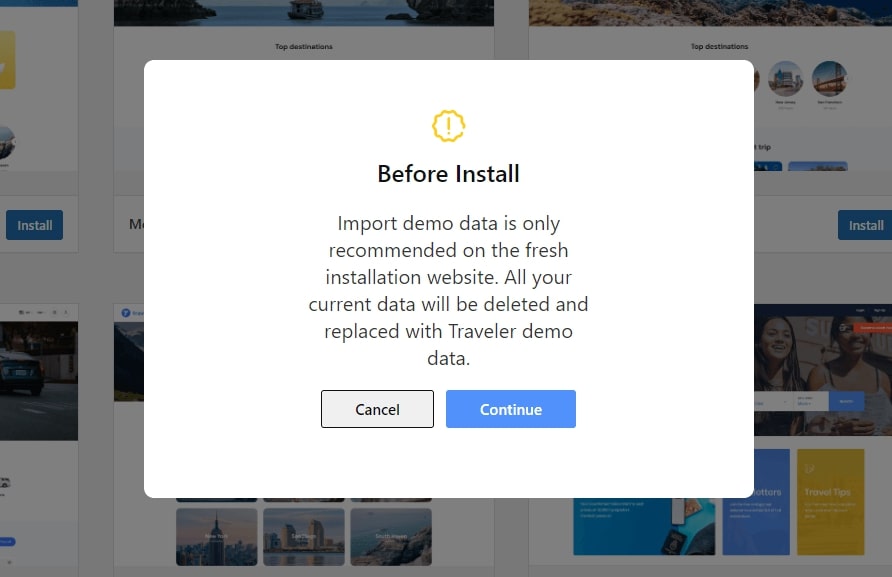
– Once you’ve decided on a demo version, click the Install button below the demo thumbnail. A pop-up warning may appear, reminding you that importing the demo content will overwrite your current settings and content. If you’re ready to proceed, click Continue to import
– The importing process will now begin. It might take several minutes, so use this time to stretch your legs or grab a quick snack. Once it reaches 100%, you’ll see a success message confirming the demo content import is complete.
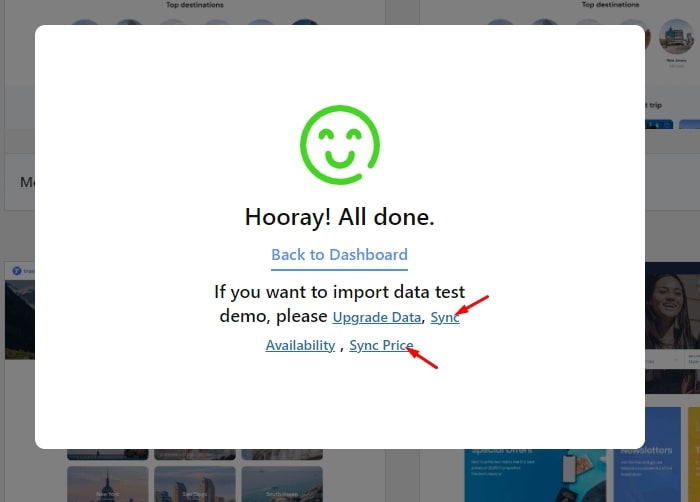
– The data of demo content will not appear if you don’t import it, click Sync Availability and Sync Price to update automatically the availability and pricing of tours and accommodations on your website.
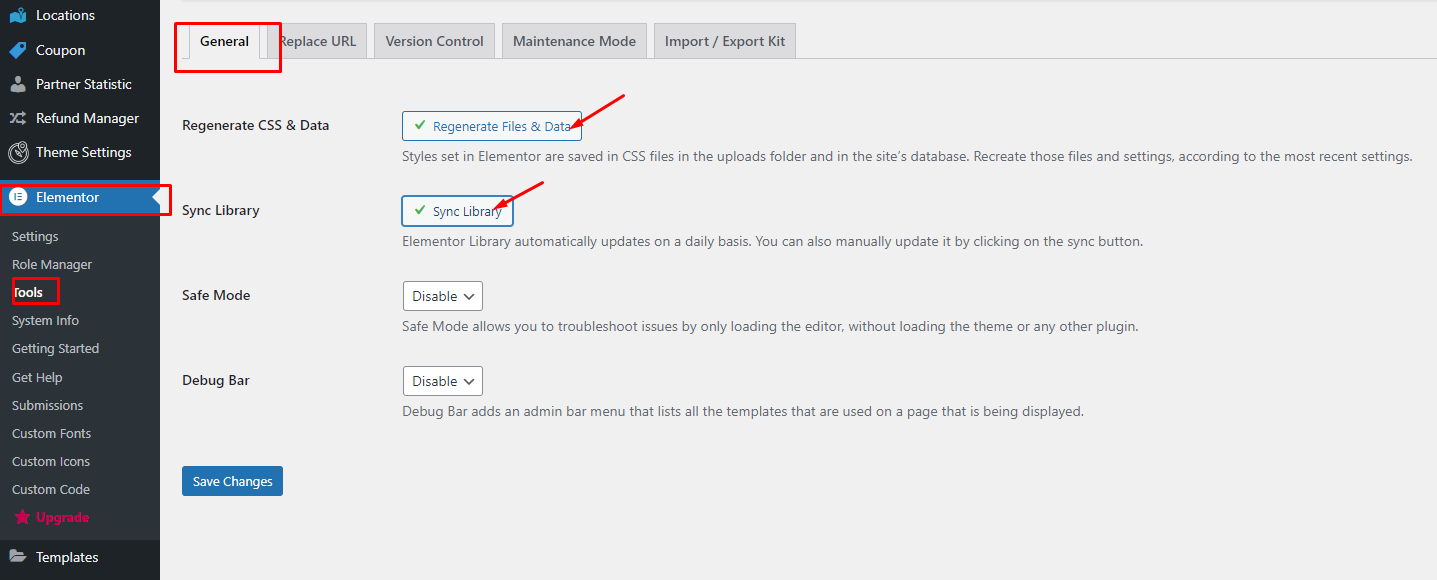
– If you import the Elementor demo, go to Elementor > Tools > General, click the Regenerate CSS & Data and Sync Library to clear the cache.
– Head back to your website’s homepage and refresh the page. Your site should now showcase the stunning demo content, ready for you to customize.
Bonus: Troubleshooting issues
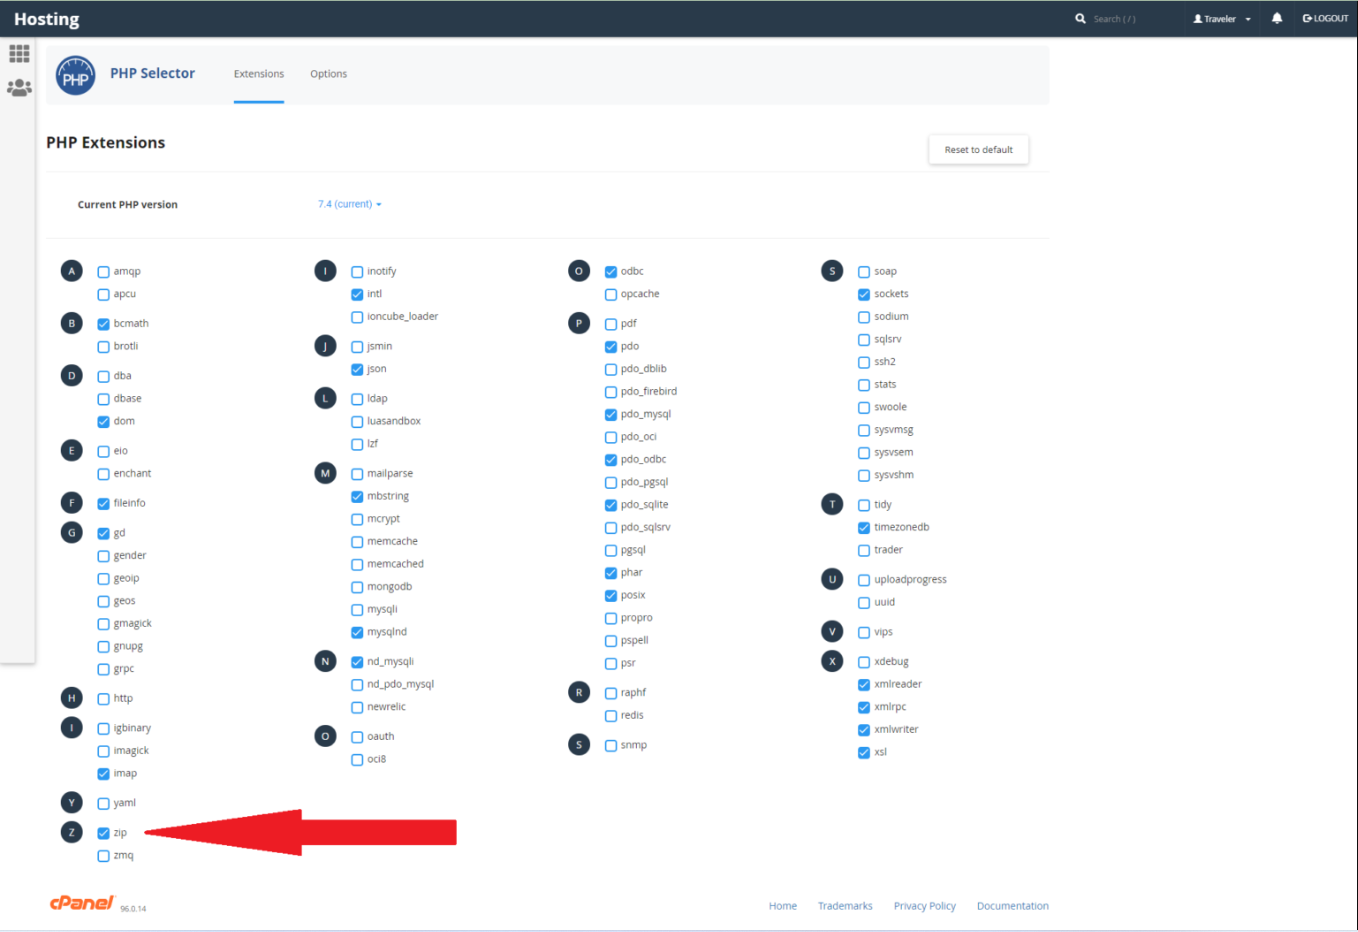
– Stuck at 0%: Stuck at 0% is the error that your server can not download and unzip the demo content. In your server hosting, find a Select PHP Version > PHP Extension and select Zip to fix this error.
– Warning Notice in FrontEnd: Warning Notice in FrontEnd occurs when you import the demo sites in the frontend. For example
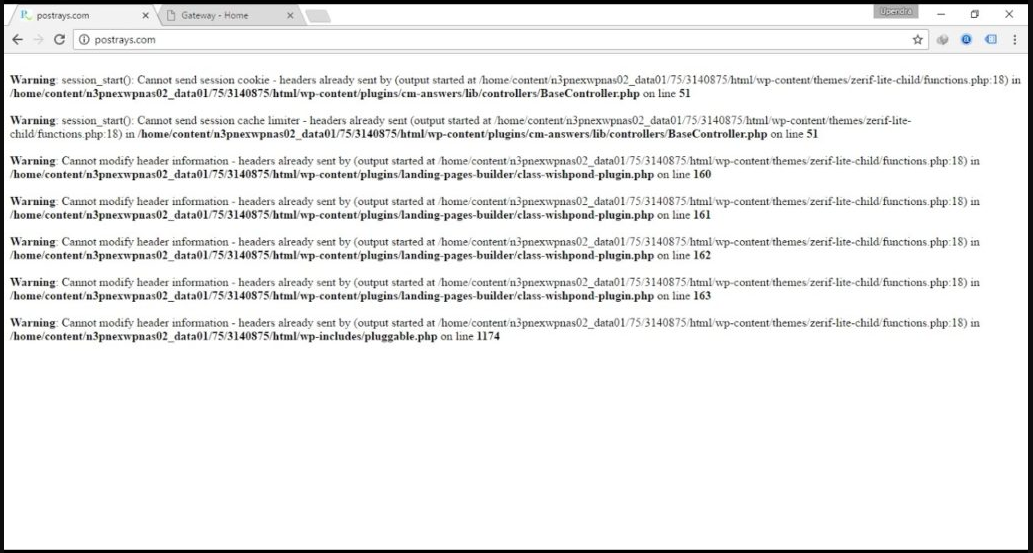
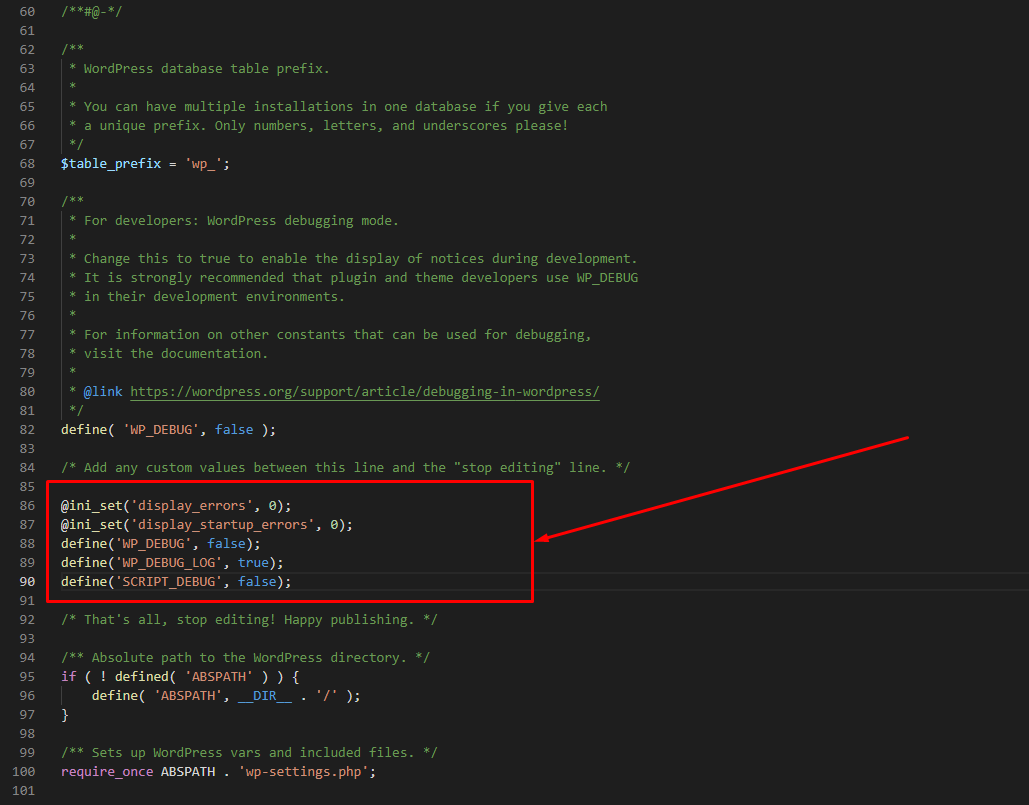
– To solve it, add the following code to the bottom of your wp-config file to fix it.
					@ini_set('display_errors', 0);
@ini_set('display_startup_errors', 0);
define('WP_DEBUG', false);
define('WP_DEBUG_LOG', true);
define('SCRIPT_DEBUG', false);
