Note #1: The WPAdmin > WPML > Languages > Language URL format must be Different languages in directories. And Store a language cookie to support language filtering for AJAX must be choosen
It is recommended that you first add content to your website in primary language. This will ensure that you have a solid foundation to work with before translating the content into other languages using the WPML plugin
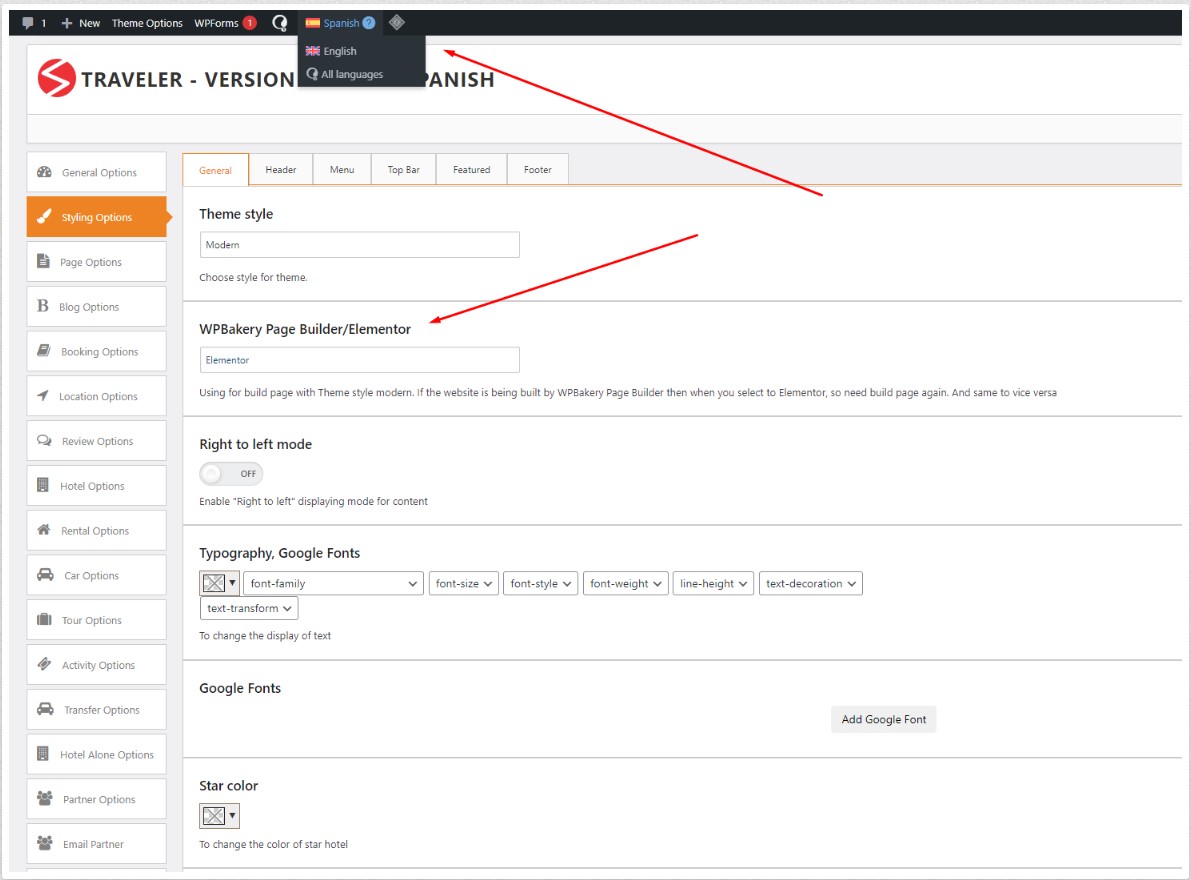
Note #2: After you have installed the WPML Plugin on your website, you will need to configure the theme settings for each language you want to add to your website. For instance, let’s say you want to set up a Spanish language version for your website.
To do this, follow these steps:
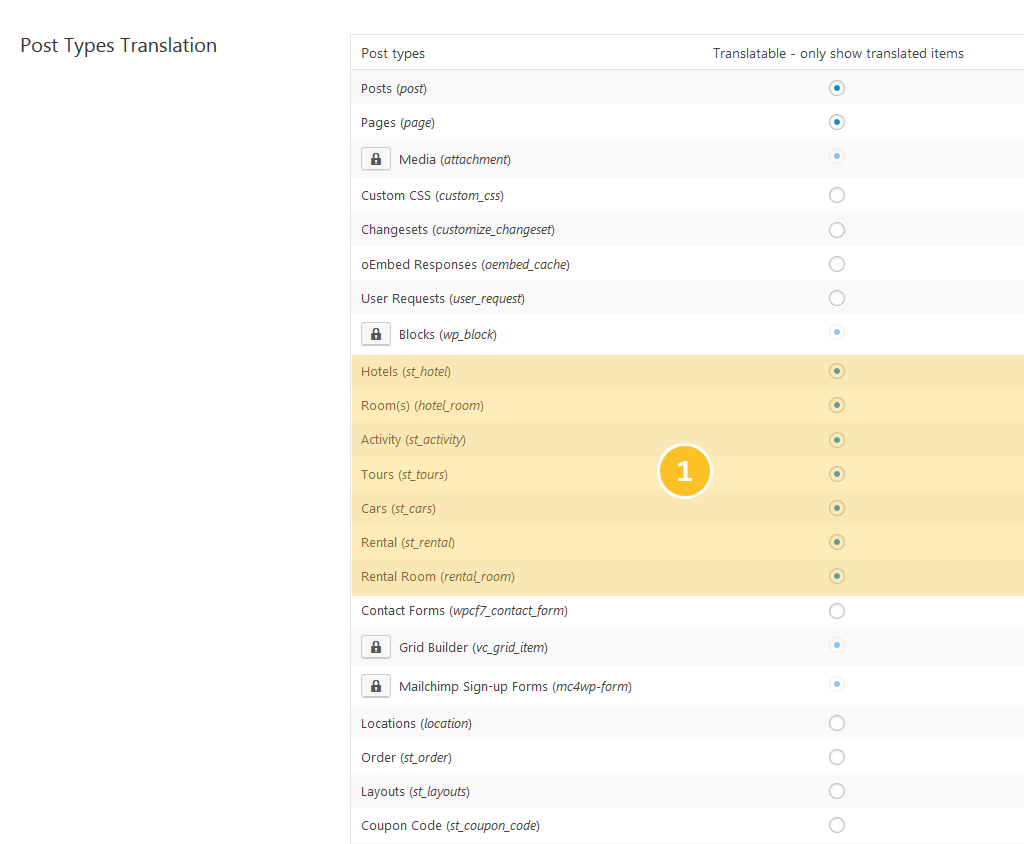
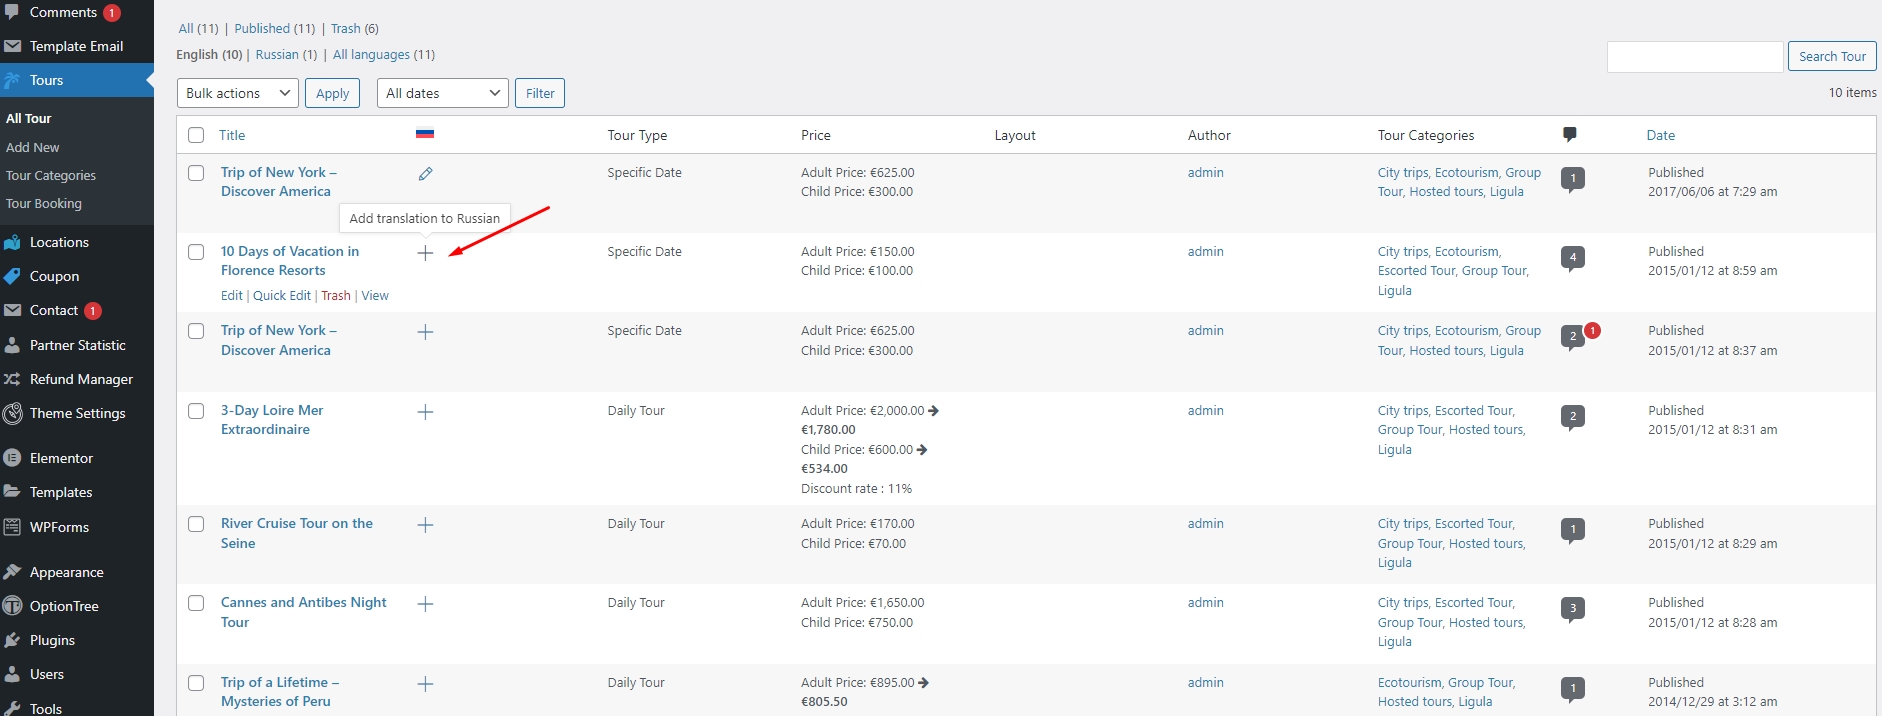
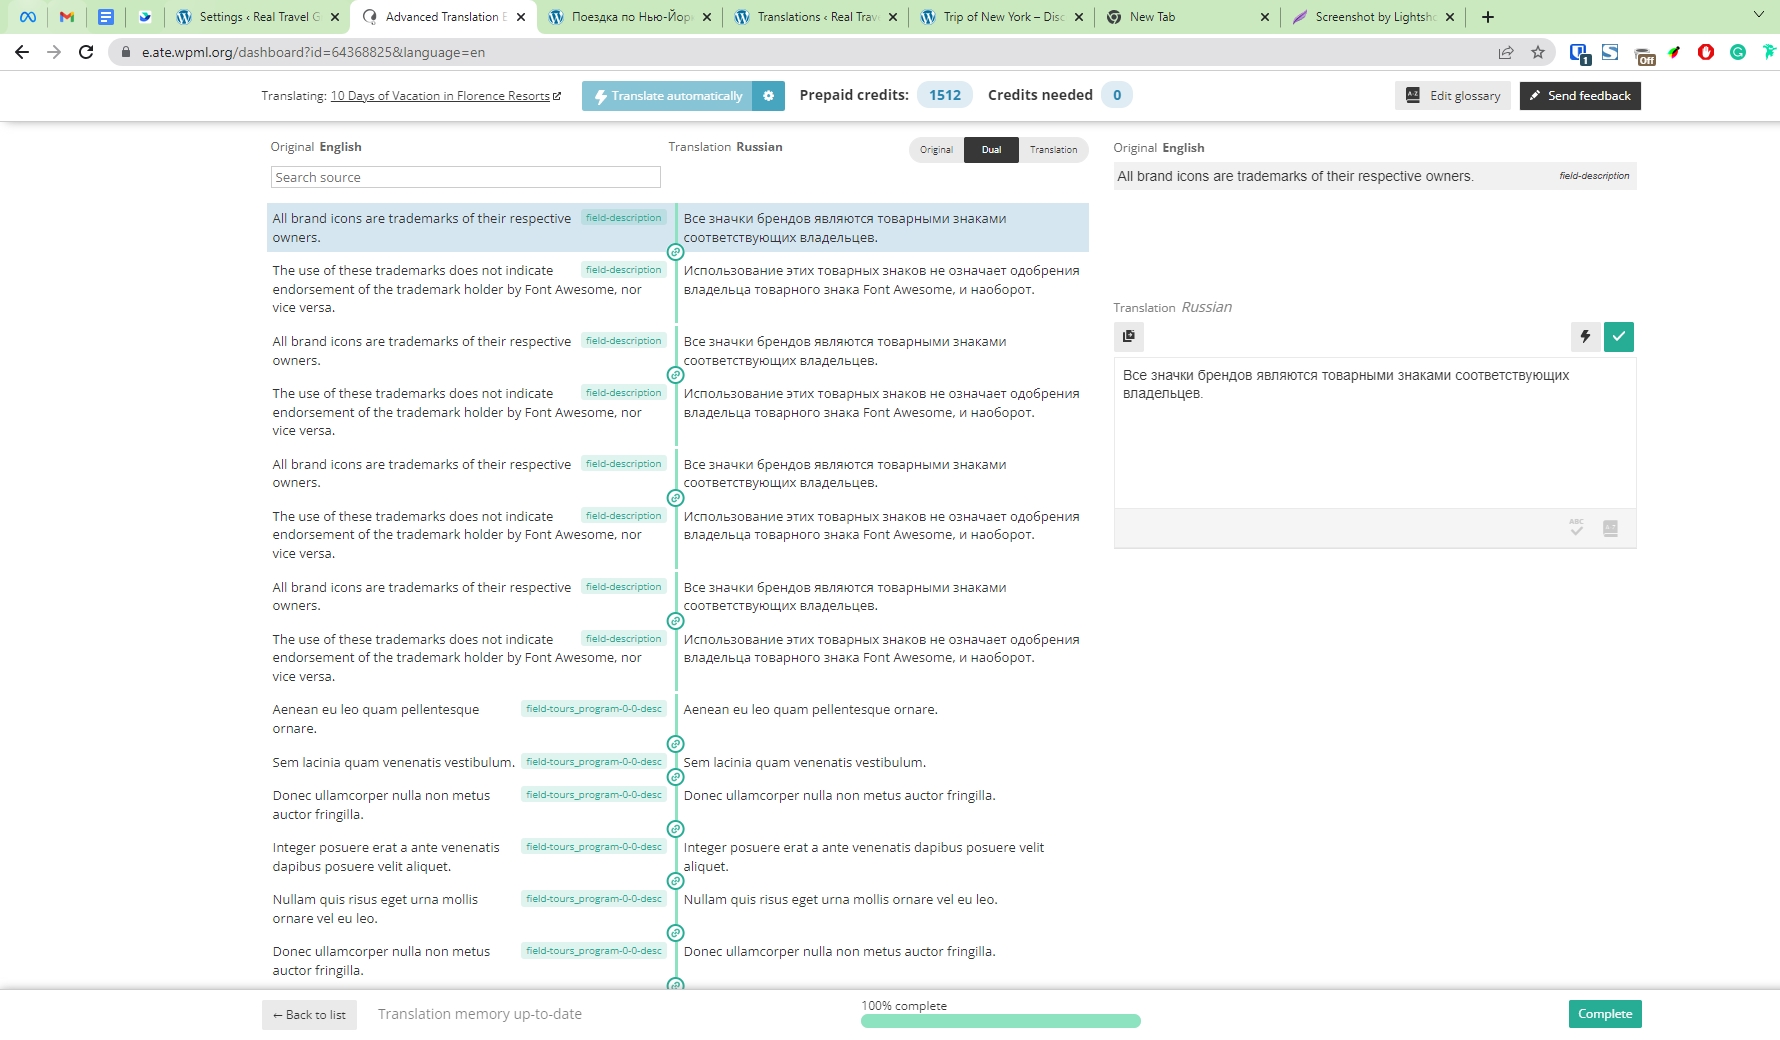
To translate content, go to WPML > Translation Dashboard and look for the sections you want to translate.
Let’s say you want to translate your hotels. Look for the Hotels section and select the hotel pages you want to translate. Then, send them for translation, choosing whether to translate automatically or manually.
WPML recommends translating with the Private Translation Cloud (PTC) — their powerful AI translation engine. According to the WPML team, PTC uses site context to deliver human-quality translations. PTC even has a quality guarantee: if you’re unsatisfied with the AI translations, you get a refund.
![]()
WPML displays the exact amount of credits you need to translate the selected content and their cost on the Translation Dashboard.
![]()
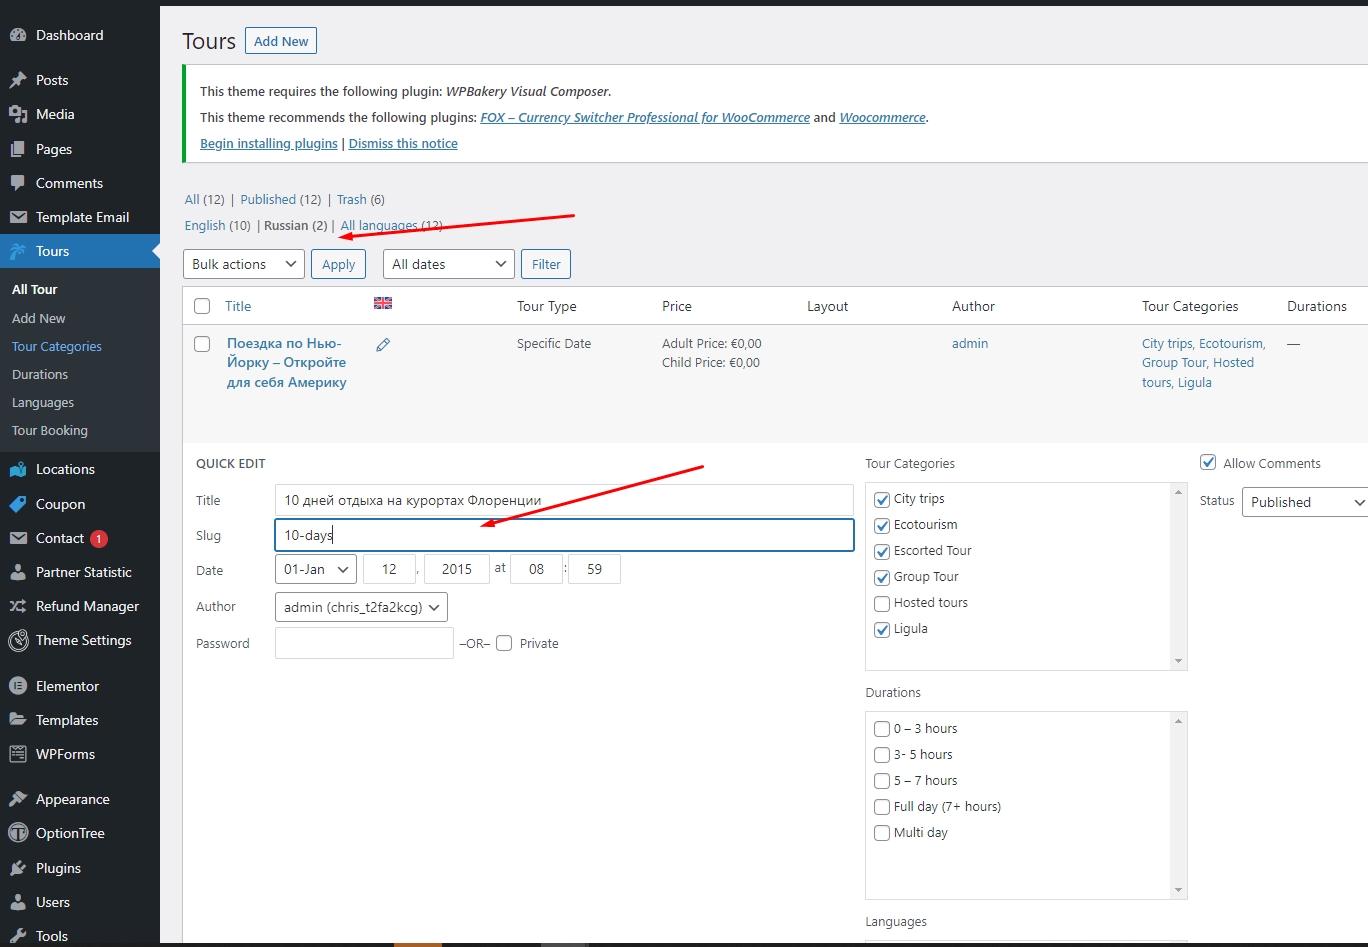
Translating content also translates other attached elements, like navigation menus. This works for custom post types too: for example, translating a Tour translates the Tour Types you’ve added to that page, too.
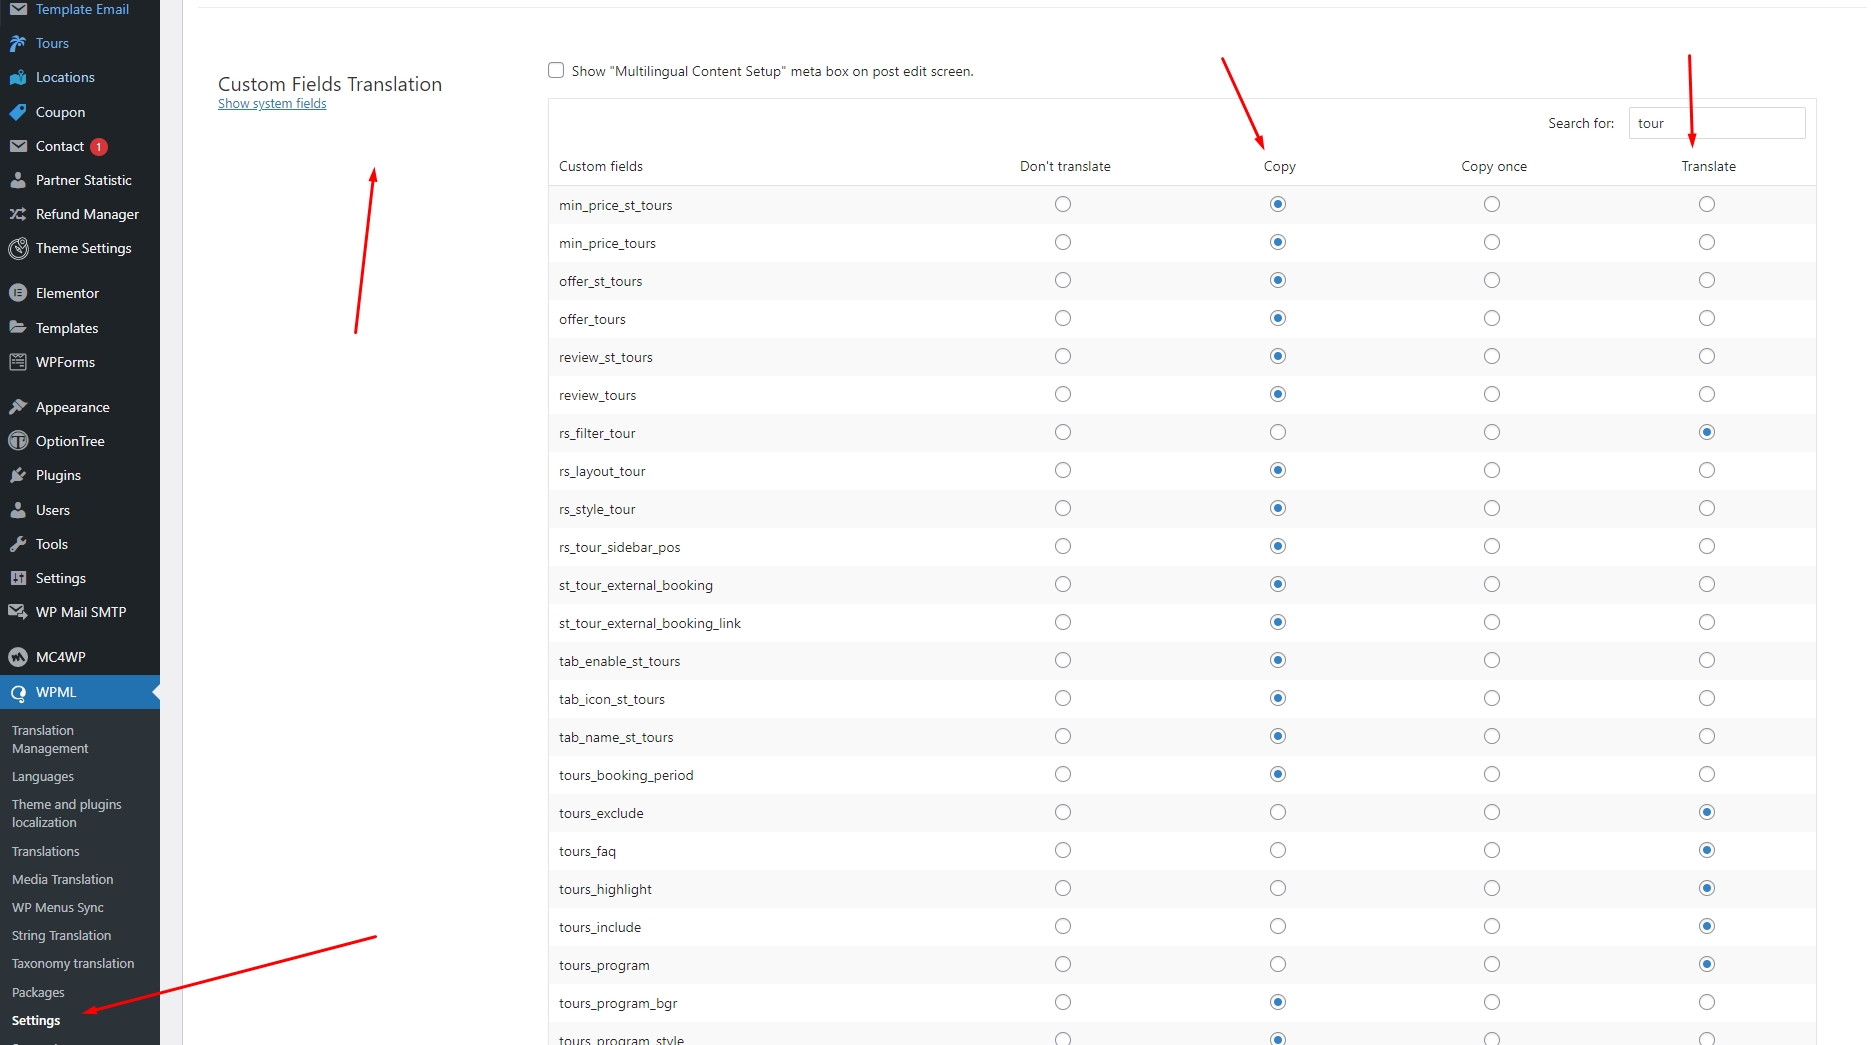

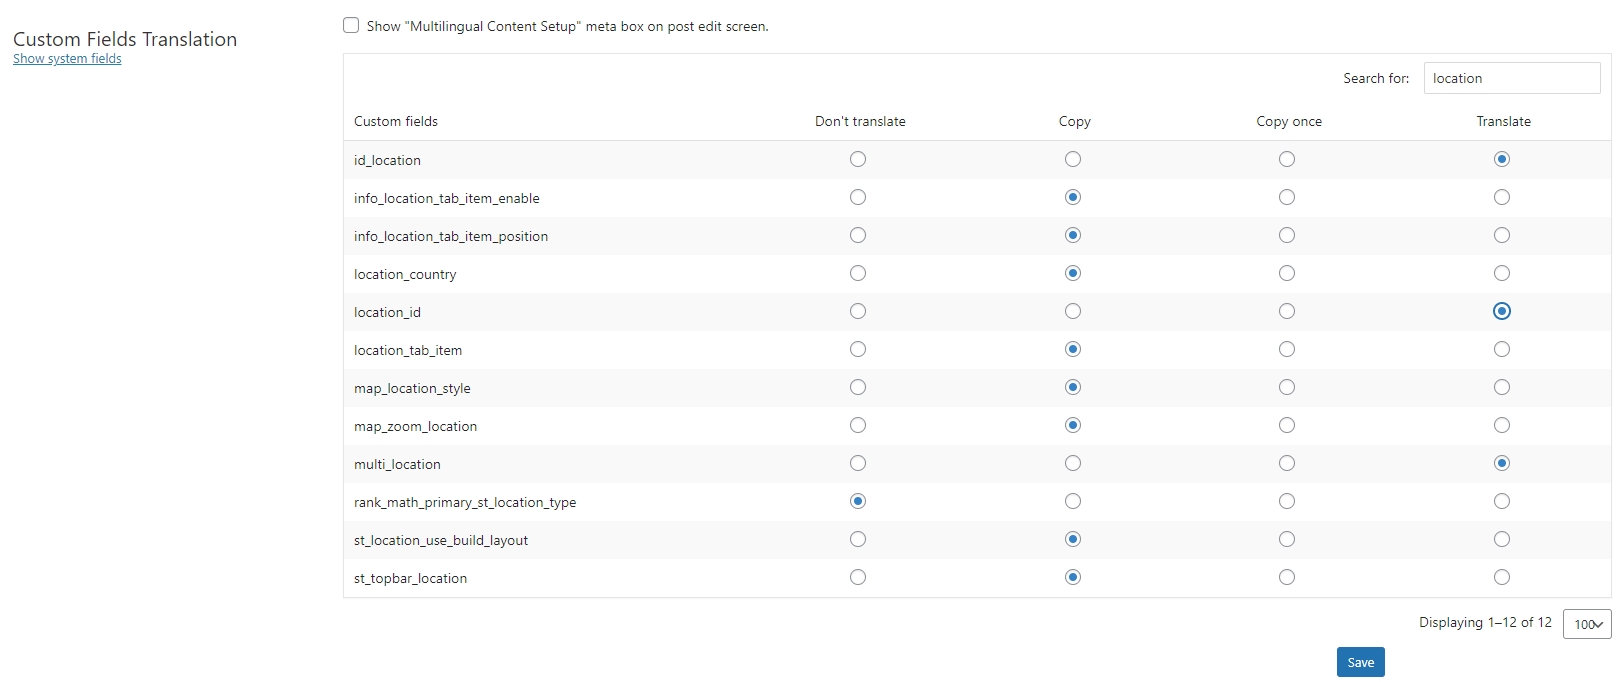

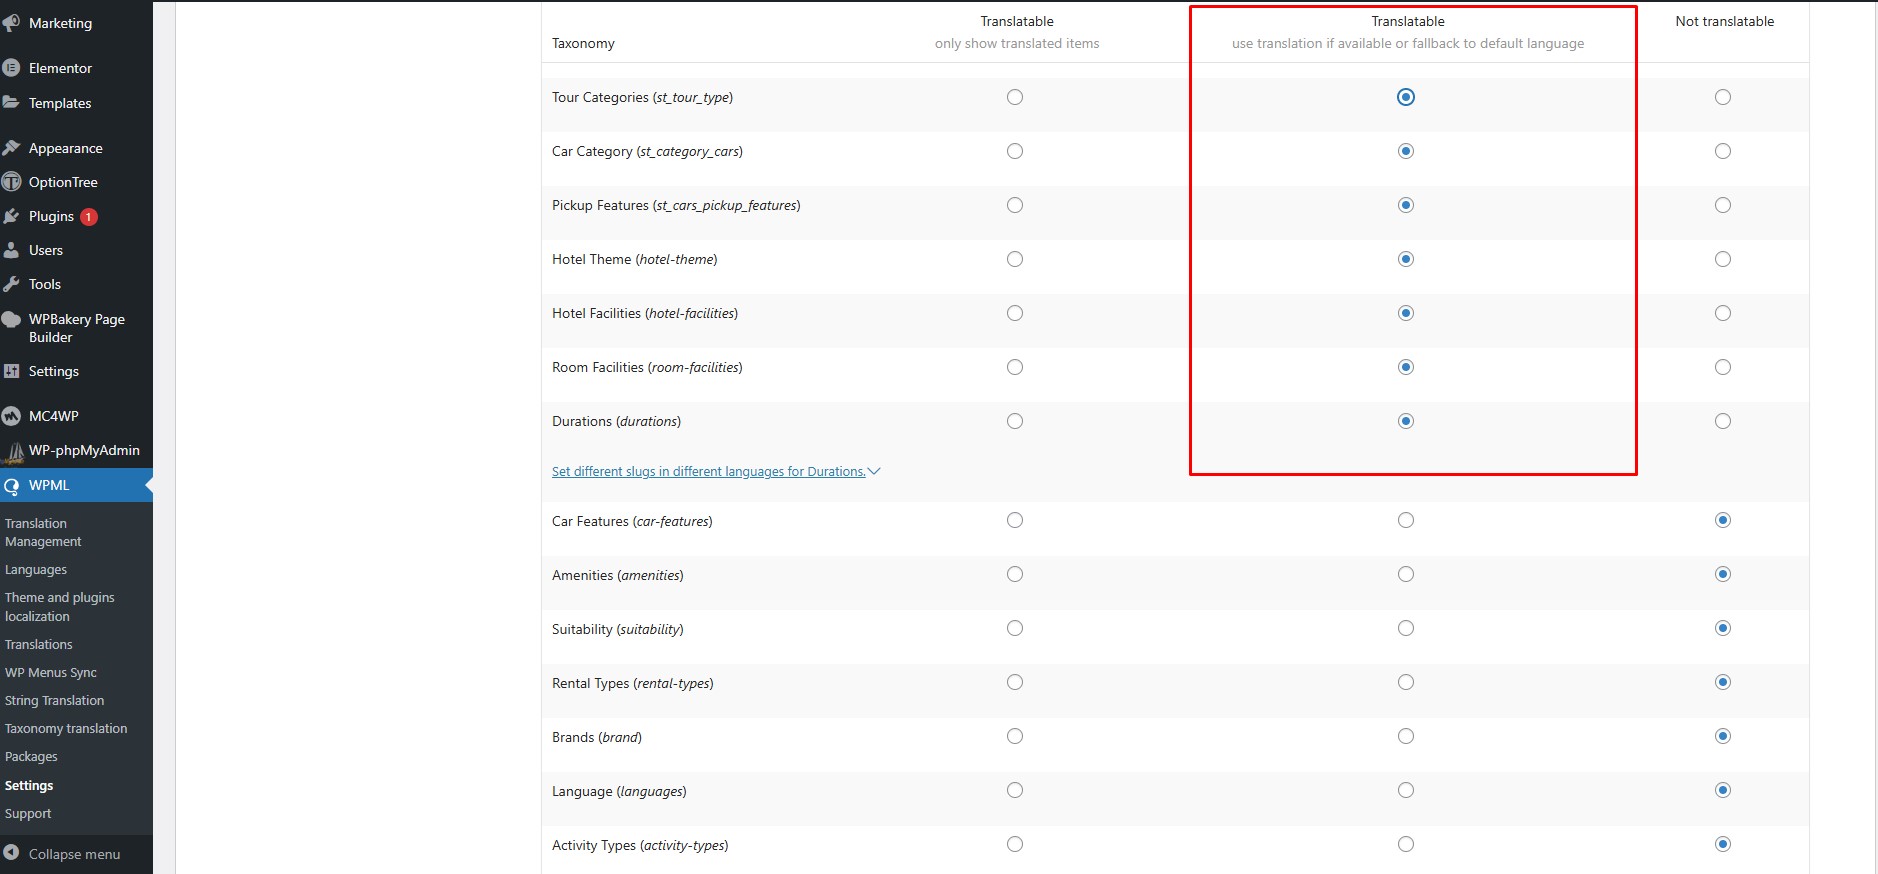


Apart from the main content that comes from posts, pages, and articles, there are texts coming from the theme and certain plugins.
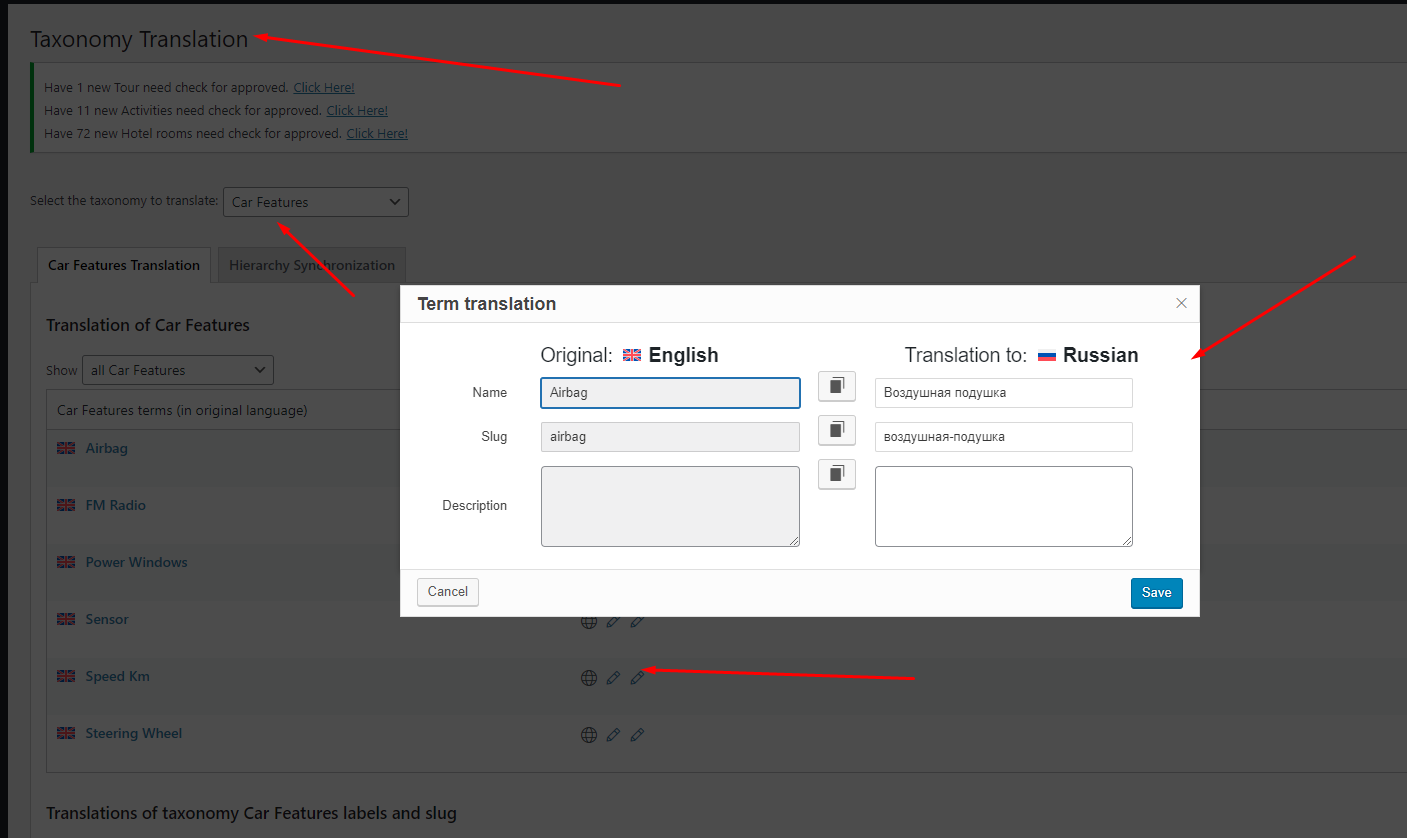
For example, a policy on a hotel page consists of the policy content and the title “Hotel Policies”. The title “Hotel Policies” is a text (string) coming from the Traveler theme and you need to translate it separately from the content.
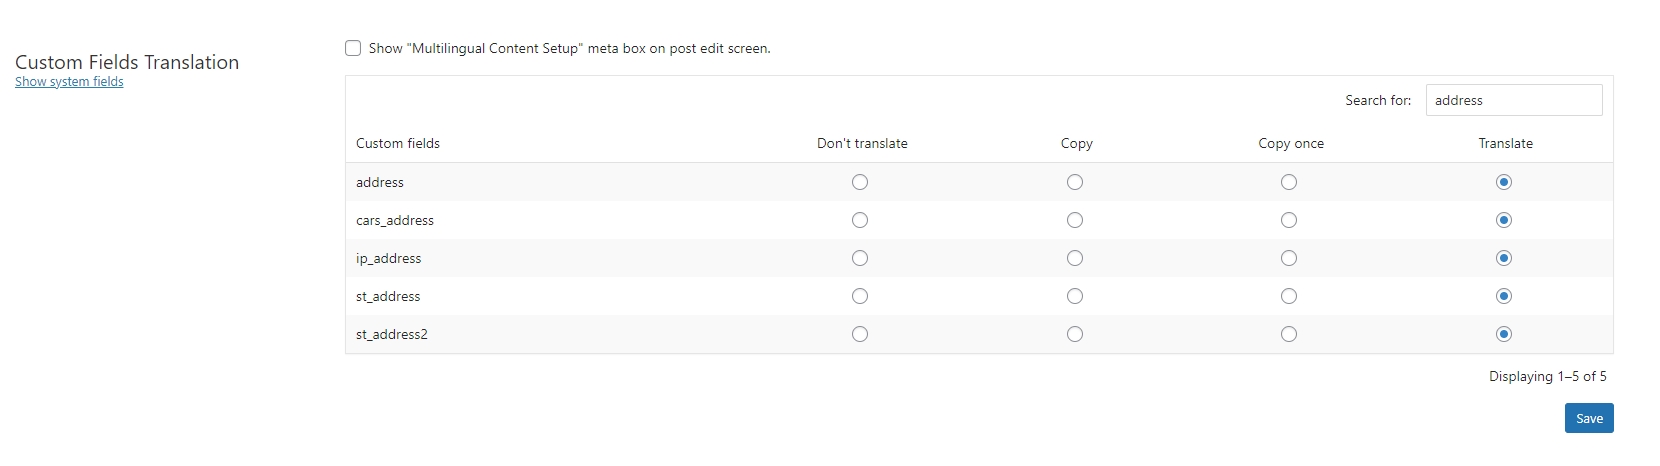
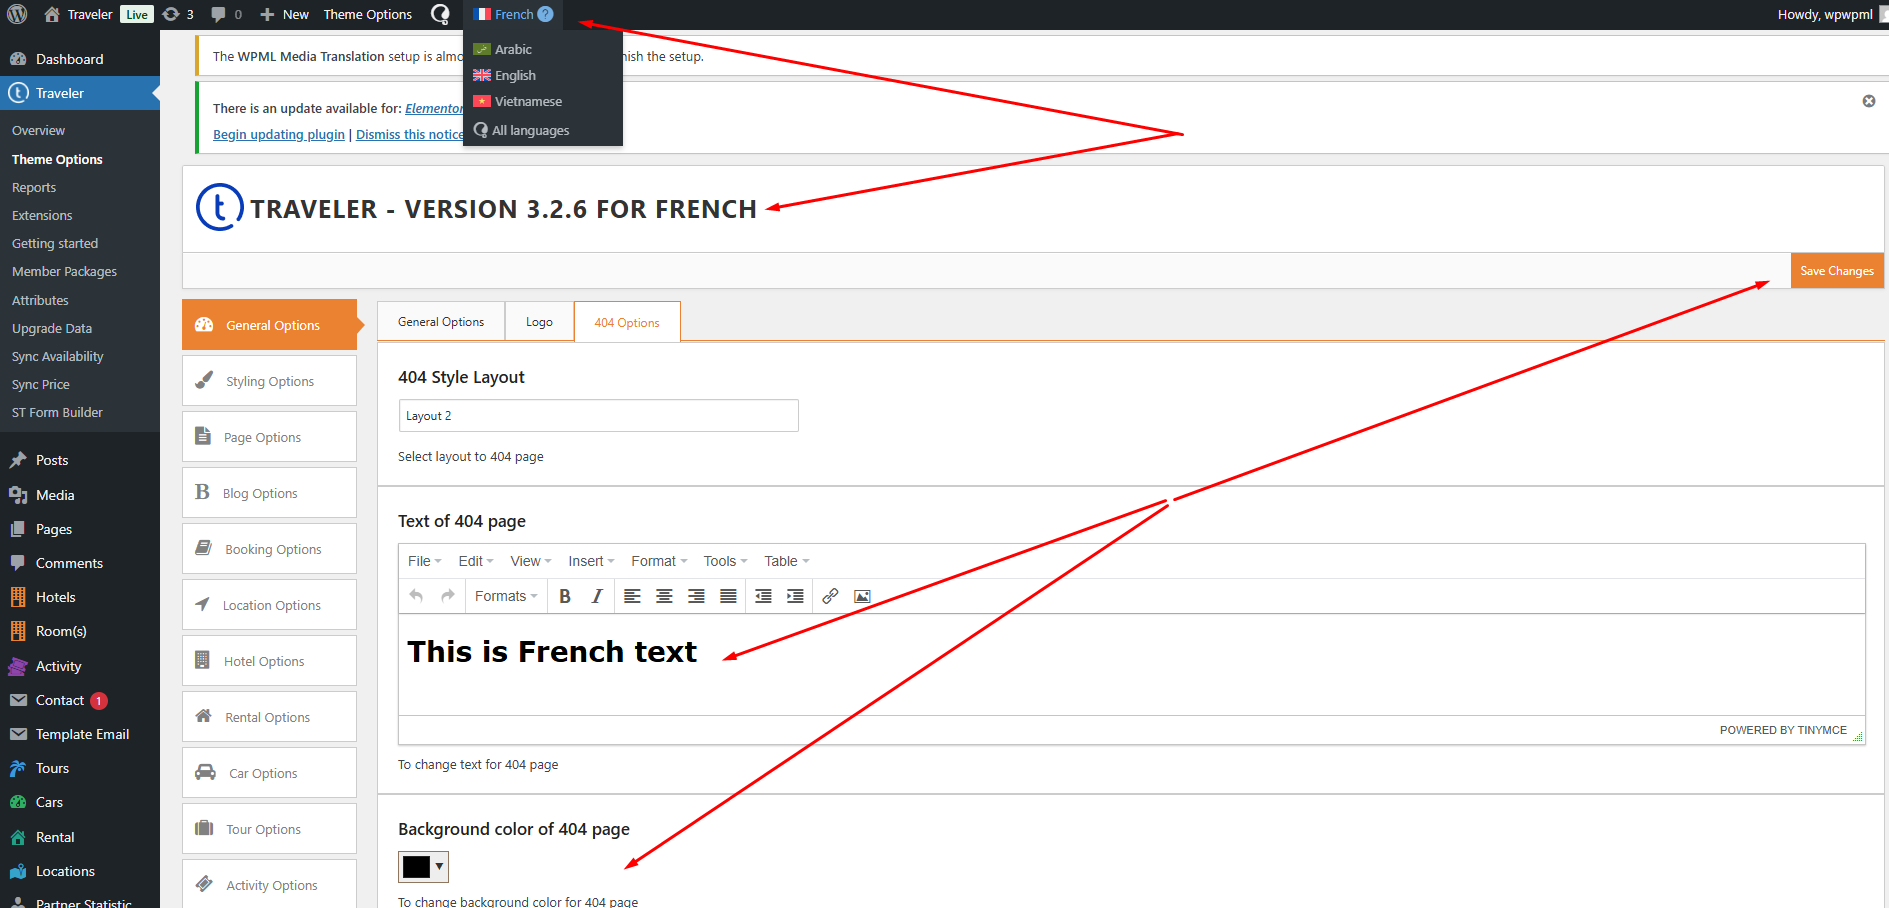
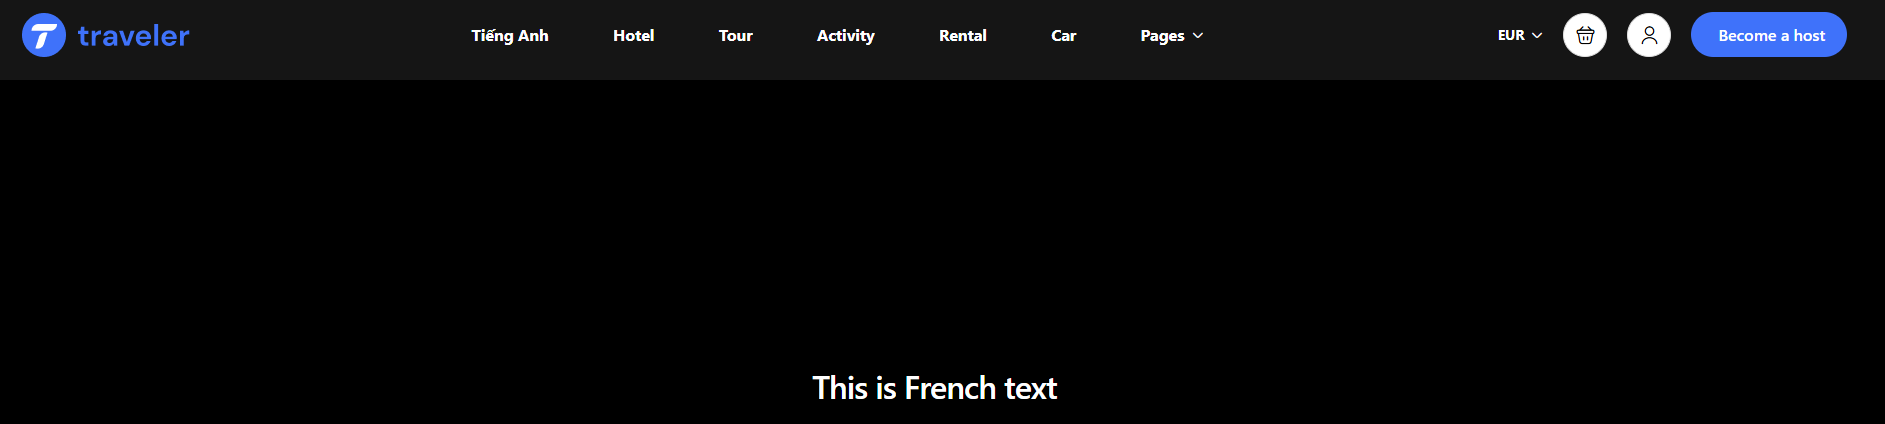
By default, WPML picks up these strings as you visit your site’s pages on the front-end. So, make sure you’ve visited the pages you’re translating and follow these steps to translate additional texts:
![]()
If you want to translate only specific strings, you can use the search function in this section.
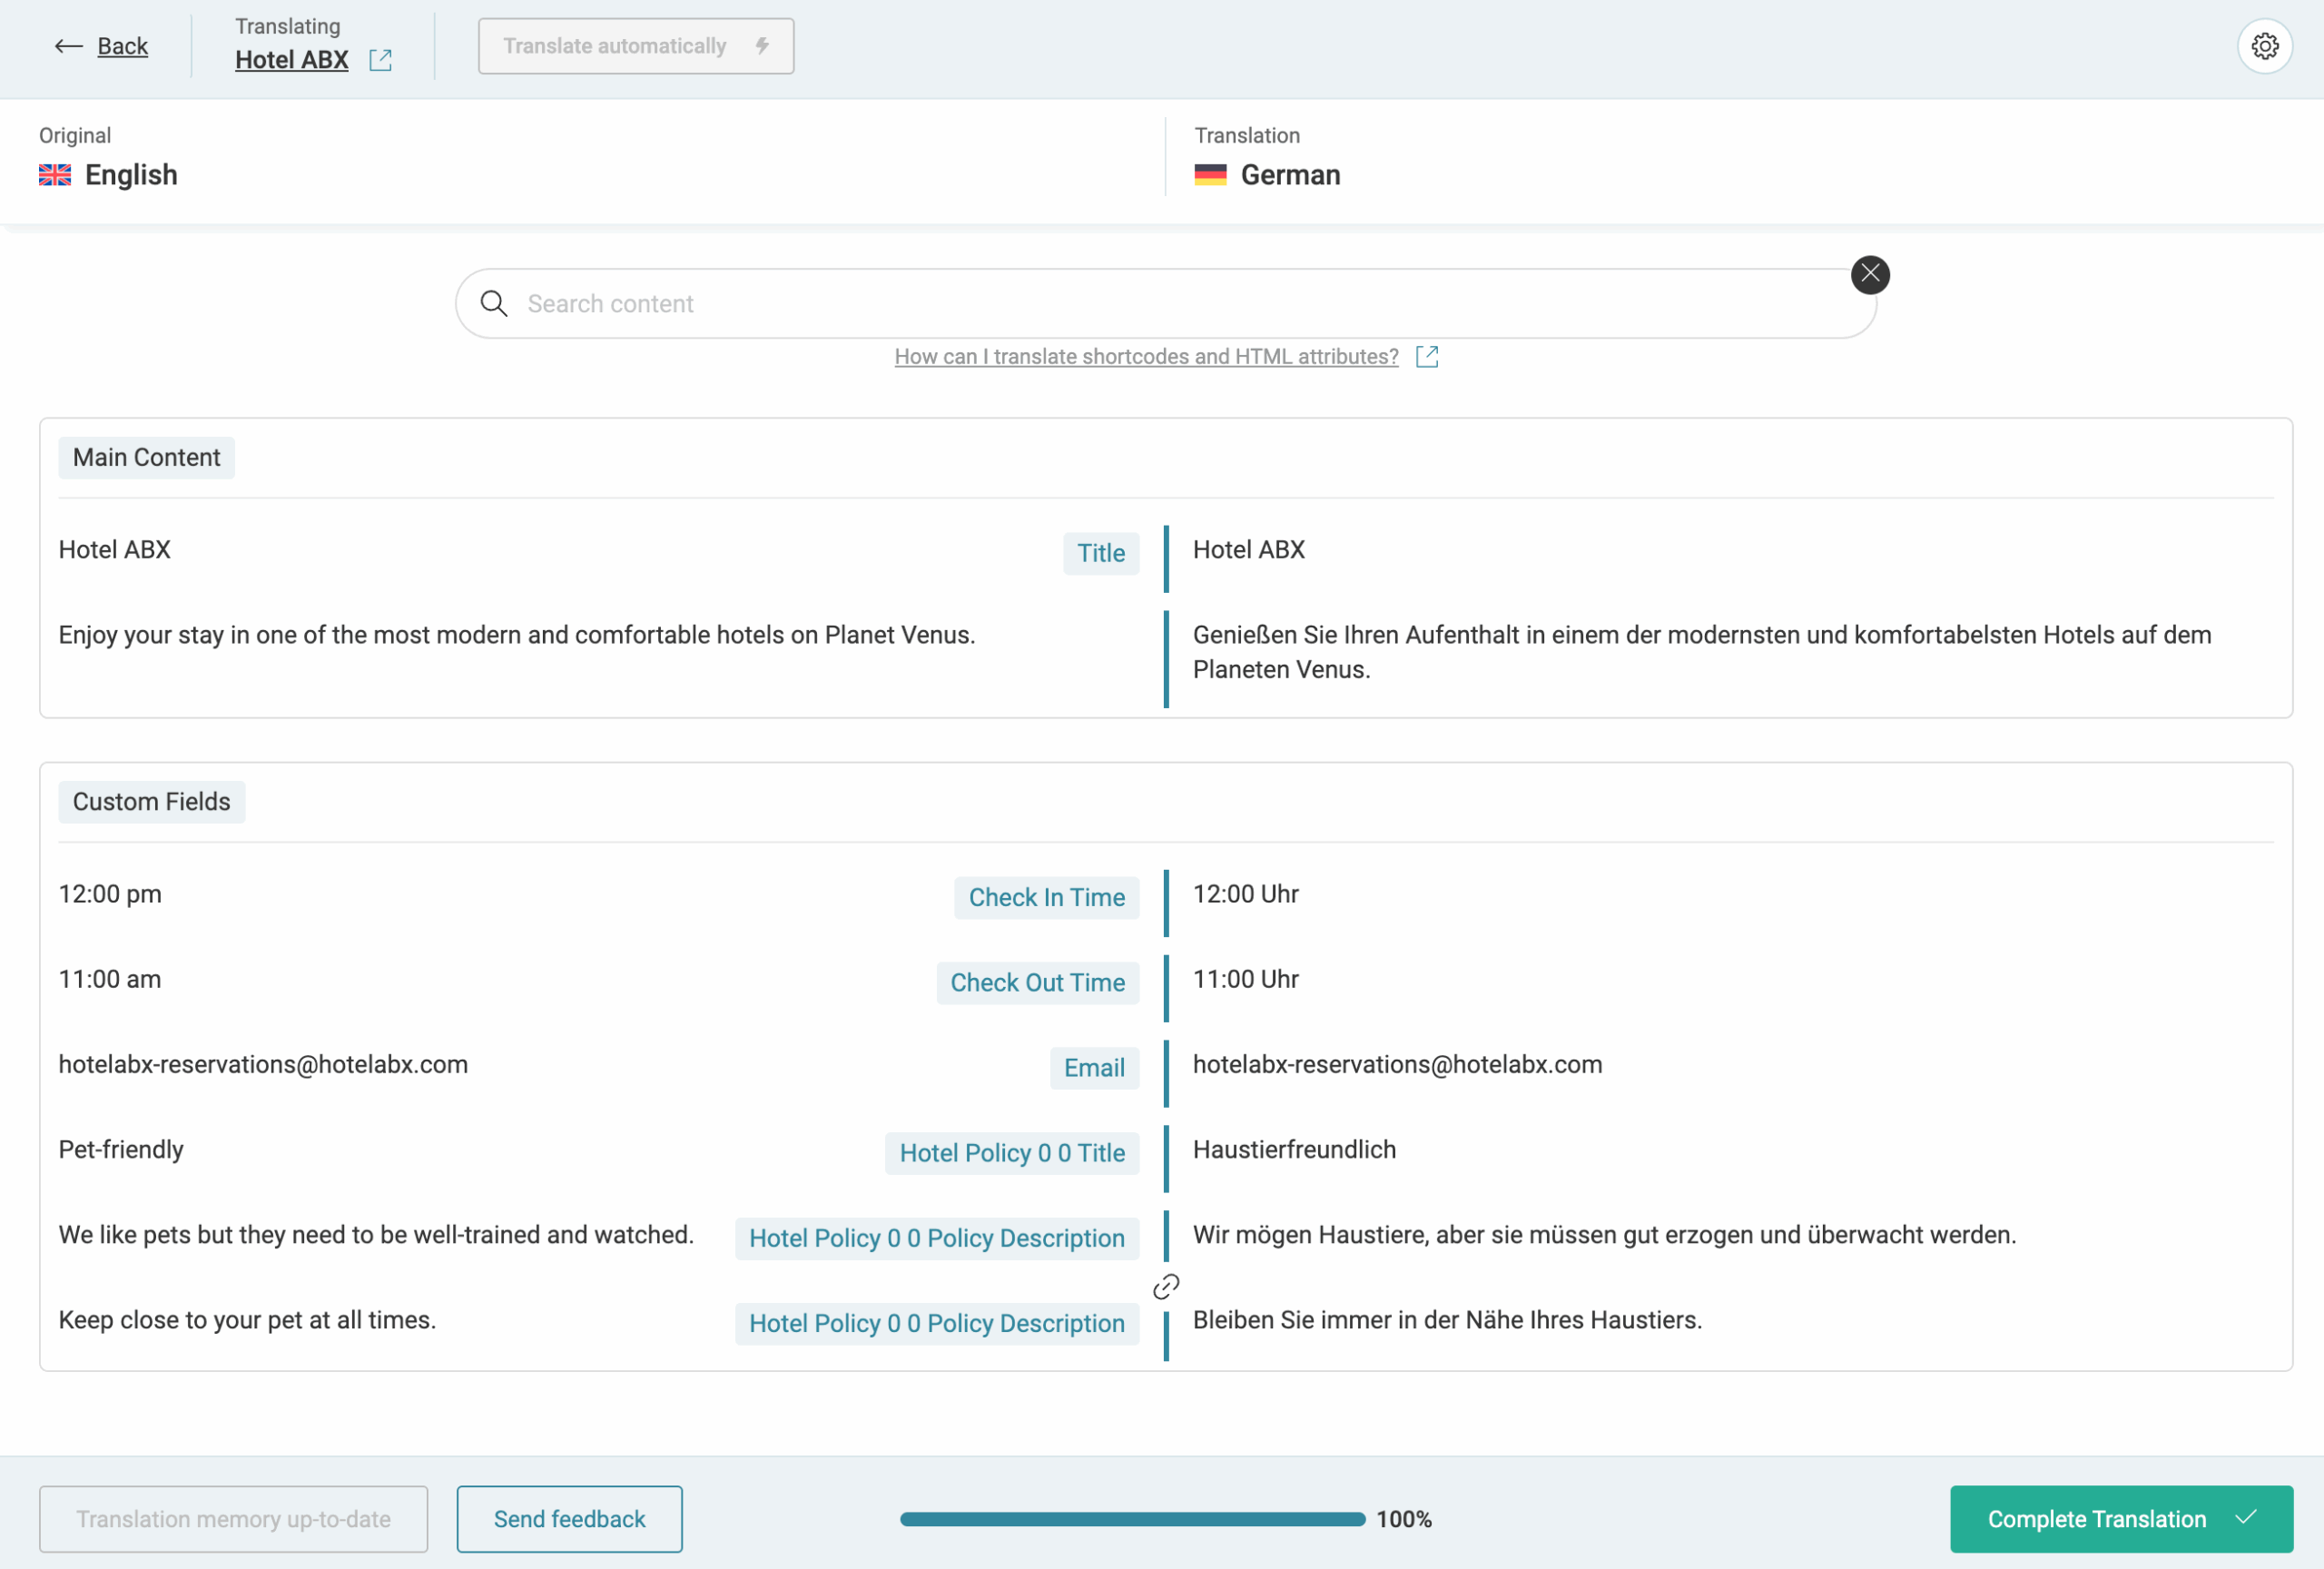
If you want to review all translations at the same time, find them under WPML > Translations. To edit a particular translation, visit the translated page on the frontend and click on Edit Translation to open WPML’s Advanced Translation Editor.